| View previous topic :: View next topic |
| Author |
Message |
2bims

Joined: 03 Apr 2010
Posts: 7292
|
 Posted: Tue Jan 05, 2016 12:33 pm Post subject: Posted: Tue Jan 05, 2016 12:33 pm Post subject: |
 |
|
It could be the engine came like that....Bimota always having to buy engines from other suppliers...and I'm pretty sure Ducati used to...and still do....provide some engines that maybe have failed their inspection...I've seen some shocking sand cast cases on DB5 and DB7 where it looks like chunks are missing from the casings due to faulty casts....and thats on New engines on new Bimotas.....
Replace that bolt on the gear change linkage shaft also....the heads too big....it should be a small "low head" that fits into the recess of the alloy union joint....thus clamping properly...I think your bolt is clamping on the outside of the union joint.....
Its one of these you need....and easy to strip paint or paint silver....couldnt find any UK stock...normally not sold separate from the cover...seeing as theres plenty of aftermarket blingey ones....
http://www.ebay.co.uk/itm/2006-2008-Ducati-OEM-Monster-S2R-1000-Alternator-Timing-Cover-Inspection-Plate-/271724602304?hash=item3f440c63c0:g:sbcAAOSwnDxUozDa
Or choose a blingey one...coloured or plain...and comes with allen key SS bolts and a new rubber seal......
http://www.ebay.co.uk/itm/DUCATI-ALTERNATOR-CRANKCASE-COVER-MULTISTRADA-1200-S-/290821911558?hash=item43b6563406:m:maDPFL8nLQukBwOreWkrHAw
Quite common for a Bimota to have been street ready prepared and then just parked up...a lot of sellers may prepare them and get them running to sell...only for the new buyer to then just park it up again......A dealer in Yorkshire sold a DB2FE....and they were going to service and change belts on the bike when it sold..."No need" said the new buyer....its going on display in my office reception and wont ever be ridden......each to their own.......
Get yourself a rainproof gazebo and wheel that bad boy out and get stripping and photo'ing.....Intrigued to know whats behind that silver sprocket plate and washer and mushroom domed allen bolt.... |
|
| Back to top |
|
 |
2bims
Joined: 03 Apr 2010
Posts: 7292
|
| Posted: Tue Jan 05, 2016 6:13 pm Post subject: |
|
|
Been digging through spare stock and trying to find bits and pieces you either need...or may need.......
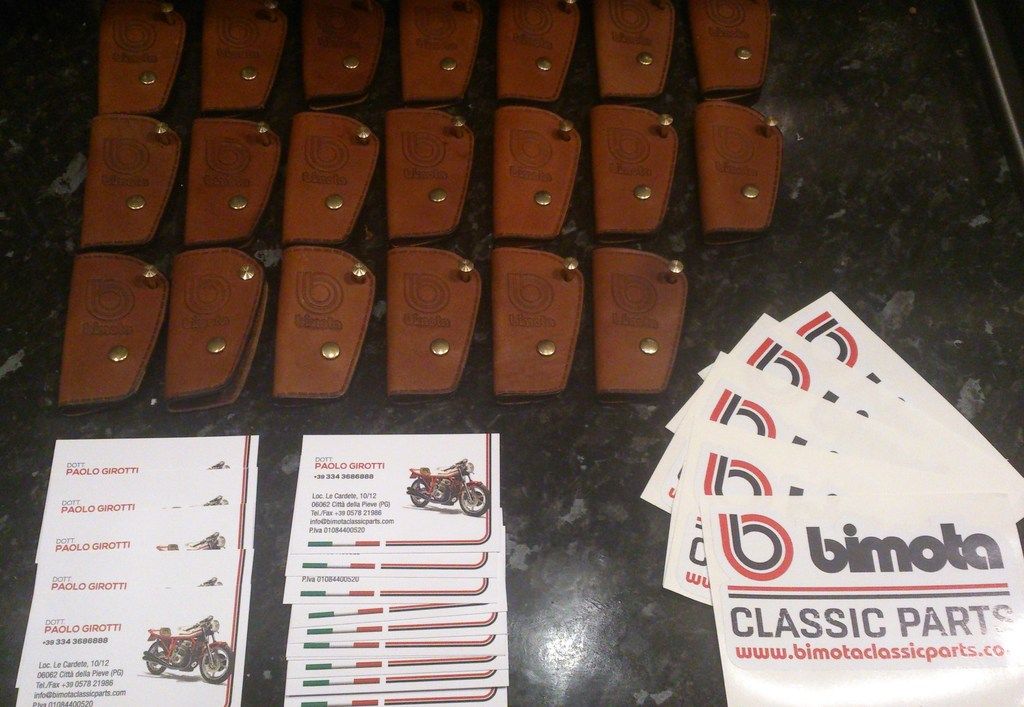
This is the older fashioned tool kit with the black pvc press stud case...

This is the newer version tool kit with black textile bimota holder/wallet....but with the spanner, screwdriver and rear spring adjuster spanner also

And here is a few bits that you need...or may need....as applicable......Theres Cush drive rubbers for the rear sprocket...when jacked up lock the engine in gear and see if theres any back/forward movement on the wheel indicating worn cush drive rubbers....before you pull the back wheel....evidently after its pulled you'll be able to see if they are worn/perished....

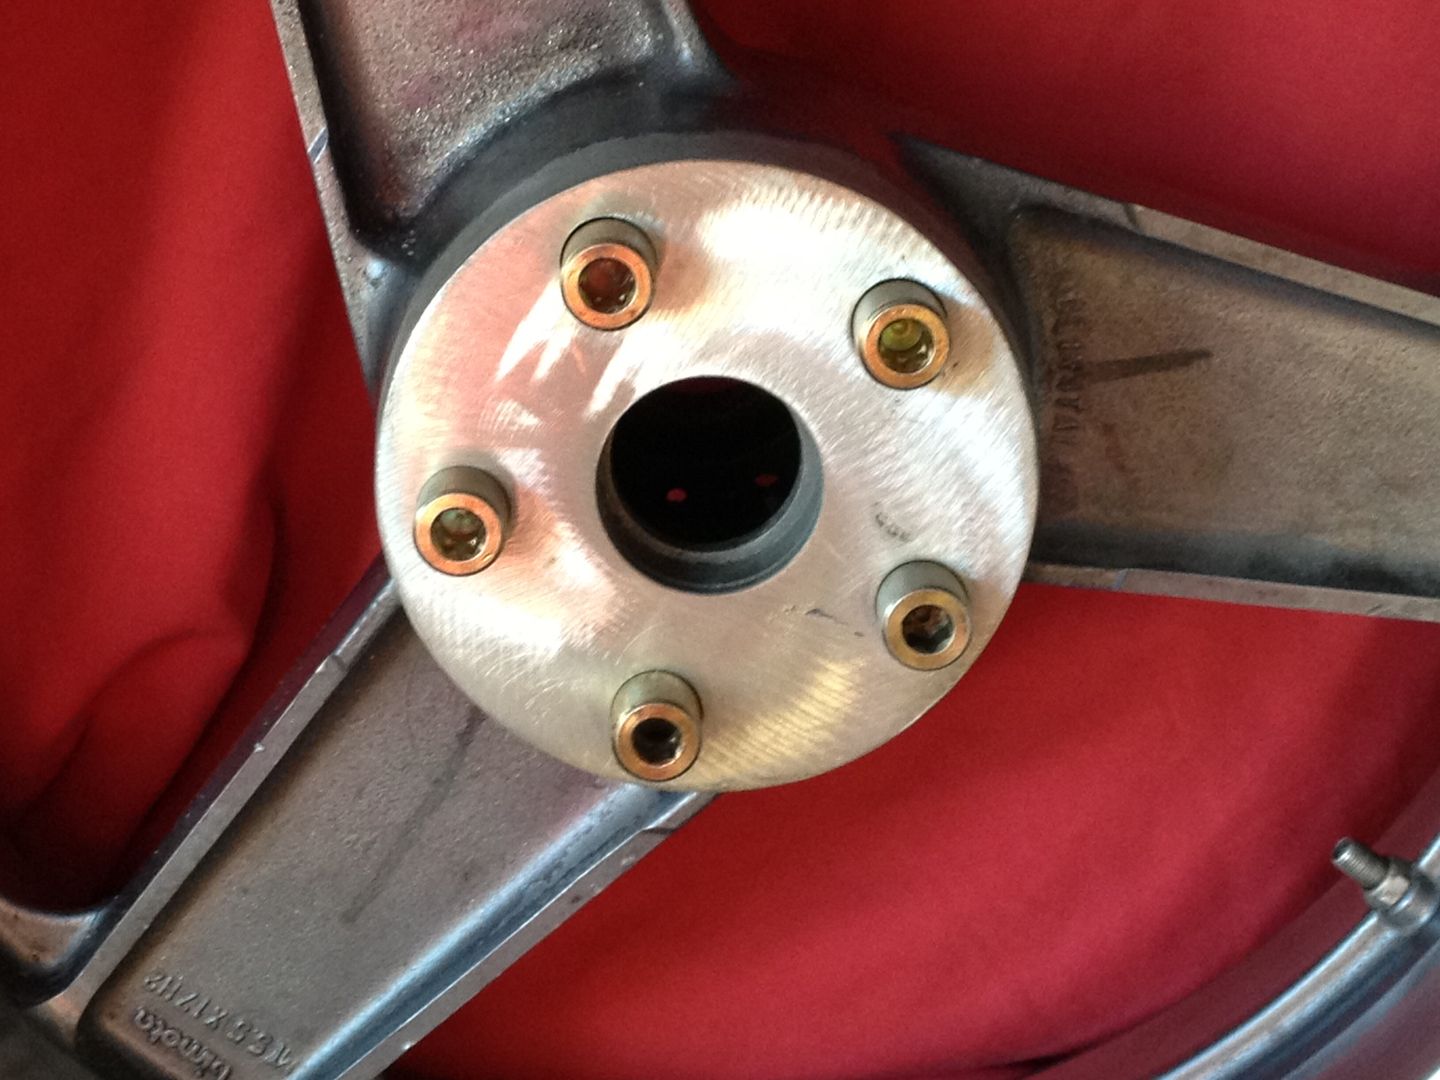
Here is what a DB2 front sprocket and splined retainer plate normally looks like....Also found you a metal rubber lined P clip to retain the rear brake braided hose into the rear swinging arm instead of the cable tie thats there at the moment....
Heres a Genuine Ducati/Bimota plastic front sprocket cover that fits your bike....just 2 bolt holes for fixing...normally you loosen off the clutch slave bolts to get it to fit underneath it....

You'll also see I've set aside the side stand plate and bolt modification to convert a suicide side to a normal stand that stays out until you kick it back....it simply fits onto the hole in front of the sidestand main pin thats doing nothing...then the spring top ends relocate to the new hole on the alloy plate at the top.......
I've also dug out some spare SS header nuts..4 No.....one spare exhaust gasket (thought I had more??? cheap enough from Ducati stores though...)....Spare rear cush drive bolts in case you have any that are sheared off (theres 2 sizes depending on what model you have as Bimota upped the size when they realised they were shearing off....)
Oh a spare piece of cable tidy to replace the faded one on the rear shock remote braided hose........Should keep you nicely topped up.....New stock of 20 No. Bimota leather key fobs are arriving today also....so I can set a couple aside i you're interested......no hurry for anything though......
If youre interested I have a Ducati Torque Wrench settings pair of tables for the engine that I could flatbed scan and send you....Bimota dont normally include them in the manuals be it handbook or workshop... |
|
| Back to top |
|
|
welshlamb

Joined: 09 Mar 2011
Posts: 592
Location: South Wales , Nr. Abergavenny
|
| Posted: Tue Jan 05, 2016 7:13 pm Post subject: |
|
|
Whooa man! This is certainly above and beyond call of duty ..but Very much appreciated. It was (my) wife's last day off work today so was a "shared time" day with view to ensuring future shed/bike time. I should be back on duty tomorrow!
FYI the disc mounting bolts are all SS not Ti (boo hoo!)
Cyl studs look shiny (not black) so probably SS but I see no need to replace unless engine needs strip down for something else.
Had a session on Google Image Search for Duc alternator cover/cases and will put up my findings later. Also found source of the 3 instrument (plus warning lights) 3D panels in Germany but price more than double what you paid (although that's a few years ago now I guess) trying to order one but their webste isn't taking orders. Will phone them tomorrow.
Finally, I scored a used Haynes manual for £5 on Ebay which should be good enough for my requirements!
Just trying to make a little progress each day. Now just got to get the thing outside for a couple of hours for a engine clean and some more photos.
_________________
Not as many bikes as I would like and already too many to keep up with! |
|
| Back to top |
|
|
bimotanige

Joined: 12 Jul 2010
Posts: 582
Location: yorkshire
|
| Posted: Tue Jan 05, 2016 7:43 pm Post subject: |
|
|
just to add to 2Bims - check all the rear Cush drive studs in the wheel, I had 1 broken, 1, stripped, 2 barely repaired and 1 good one! I replaced the 10mm ones with 14mm. Also a standard Ducati front sprocket needs the securing washer recess machining in it so it lines up with the rear sprocket - you can see in the picture 


_________________
KB1x2, SB3 SB4 BB1 DB2 Vdue Evo YB11 RB1 Ducati MHR Suzi GS650 |
|
| Back to top |
|
|
2bims
Joined: 03 Apr 2010
Posts: 7292
|
| Posted: Tue Jan 05, 2016 9:23 pm Post subject: |
|
|
| welshlamb wrote: |
Whooa man! This is certainly above and beyond call of duty ..but Very much appreciated. It was (my) wife's last day off work today so was a "shared time" day with view to ensuring future shed/bike time. I should be back on duty tomorrow!
FYI the disc mounting bolts are all SS not Ti (boo hoo!)
Cyl studs look shiny (not black) so probably SS but I see no need to replace unless engine needs strip down for something else.
Had a session on Google Image Search for Duc alternator cover/cases and will put up my findings later. Also found source of the 3 instrument (plus warning lights) 3D panels in Germany but price more than double what you paid (although that's a few years ago now I guess) trying to order one but their webste isn't taking orders. Will phone them tomorrow.
Finally, I scored a used Haynes manual for £5 on Ebay which should be good enough for my requirements!
Just trying to make a little progress each day. Now just got to get the thing outside for a couple of hours for a engine clean and some more photos. |
Oh yes...more time and more pictures please....although it has to be said if anything else is untoward...I'm rapidly running out of spares....You may think about fitting an inline Fuel filter....even my petrol tank which is plastic had crud in it when I emptied it out...and the one on the fuel tap is just a fine mesh nylon tube that has probably disintegrated over the years....its also nice to put an inline glass one in so that you can not only see the fuel coming through but also it can be undone and cleaned....
SS front disc bolts...Oh me oh my....why do some people do that? Torsional strength not known to be up to the job on front discs.....shouldnt take you long to engine clean...WD40 sprayed on and brushed in works fine.....I get my WD40 from Poundland......cheaper than proprietary engine cleaning products.....
Could you put up a link to the company you found that do the 3D carbon wrap around for triple clocks? be handy to have a new companys name that make them.... |
|
| Back to top |
|
|
2bims
Joined: 03 Apr 2010
Posts: 7292
|
| Posted: Tue Jan 05, 2016 9:26 pm Post subject: |
|
|
Oh....have plenty of Bimota leather key fobs once again courtesy of BimotaClassicParts.......if anyones interested just pm me....
 |
|
| Back to top |
|
|
2bims
Joined: 03 Apr 2010
Posts: 7292
|
| Posted: Tue Jan 05, 2016 9:30 pm Post subject: |
|
|
| bimotanige wrote: |
just to add to 2Bims - check all the rear Cush drive studs in the wheel, I had 1 broken, 1, stripped, 2 barely repaired and 1 good one! I replaced the 10mm ones with 14mm. Also a standard Ducati front sprocket needs the securing washer recess machining in it so it lines up with the rear sprocket - you can see in the picture
|
Still quite shocking to see the state of those bolts and repairs made and that someone then put it all back together and still rode it knowing how shabby the "fix" was......Mine wasnt so bad on first inspection....only one had sheared off...but the head was nowhere to be found....so evidently it had been removed and cush drive assembly just plopped back on with the mentality of "4's enough...." |
|
| Back to top |
|
|
welshlamb
Joined: 09 Mar 2011
Posts: 592
Location: South Wales , Nr. Abergavenny
|
| Posted: Tue Jan 05, 2016 10:05 pm Post subject: |
|
|
| Quote: |
| ....You may think about fitting an inline Fuel filter....even my petrol tank which is plastic had crud in it when I emptied it out...and the one on the fuel tap is just a fine mesh nylon tube that has probably disintegrated over the years....its also nice to put an inline glass one in so that you can not only see the fuel coming through but also it can be undone and cleaned.... |
The IE version is quite different (I assume!) The Fuel pressure regulator sits outside the tank but the main pump etc is inside.. Emptied the tank out and looked fine and pulled the main pump assy out half way and the bottom filter screens looked squeaky clean. Would be nice to see a schematic of the IE fuel system (LOL) in the manual and just to (not) help the fuel tank and the injectors are treated on two different parts lists so hard to tie up. One for more study tomorrow!
_________________
Not as many bikes as I would like and already too many to keep up with! |
|
| Back to top |
|
|
welshlamb
Joined: 09 Mar 2011
Posts: 592
Location: South Wales , Nr. Abergavenny
|
| Posted: Tue Jan 05, 2016 10:43 pm Post subject: |
|
|
So the question is why is there a difference between my alternator cover and that on 2Bims bike ?
First pic is 2Bims' and mine is the second one. Note that my bike's housing has a distinct 'cupcake' appearance compared to the flat housing on 2Bims'. (ignore the access cover on mine... see 2Bims post above)


Looking at Google image search threw up loads of options for both 900 Monster and SS but captions were inconsistent so not a lot of help.
However one image was for an old ebay item (October) which seems identical to mine except for paint finish.

other photos on the listing show the part number on inside and description states..."This is a genuine new NoS alternator cover.
OEM part number 242.2.013.1B or later part number 242.2.013.1BA2.
Fits
900SL or Supersport 94-98
900 Monster 93/94"
So this may show it is a credible part for a 1994 model SS (assuming vendor did his homework) but it doesn't explain why its different to 2Bims' (especially as we know our bikes have consecutive frame #)
Anyone with DB2, SS or SL shed any light on this. Are there late model Ducatis that still had the (believed) earlier cover version or is it the other way around? and Why the changed design anyway?
_________________
Not as many bikes as I would like and already too many to keep up with! |
|
| Back to top |
|
|
2bims
Joined: 03 Apr 2010
Posts: 7292
|
| Posted: Wed Jan 06, 2016 12:46 am Post subject: |
|
|
Although my frame number may be only one away from yours.....its often believed that Bimota decided on how many to make...had the plates made up....and thrown in a bucket and the fabricators simply delved in lucky dip style when putting a bike together....hence sequential frame numbers of bikes can have 3-4 years difference in dates when manufactured......My engine number shares all the same codes and numbers up to the *.......* sequence...yet is numbered some 3,000 before yours.....as in Ducati made another 3,000 engines before yours was made to go in your bike.....By comparsion...my Ducati 900SS...which is a 1991 model...again shares all the same pre-numbers yet it is *004170* and my 1994 DB2 is *013278*....9000 engines later on in only 3 years.........Engine casing is still the same though without the "cupcake" element that you aptly named...


It could be that maybe Ducati were suffering engine failures and maybe thought that the heads were being starved of oil......billowing out the crank case in that fashion would expand its capacity without raising the level on the Oil sight windows....helping to transfer more oil on the collecters up to the heads and mechanical cams/valves....etc...just a thought...
Whats the extra allen headed bolt on your crankcase cover....just above the Bleed off rubber nipple cap...above the other allen bolt? Seems like a different crankcase cover there also?? I dont have that shape or that extra bolt...or is it just a weird angle shot out of true perspective.
One thing that these engines are known for...is that if a chain snaps...it invariably whips a dirty great chunk out of the crankcase cover just in front of the sprocket.....emptying out your 4 litres of gearbox oil directly onto your back tyre....so maybe the cover was changed at some time? Those slotted head bolts are also know to be a bugger to get out...later changed to hex allen bolts....and they can turn to cheese when impact drivered.....Thing is...this "inspection cover" needs to come off to bolt in the crankcase cover removal tool....that is in effect like a bearing puller...the 2 bolt holes are used....and central pulling bolt bears against the alternator pinion shaft.....so maybe someone had to chisel off the off cover...and just replaced with whatever he had lying around...albeit a cover from 1984 or so..... |
|
| Back to top |
|
|
welshlamb
Joined: 09 Mar 2011
Posts: 592
Location: South Wales , Nr. Abergavenny
|
| Posted: Wed Jan 06, 2016 11:34 am Post subject: |
|
|
Jeez, its a bit like 'Time Team' this and we are only talking 21 years ago. A combination of no history with the bike plus original Italian administrative chaos doesn't help!
Interesting theory re the chain snapping?? I note that NZ Bike gear website shows the following (and strongly recommends!)

The 'extra bolt' you refer to is I think a trick of perspective, crankcases seem to be same shape as your Ducati. Will take some photos to make clearer.
Inspection plate will be replaced by allen head secured new one. But will leave the screws alone until I have a replacement in hand. (German shop only reopens next week)
_________________
Not as many bikes as I would like and already too many to keep up with! |
|
| Back to top |
|
|
welshlamb
Joined: 09 Mar 2011
Posts: 592
Location: South Wales , Nr. Abergavenny
|
| Posted: Thu Jan 07, 2016 12:25 am Post subject: we're stripping off! |
|
|
well lets say we got outside today for a bit of a wash down .


Note that the sidestand assy is off in the above shot. I wanted to clean cases around it as with no sprocket cover in place the area was a bit chain lube laden.
Holding on the sidestand bracket were these two light alloy capscrews. Think I shall be chasing out the thread in the case and using better quality replacement bolts!

Most of the engine frame components looking quite clean (apart from the bloody exhausts!). did notice that the CF mudguards are very thin and either didn't have much lacquer in the first place or its worn away... almost down to the weave cloth and on the back mudguard in places it virtually is. definitely needs some remedial work. May well take them to a local paint shop and also get them to give their views on the fairing paint (are there agreed paint references for the tricolore colours??)
BTW 2 Bims , you asked about the 'extra' bolt in the earlier casing shot. Here is another angle where you can see it clearly towards the cases split line.

Also investigated the gearbox output sprocket. The position on shaft is determined by the outer retainer (a la DB1) but is seems to have a DB2 retainer under that and then a flat faced sprocket onto the splined shaft. I guess on the DB2 it should be the sprocket alone fitting on the splines that determines offset. In any case this don't look right so a new sprocket is required methinks.


I have found the 'hidden' main fuse and the frame ID plate (neither of which are visible with fairing on!) and got Timpsons to cut me a spare key for the seat/tank. Unlike with 2Bims, the 'nice lady' was on her day off so I got charged standard by the grumpy old man instead.
The controls all look OK. The clutch and brake M/Cyl covers are a bit worn but NOS is available. Bling (and better) alternative would be goldline tackle but does anybody run a DB2 with these on standard bimota handlebars? Just concerned about clearance.

The steering dampener seems to work.. is it really meant to be a loose fit at both ends?

Also realised that I had my wires crossed.. the replacement MPH speedo is 22000m but the KM speedo reads just under 16000km so only 10000miles. Must have been summer ones only? So not a bad day in all but really want now to get the rear wheel off and check the cush drive!
[/img]
_________________
Not as many bikes as I would like and already too many to keep up with! |
|
| Back to top |
|
|
welshlamb
Joined: 09 Mar 2011
Posts: 592
Location: South Wales , Nr. Abergavenny
|
| Posted: Thu Jan 07, 2016 8:07 pm Post subject: raer axle assy disassembly |
|
|
OK I managed to drop the rear wheel out. Before loosening the eccentric clamp bolts I managed to loosen and remove the (brake side) fine threaded special bolt covering the axle. The other side was f***g tight and I wasn't sure if it was meant to loosen as well, so left it as is.
QUESTION:
Should the brake side eccentric now 'slide' off the shaft? I assume it may need some heating and a light tap from a dead hammer to do this. The Workshop Manual gives NO information (again) but it looks like there is a locating pin that stops the eccentric rotating on the spindle and the fine threaded bolt just keeps everything in one piece??
If I could get this (eccentric) off then I could I assume withdraw the axle and other eccentric as one piece and then get on with removing cush drive for inspection.
PS the rear sprocket shows sign of misalignment surprise surprise! (see previous post)
Advise much appreciated.
_________________
Not as many bikes as I would like and already too many to keep up with! |
|
| Back to top |
|
|
2bims
Joined: 03 Apr 2010
Posts: 7292
|
| Posted: Thu Jan 07, 2016 8:26 pm Post subject: |
|
|
Really enjoying these regular updates of someone breathing life back into a DB2 to get it back out on the road again....which is where they really shine......
Not looking too bad under its clothes...really still quite fresh really...not belying its 20 years of age at all really....
I did have a hunt around for spare sidestand bolts...as I have a few spare sidestands and the odd plate...but no luck...I'll ask at Duc MCr when I'm next down there...they usually have stock and usually quite cheap for small sundries....bolts are normal steel bolts not SS as standard...to be loctited and torqued to between 40-45Nm...so not surprising your italian SS bolts have turned to cheese with the threads peeling.....
The front and rar carbon guards are really thin....but neither are structural or amy type of bracing in them...so they do the job really and no more.....and can be brought back to life with wet and drying and re-lacquering and then buffing and polishing...I even managed to retain the white Bimota B logo on mine by not cutting it back too much....guards still look like new now and thats been five years since I refinished mine......
Intrigued to know what the mini-me reg/rectifier is behind the headlight on the LHS....reg rec normal is on the other side but that thing? Heaven knows what that is...must be related to the fuel injection system.......You also have a mighty sized ECU for the Fuel injection....me oh my...hope its all fine......
Does look like you have a standard Ducati 900ss front sprocket...that probably sits too far out from the engine alignment wise....you may want to invest in a 2gbp laser placed on rear sprocket and check alignment...available on ebay...mind you a straight edge does the same placed flat against the rear sprocket.....
Steering damper........Yup...they have olives on both fixing points so it seem all a bit loose...you could change the bolts out...but the brackets should be standard on the headstock and on the RHS fork leg....which dictates the bolt sizes anyhow....its seems to work though and I've never noticed any jurkiness or floppy steering........
You seem to have the same Speedo drive cable that I used to have....having very little slack in it...usually on Ducatis...it comes out the speedo drive hub on the front wheel at 3 0'clock and gradually spirals round to the vertical and into the clocks.........I was haring up a dual carriageway in Wales one day on mine....clocking ahem....105-110 when I reached the brow of the hill I was ascending....steering went light.....wheel slightly off ground.....front forks reached full extension...and ping....speedo read zero.......cable over extended and snapped its inner as it was pulled straight at the point it met the clocks.......
I took the offending item to Duc MCr.....and bought a longer version off a Monster...it had one ferrulled end wrong size to what Bimota use...so I simply unscrewed the wrong end and screwed back on one from my broken outer cable and sorted.....just something to watch out for......
I see you have the retro fitted thermister on the sump gauze plug RHS crankcase beneath the oil level window....to send readings to the retro fitted temp gauge.......As a favour...could you trace where the end goes and where its wired into and take a piccie.....?/....When I fitted mine I simply put an in-line fuse and holder in place and too it direct to the battery (the power side that is....the one off the thermister should go direct to the temp gauge.......This means on mine that if I leave the fuse in place...it permanently gives a reading when ignition is off as I have hard wired it rather than wiring it into a switched key operated live........ |
|
| Back to top |
|
|
2bims
Joined: 03 Apr 2010
Posts: 7292
|
| Posted: Thu Jan 07, 2016 8:54 pm Post subject: Re: raer axle assy disassembly |
|
|
| welshlamb wrote: |
OK I managed to drop the rear wheel out. Before loosening the eccentric clamp bolts I managed to loosen and remove the (brake side) fine threaded special bolt covering the axle. The other side was f***g tight and I wasn't sure if it was meant to loosen as well, so left it as is.
QUESTION:
Should the brake side eccentric now 'slide' off the shaft? I assume it may need some heating and a light tap from a dead hammer to do this. The Workshop Manual gives NO information (again) but it looks like there is a locating pin that stops the eccentric rotating on the spindle and the fine threaded bolt just keeps everything in one piece??
If I could get this (eccentric) off then I could I assume withdraw the axle and other eccentric as one piece and then get on with removing cush drive for inspection.
PS the rear sprocket shows sign of misalignment surprise surprise! (see previous post)
Advise much appreciated. |
Yeh....theres an offset drift cylindrical pin that is knocked in after the eccentric is fiited to stop it rotating so that you can adjust the chain tension as both concentrics are then locked together on the shaft
Half way down this page one of my resto....you can see the rear wheel set-up...without the wheel....and one of the concentrics without the covering bolt or the threaded spindle...and there you can see the pin that goes in at an angle
http://www.bimotaforum.co.uk/viewtopic.php?t=1196&postdays=0&postorder=asc&start=0
With the "cap" removed from the brake disc side...you should be able to see the pin...and the holed threaded spindle...which is held tight by the pin.....easier if its still on the bike with the half moon couplings still in place (but loose) ....but hit the spindle with a drift to free it from the holding drift pin...and it should be able to move towards the left sprocket side.....the cap on the other side you can leave in place...it will move out with the spindle....no need to remove it....the whole thing will dissasemble and leave you with the spindle and one concentric still attached....take plenty of pictures so that you dont put the spacers in the wrong way around when re-assembling...as they are one way only to push onto the bearing surfaces/liners...get it wrong and you'll crush the bearings......
Oh...chain tension....this is done with a rider sat on the bike...as per the manual...thus chain often looks slack when simply parked up and not under load... |
|
| Back to top |
|
|
|


