| View previous topic :: View next topic |
| Author |
Message |
Frank.61

Joined: 28 Nov 2013
Posts: 108
Location: Maasmechelen, Belgium
|
 Posted: Sun Feb 23, 2014 8:34 am Post subject: Posted: Sun Feb 23, 2014 8:34 am Post subject: |
 |
|
Neat solution! 
One of the two I'm considering (either a small steel bracket welded on the frame or this aluminium bolted on bracket).
When I get my shock I will measure it up and see what goes. 
Thanks for sharing it.
Frank |
|
| Back to top |
|
 |
Frank.61
Joined: 28 Nov 2013
Posts: 108
Location: Maasmechelen, Belgium
|
| Posted: Sun Feb 23, 2014 9:21 am Post subject: |
|
|
Hi
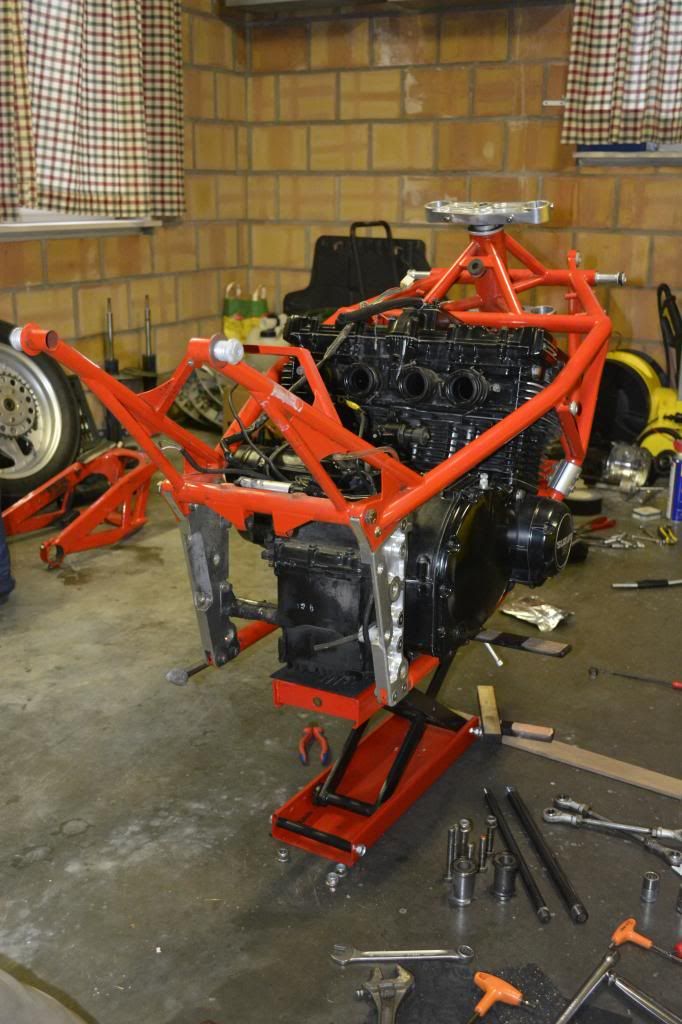
Started to take her apart 3 weeks ago with the aid of my brother, also a Bimota fan of the first hour.
Here she is without the fairing and the body.
On the pic's she looks nice but she has some damage on the right side, most likely a fall in her early life.
Also she has been neglected but hey what do you expect after 30 years.
The fall has likely been the reason why the original exhaust system has been replaced with a more modern 4/1.
The right side footpegs are lightly damaged/bend and the clip-on on the rightside is also bend.
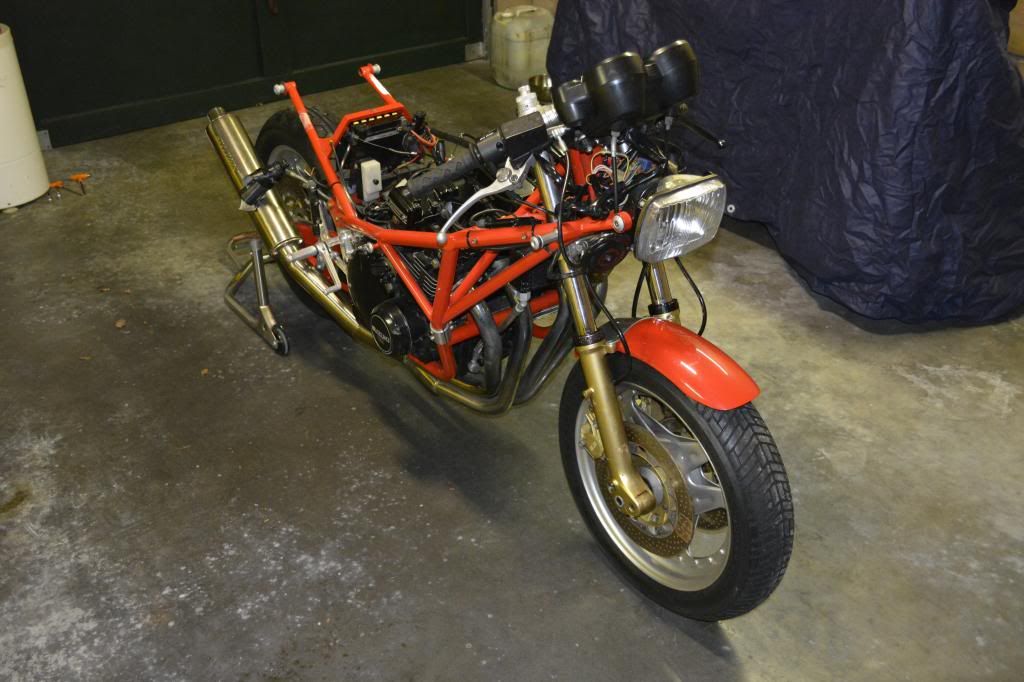
Taking her apart is a straight forward job, incomparable with any other bike I've been working on.
It is so transparant due to the fact that if you remove the bodywork and tank you remove everything from above in contrast to the fiddling with bolts and connectors on current bikes.
To be continued! |
|
| Back to top |
|
|
Frank.61
Joined: 28 Nov 2013
Posts: 108
Location: Maasmechelen, Belgium
|
| Posted: Sun Feb 23, 2014 10:31 am Post subject: |
|
|
Hi
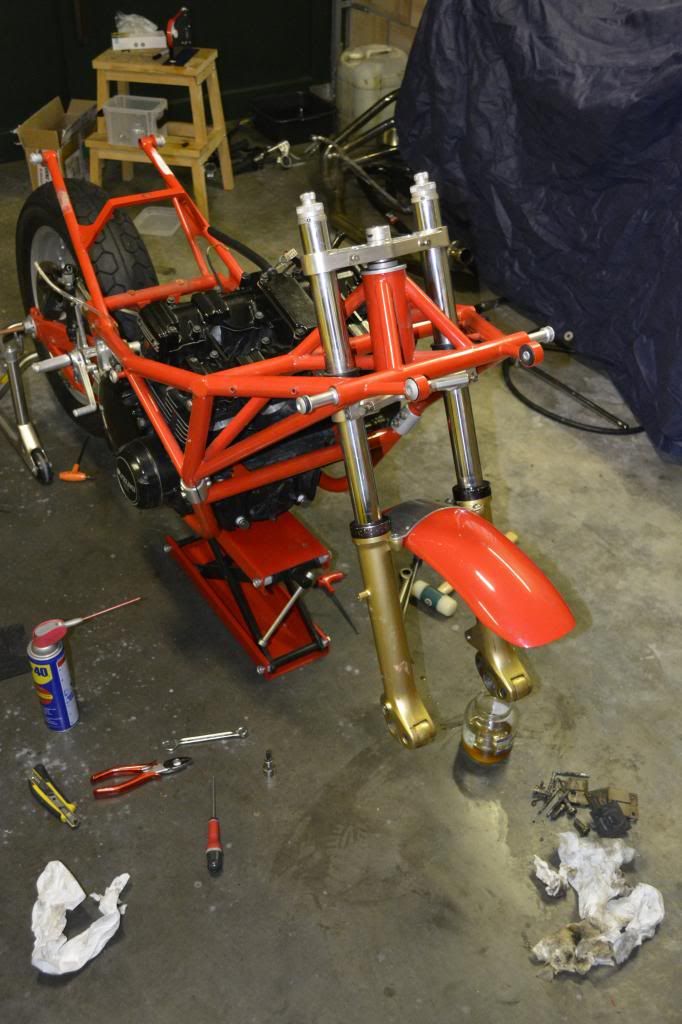
Part II .....
Taking her apart as said was straight forward just some bolts were almost impossible to loosen (hence the reason I always use to smear a little ceramic assembly paste on bolts before fastening and my numerous torque wrenches, which by the way have been calibrated last week, just to be sure the B will be handled as she should be - noblesse oblige - ).
All but one bolt did come loose, needed to weld an extension on/in it since the hexagon allen bolt seized on the inside!!!!
The first hexagon allen bolt EVER that seized on the inside ..... (8.8 quality !).
First I welded a number 6 bit but that one seized after a first blow with an impact drive but after a second bit was welded and a HUGE amount of force was applied it gave in (I feared it would break).
Cause was a.o. the grease used 30 years ago was almost rubberised something I noticed also at the lower steering bearing (never seen that before to be honest).
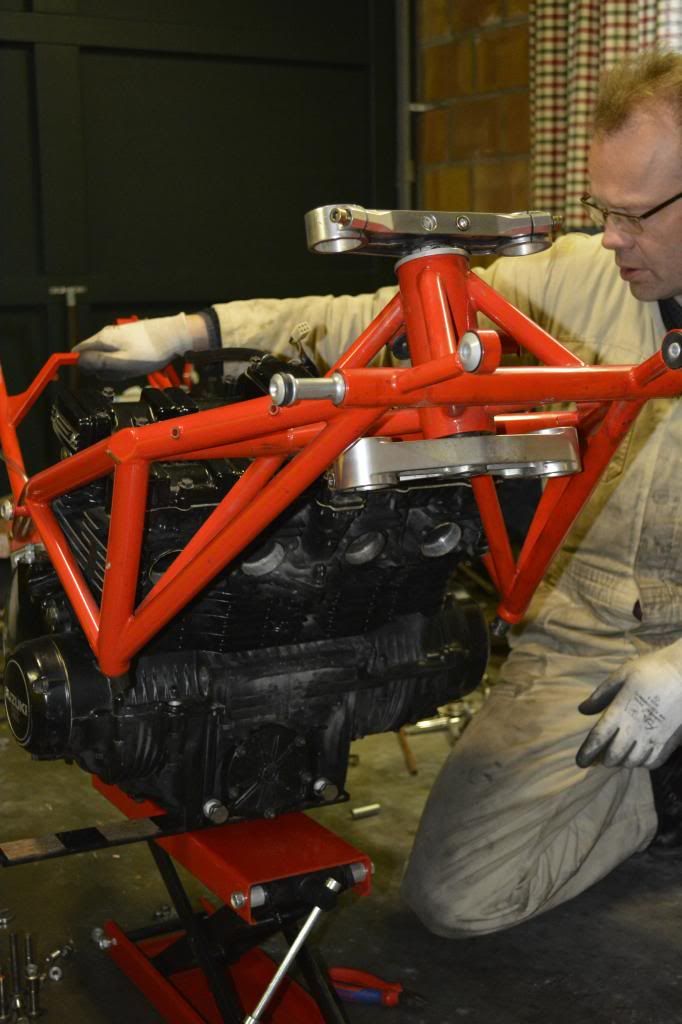
What a mess :oops
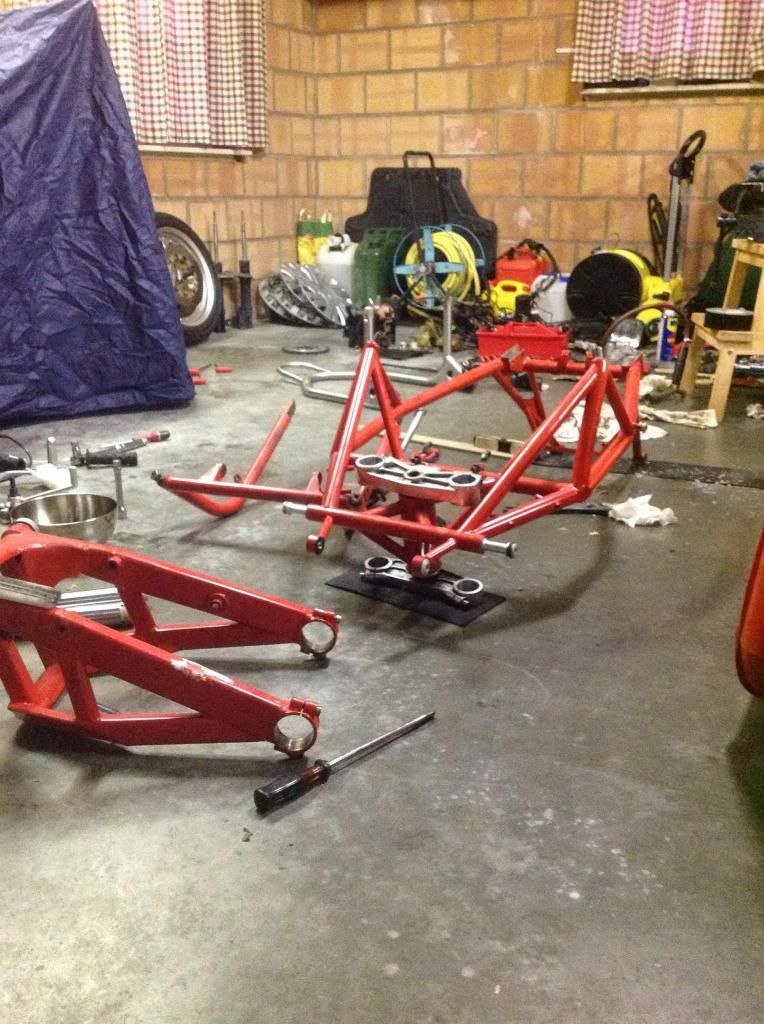
Here you see the frame after the gusset plates are removed .....
The nuisance bolt (from upper yoke)  
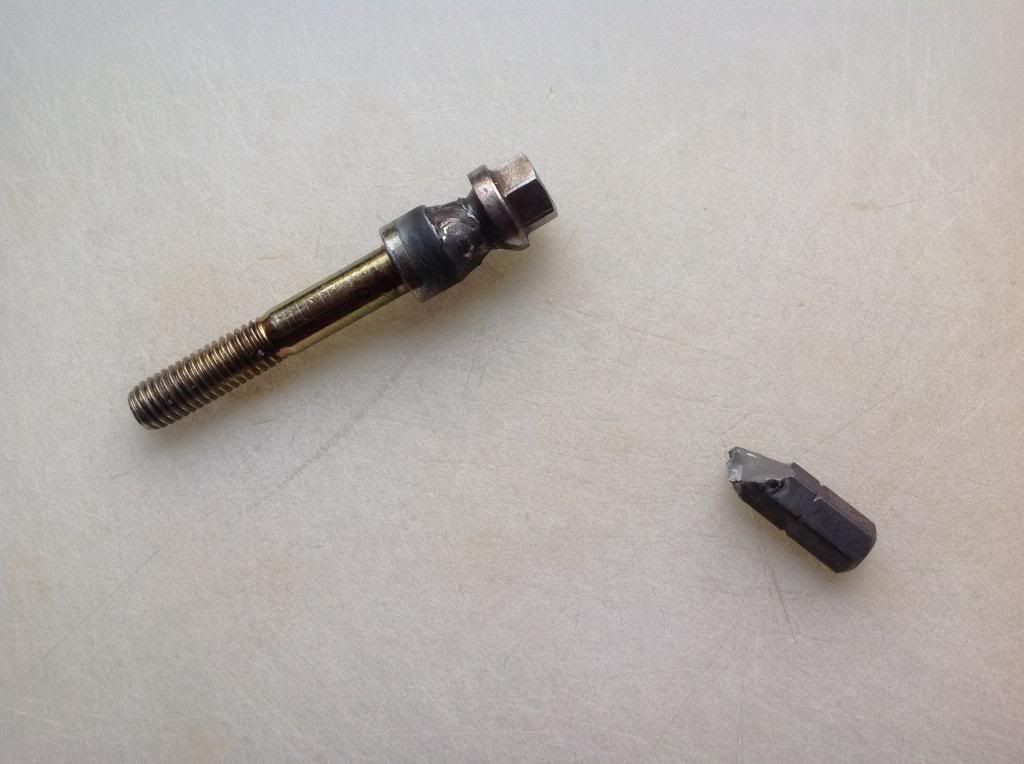
The aluminium gusset plates (?) were easy to remove since Bimotanige told how he did it and it really was a piece of cake knowing how to do it right!
Again Nige, big thanks!
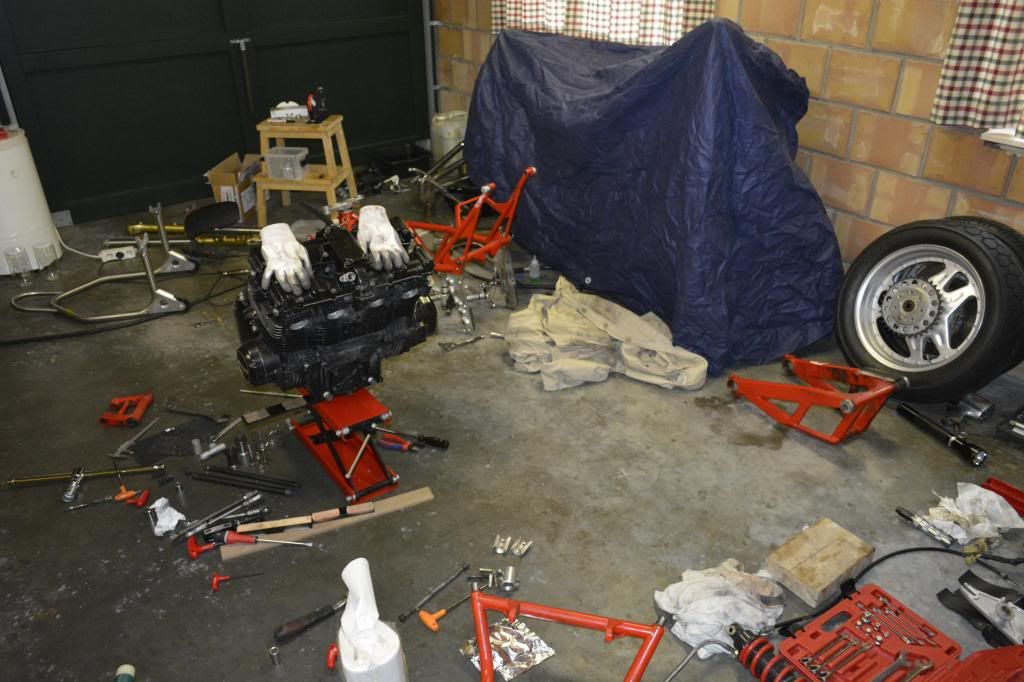
So now she is merely a collection of dirty old parts (BUT Bimota parts ).
Making an inventory for all fasteners used, most of them will become SS ones except the ones used on the gusset plates and the rear chain wheel fixing plate (?) which I will buy new and have them galvanized and yellow passivated like the original ones, this since I like the original look of those.
Well lot of cleaning and inspection to do.....
Frank
Frank |
|
| Back to top |
|
|
morebhp

Joined: 02 May 2012
Posts: 302
Location: Marbella, Spain
|
| Posted: Sun Feb 23, 2014 10:36 am Post subject: |
|
|
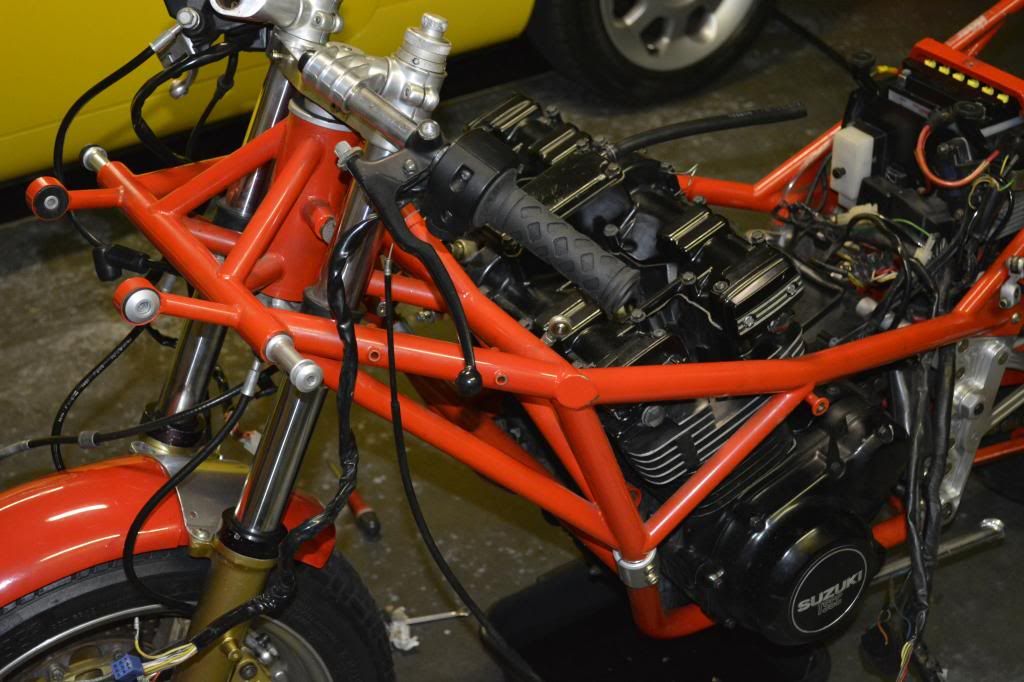
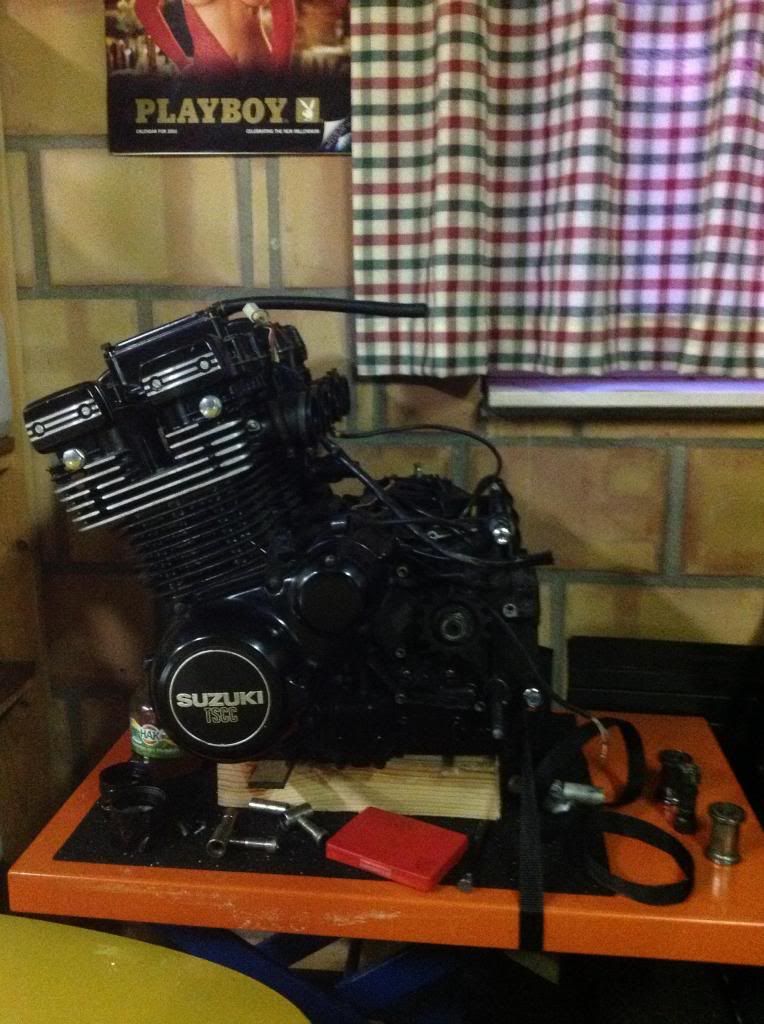
That engine shot was taken just a little too low 
_________________
Now - SB6R, GSX1400, KTM 990 SuperDuke
Then - H2A Trip, GSX1000R , EXC400, TZ250, R1, TL1000S, 1100 Kat, RG500, RD500, GPZ 900R GPZ1100 UniT, GSX1100, Z650
It was like that when I got here  |
|
| Back to top |
|
|
Frank.61
Joined: 28 Nov 2013
Posts: 108
Location: Maasmechelen, Belgium
|
| Posted: Sun Feb 23, 2014 10:56 am Post subject: |
|
|
| I don't want to be removed from the forum |
|
| Back to top |
|
|
waggy

Joined: 26 Sep 2011
Posts: 277
Location: Northern Ireland
|
| Posted: Sun Feb 23, 2014 5:33 pm Post subject: |
|
|
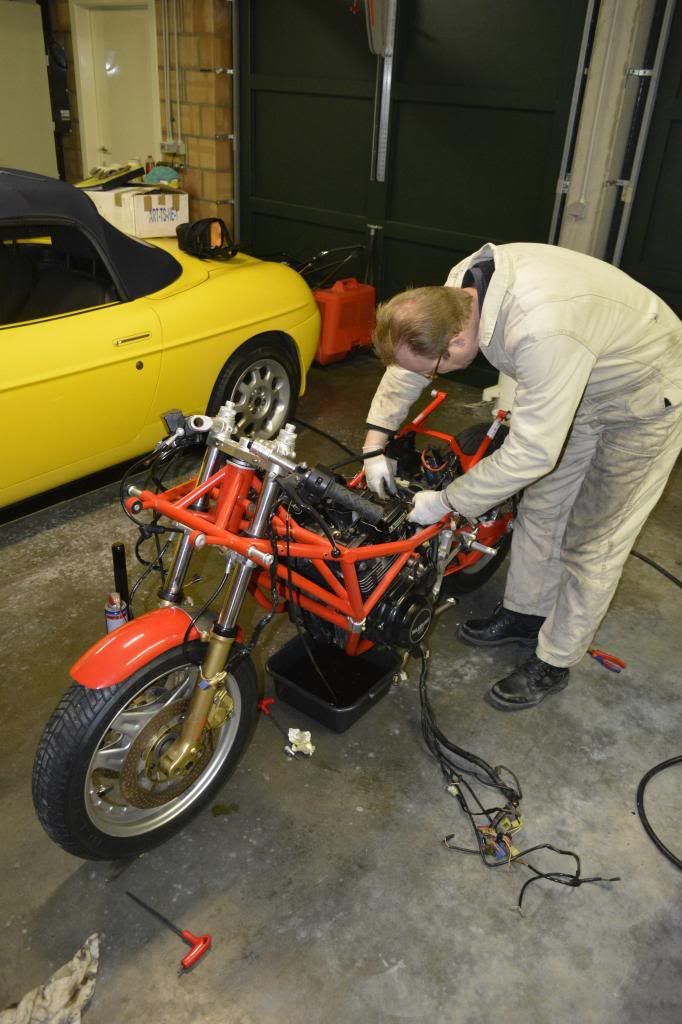
Looks like you have the invisible man holding up your engine, with those white gloves
Wouldn't it be great if modern bike designers could build bikes that are so easy to work on as these.
Great work Frank |
|
| Back to top |
|
|
Frank.61
Joined: 28 Nov 2013
Posts: 108
Location: Maasmechelen, Belgium
|
| Posted: Sun Feb 23, 2014 6:26 pm Post subject: |
|
|
Hi Waggy,
In the meanwhile I've been working on the lower front fork legs (next week text and pics will follow).
Question how did you get yours so smooth?
Sanding and a little filler and lots of elbow grease?
What color code did you use for your "Gold"-paint?
Am not sure which shade to use but I would like a little more sparkling than the original color.
Want a little more yellow/sunny gold and yours looks very nice (but pics can be deceiving when it comes to yellow and gold colors).
Pics are just examples of the direction I would like to go (shade wise).
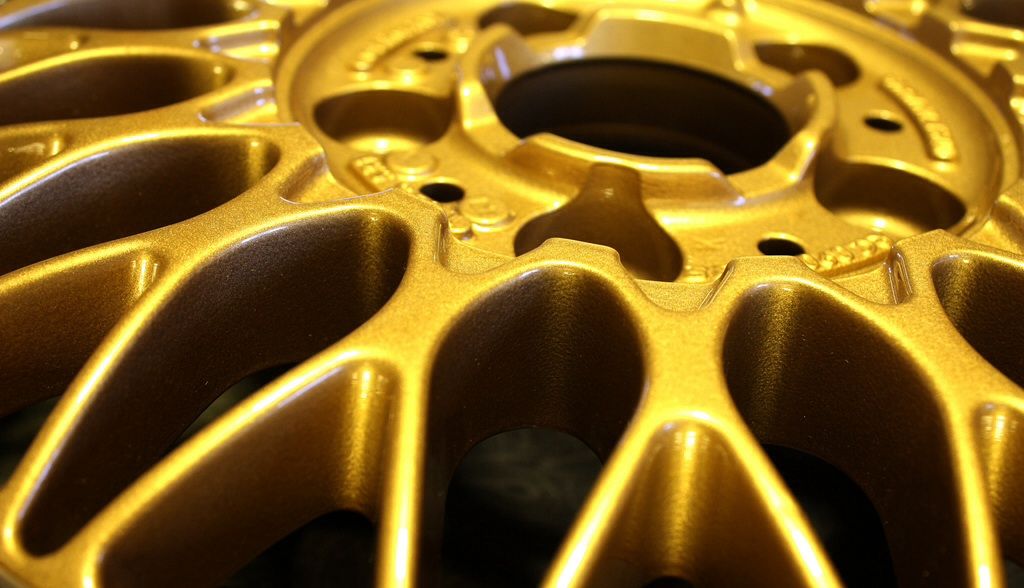
Don't want flakes but with similar effect .....
Frank |
|
| Back to top |
|
|
waggy
Joined: 26 Sep 2011
Posts: 277
Location: Northern Ireland
|
| Posted: Sun Feb 23, 2014 8:06 pm Post subject: |
|
|
Hi Frank,
The credit for my fork legs goes to my painter, they were originally blue, so he removed the old paint and any imperfections were probably filled and smoothed.
I have to visit my painter hopefully this week to pick up some bodywork for one of my other bikes, so will ask him what he uses for his gold paint. |
|
| Back to top |
|
|
Frank.61
Joined: 28 Nov 2013
Posts: 108
Location: Maasmechelen, Belgium
|
| Posted: Sun Feb 23, 2014 8:49 pm Post subject: |
|
|
He really deserves credit since the front fork lowers are sandcasted and plain they look like it sounds: crude!
Mine are grit blasted last Friday (by the invisible man ) .... my brother.
They were manufactured in a different way than most fork lowers (see next week's contribution).
But for me these are distinctive and period items for the Bimota's of the beginning of the 80-ties.
I wonder who else used these forks with the quick release system (a special Ducati maybe?).
Typical Tamburini style (Bimota & Mv Agusta).
That's why I want them perfect (after the frame, the milled aluminium parts and fairing the most characteristic parts).
Can't tell you how happy I am that they are from "plain" aluminium instead of magnesium ... pfffff ! |
|
| Back to top |
|
|
Macx2
Joined: 03 Dec 2011
Posts: 44
Location: Wide Bay Queensland Australia
|
| Posted: Sun Feb 23, 2014 10:32 pm Post subject: |
|
|
Thanks for posting the photos Frank! I think that the SB2 may even be easier to pull apart, as the front and rear ends come apart with the frame sections. I had mine reassembled to the point where all I had to do was put the bodywork on and fit some sundry items and I realised that I had left an o-ring out of the digital gear indicator pickup on the gearbox. I had apart and reversed in quite a short time.
Ian |
|
| Back to top |
|
|
brian

Joined: 22 Aug 2011
Posts: 3769
Location: Australia
|
| Posted: Mon Feb 24, 2014 12:34 am Post subject: |
|
|
It's coming along nicely Frank. I suspect you are somewhat of a photographer too? Beautiful photo's mate... i especially like the photo's of your carbs.
Keep up the good work
_________________
'99 DB4 #104, '96 SB6 #1165, '94 DB2 J #652, '99 DB4 #088, '08 VTX1800, '93 ZXR750R M1, '95 ZXR750, '95 ZXR750 Race Bike, '94 CBR400rr NC29 Race Bike, '94 CB250, '49 BSA C10 250, '61 BSA A10 650, '89 ZXR750, '91 Ducati 851 |
|
| Back to top |
|
|
Les Caddaye
Joined: 17 Dec 2010
Posts: 61
Location: Australia
|
| Posted: Mon Feb 24, 2014 12:45 pm Post subject: |
|
|
G'day Frank,
Also an SB4 owner. Very nice job so far and I'm extremely impressed with how organised you are. I'm very interested in your fork rebuild and await colour type and how Waggy got his so smooth. Forks are also used on Ducati F1 750s, not all of them but some.
Was your "hard to remove" bolt from the top triple clamp? I started to dismantle mine some months ago but gave up when 1 bolt just refused to move, didn't want to break anything so just put it back together as a rally was approaching that I wanted to go to.
Anyway, nice job and good luck, I am following with interest.
Thank you and cheers
Les |
|
| Back to top |
|
|
Frank.61
Joined: 28 Nov 2013
Posts: 108
Location: Maasmechelen, Belgium
|
| Posted: Mon Feb 24, 2014 9:20 pm Post subject: |
|
|
Hi Les,
Well if you look at the second picture of part II (were you see my brother), you see that in the middle of the top tripple clamp there is just 1 bolt still there.......... that's the B*****D
Honestly the clamp was pre warmed, used almost a can of WD40 and a lot of force before we took the impact driver (scared we would seize the bolt head).
But as you can see the bolt was not corroded at all.
The aluminium was perfect, just there was white grease which looked more like white rubber and which took me a week to dissolve and blow out with compressed air.
But I didn't have any choice since a) I had to exchange the head stock bearings, and b) the frame will get a new powdercoat layer.
Again, I love using ceramic assembly paste and a list with typical torque values and a calibrated torque wrench (at least now I know for sure I haven't done this in vain).
But honestly I want to exchange most of the original Suzuki engine covers bolts and in unscrewing them some turned (nee, twisted) almost 90 degrees before comming loose with a high pitched noise.
Again didn't see any trace of oxidation.
Frank |
|
| Back to top |
|
|
Frank.61
Joined: 28 Nov 2013
Posts: 108
Location: Maasmechelen, Belgium
|
| Posted: Mon Feb 24, 2014 10:16 pm Post subject: |
|
|
Hi SiBag,
Nice bracket!
What is the width, 15 mm?
I consider making a replica of it!
Frank |
|
| Back to top |
|
|
SiBag

Joined: 03 Mar 2012
Posts: 251
Location: Cheshire
|
| Posted: Mon Feb 24, 2014 10:43 pm Post subject: |
|
|
I'll have a measure up looks like I lost the drawing.
Think they are 10 - 12mm. The pinch bolts were M6.
Wanted them to look quite slim and minimalist. They took about 4 - 6 hours to make on my little mill.
_________________
Si...
SB6..CCM R30...GSXR-750-M...RGV-250-VJ22.. GSX-1100-EFE Project....Harris Magnum II project...
If its got Ti#s or Wheels its gona give you trouble |
|
| Back to top |
|
|
|


