| View previous topic :: View next topic |
| Author |
Message |
PaulDB2
Joined: 26 Apr 2014
Posts: 316
Location: Manchester
|
 Posted: Mon Apr 25, 2016 5:17 pm Post subject: Posted: Mon Apr 25, 2016 5:17 pm Post subject: |
 |
|
Blimey, at this rate, the resto will be complete by the weekend ! 
You are putting me to shame, if you have a spare week I might bring my DB1 over for you to fettle ! 
_________________
Bimota DB1, Bimota YB5, Bimota YB6 Exup, Bimota YB9 SR, Ducati NCR Replica, Moto Guzzi 750 S3, Honda CR750 race replica, Seeley-Suzuki TR500 |
|
| Back to top |
|
 |
waggy

Joined: 26 Sep 2011
Posts: 277
Location: Northern Ireland
|
| Posted: Mon Apr 25, 2016 8:39 pm Post subject: |
|
|
| Looking great 2bims, your flying along at great pace. I had a similar ohlins shock were the gold finish had all but gone. My cheat was to key the old surface, give it a coat of etch primer, then a coat of silver, then follow several coats of tamiya translucent gold, cant recall its exact name, but its not a solid colour, hence the silver undercoat. Just slowly build up the coats of gold to get a near perfect match. Then finish with lacquer. Simples |
|
| Back to top |
|
|
ladolcevita7

Joined: 02 Dec 2015
Posts: 44
Location: Manchester
|
| Posted: Tue Apr 26, 2016 11:33 am Post subject: Restoration |
|
|
Wow now thats how you do a proper restoration.
I hold my hands up and applaud you for your methodical planning.
I also hold my head in shame for not getting stuck into doing mine 😕
I need a bigger garage  |
|
| Back to top |
|
|
wallaman
Joined: 01 May 2012
Posts: 58
Location: USA
|
| Posted: Wed Apr 27, 2016 4:25 pm Post subject: |
|
|
2bims,
Just a thought on prep for powdercoating your frame. I'd have the coaters blast it first, them take it back for inspection. You can "fix" any minor blems with a dab of JB Weld, then sand smooth just like the plastic bondo used for regular paint prep. The JB Weld powdercoats over just like metal and holds up well in their oven. Perfect for fixing spots like the worn area on your swingarm. If your concerned, ask your powdercoater, but I've been using JB Weld for years for that purpose - got that tip from my powdercoater.
Thanks for the great write up. Giving me motivation to do my DB2. It needs a good refresh!
Thanks.
Chuck S. |
|
| Back to top |
|
|
Bud977
Joined: 03 Mar 2013
Posts: 525
Location: Sydney
|
| Posted: Wed Apr 27, 2016 9:43 pm Post subject: |
|
|
Awesome work so far 2bims. And I can't wait to see it go back together.
Seeing the breakdown of the DB2 and seeing the individual components makes you appreciate the skills of Bimota even more. |
|
| Back to top |
|
|
2bims

Joined: 03 Apr 2010
Posts: 7291
|
| Posted: Wed Apr 27, 2016 11:14 pm Post subject: |
|
|
| wallaman wrote: |
2bims,
Just a thought on prep for powdercoating your frame. I'd have the coaters blast it first, them take it back for inspection. You can "fix" any minor blems with a dab of JB Weld, then sand smooth just like the plastic bondo used for regular paint prep. The JB Weld powdercoats over just like metal and holds up well in their oven. Perfect for fixing spots like the worn area on your swingarm. If your concerned, ask your powdercoater, but I've been using JB Weld for years for that purpose - got that tip from my powdercoater.
Thanks for the great write up. Giving me motivation to do my DB2. It needs a good refresh!
Thanks.
Chuck S. |
Cheers Chuck....most of the wear to the frame and swingarm is just to the original Factory Bimota powder coating......something that other manufacturers still dont do today...surprising really....that bikes that are often so cared for or just plain not used get such a protective coat direct from the factory....
Yesterdays task was finding a powder coater still in business....the old place I used to use now has new houses standing on the land where there warehouse used to be...the 2nd place I tried the whole landplot has been sold off to a supermarket...so it was onto the 3rd place on my list...Hindley engineering...who purely do powder coating...and glad to see things have moved on....He had all the RAL numbers and colour patches to choose from for frame red, silver valve colours and Ohlins yellow shock....as well as some fandango metallic finishes also....
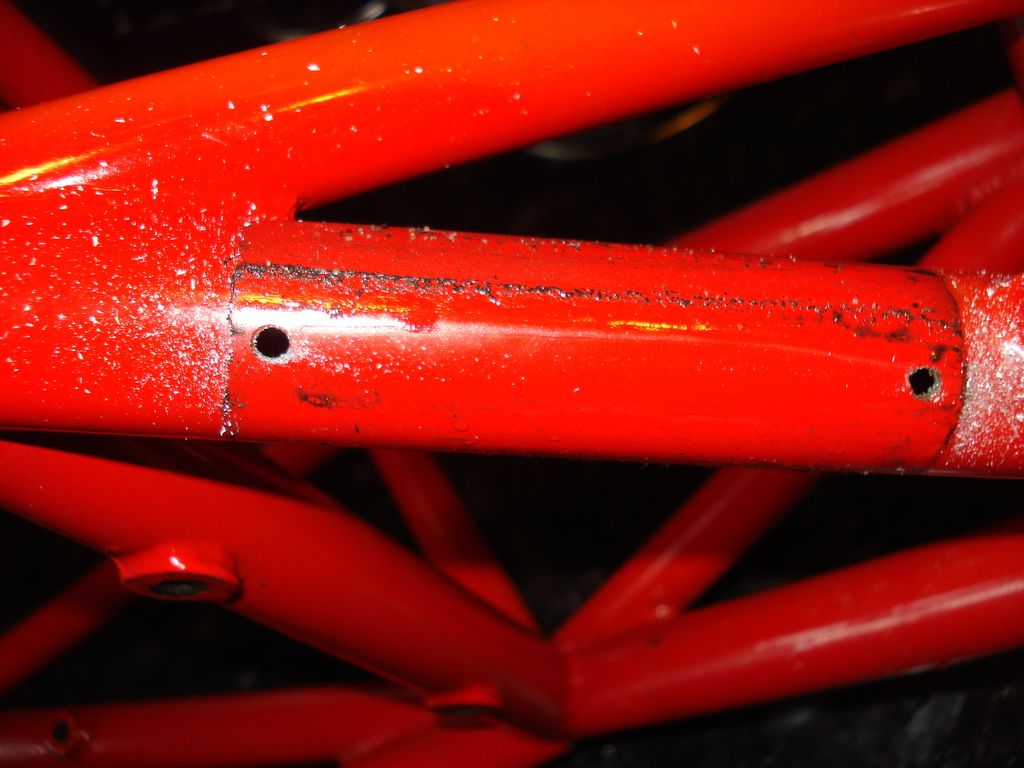
I'd prepped the frame griinding flush any imperfections or previous grind marks from chain rub....and masked off areas I didnt want powder coating.
Blokey down there outmarkets the grit blasting so that the grit in the air doesnt comtaminate or get into his painting service and ovens....he assures me that once back from the grit blasters he fine emery cloths down the surface to get really fine flat finish....then bakes the bare parts at over 200 c to burn off any residuals....then air blasts clean....then heats bare clean metal to over 200 again and then powder coats on to that and bakes again.......he did show we the air gun arear...and emery cloths etc etc....and then gave price of 150sovs for the 12 parts I took down...4 valve covers to silver, one spring to yellow...and 8 separate frame parts to red....ideally he and others prefer one colour everywhere...and the more colour you choose the higher the price....there were colour matches for frame, engine covers and ohlins yellow...oh and of course he blanks and plugs all tapped holes and areas you dont want doing...like the inner "hub" where the rear wheel concentrics go....
Prior to taking down it was the all important task of removing the vin tag delicately...so it can be re-rivetted back on later...
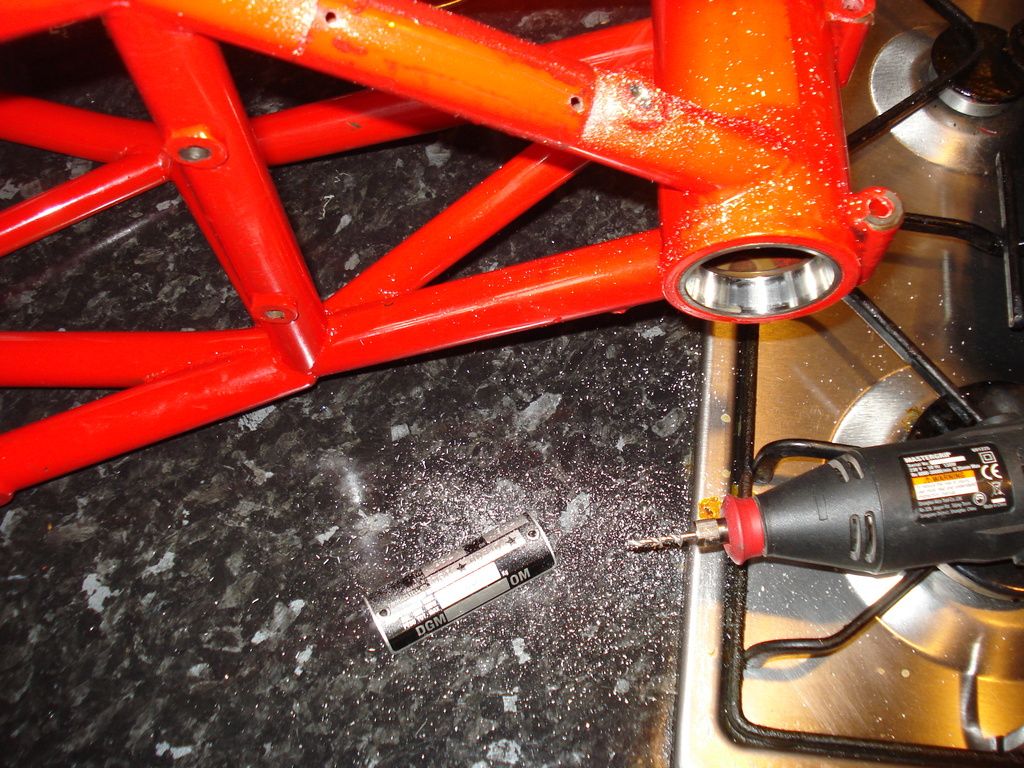
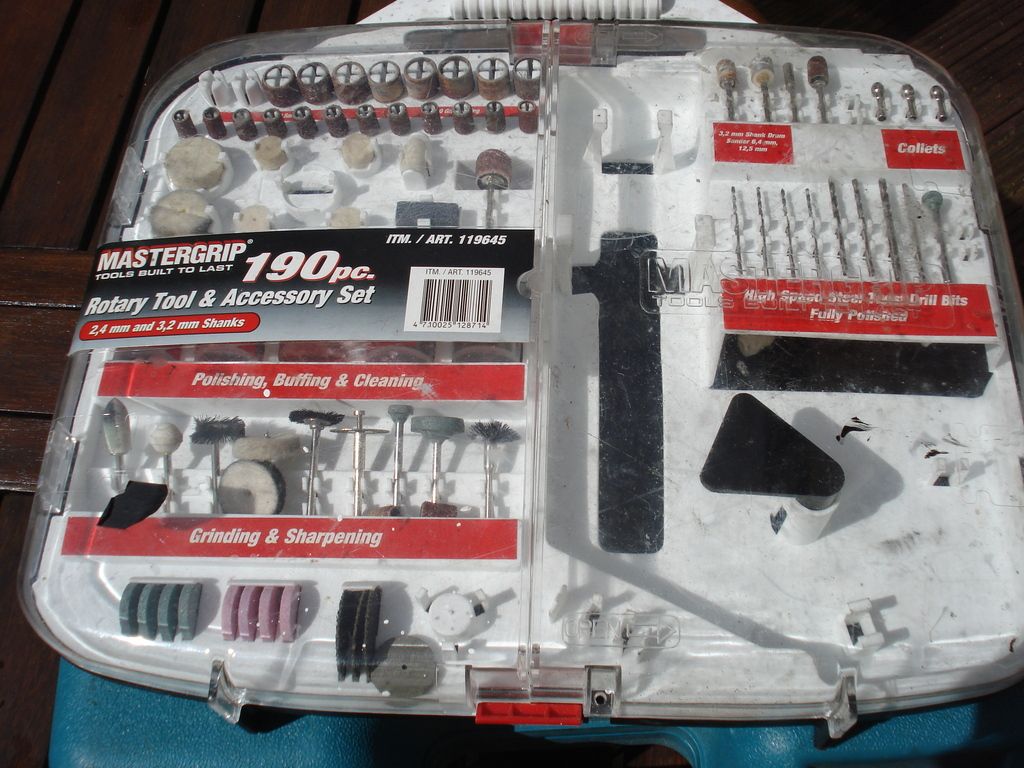
Always use my mini dremel and steel bit to drill out the old rivets rather than big hand drill..more precise and less likely to slip or drill right through to the otherside....
Costco's "best" mini-dremel kit.....works like a charm for many small detail works...
Bit of "light" shopping today in preparation for cleaning, painting, restoring etc....
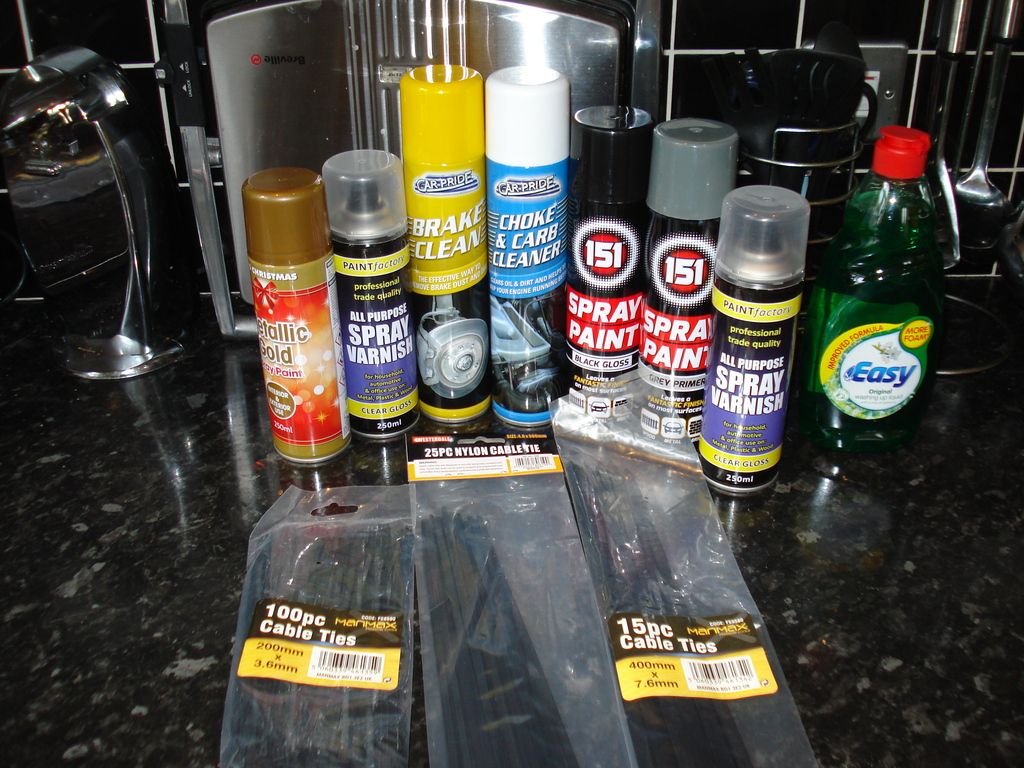
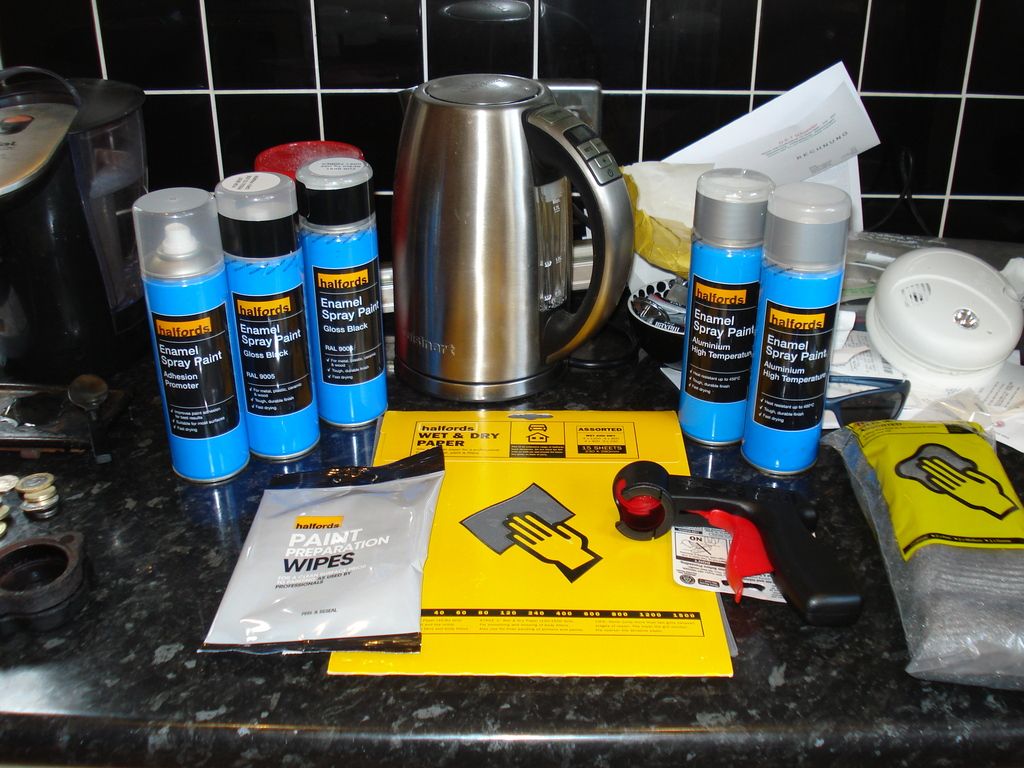
One lot was 50 sovs...and one lot was 11 sovs from poundland....no guesses needed what was from where...ruddy Halfords want 2-3 sovs for say 4 cable ties....
Polishing time as the sun had come out....although only 6 degrees today...and it did snow later on also...so too cold for painting....
Got the old mops out and waxes///....Coarse nylon mop on power drill for deep corrosion/tarnish...then coarse sizel and grey wax...then medium sizel and green wax...finishing with fine cotton sizel and blue wax....
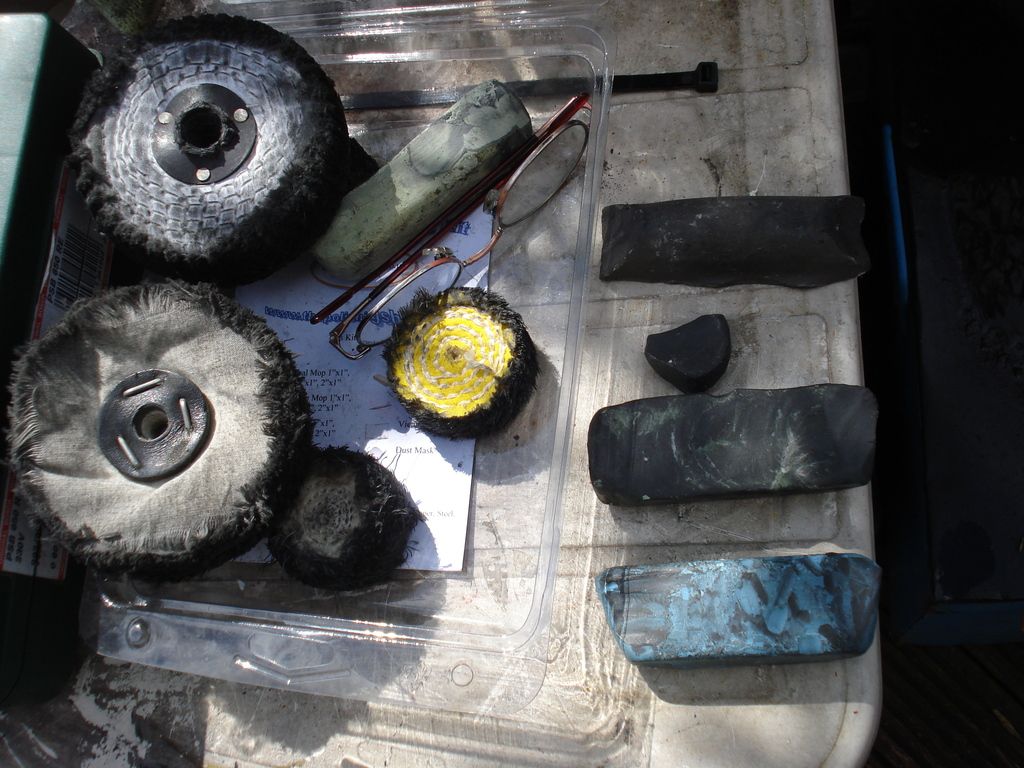
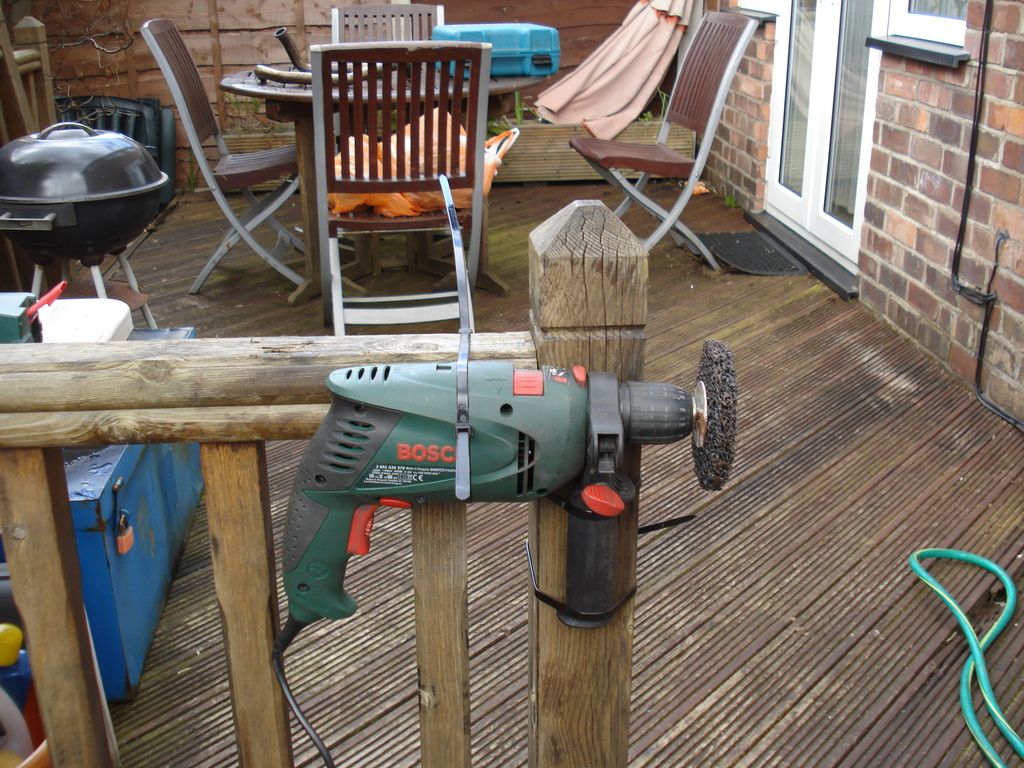
Rigged up the variable speed Bosch power drill to decking ballustrade with newly bought cable ties....."on" button can be locked for continual polishing...vari speed essential as certain mops work better at high or low speeds...as you can "burn" the wax you're applying to the surface if too high
 |
|
| Back to top |
|
|
2bims
Joined: 03 Apr 2010
Posts: 7291
|
| Posted: Wed Apr 27, 2016 11:31 pm Post subject: |
|
|
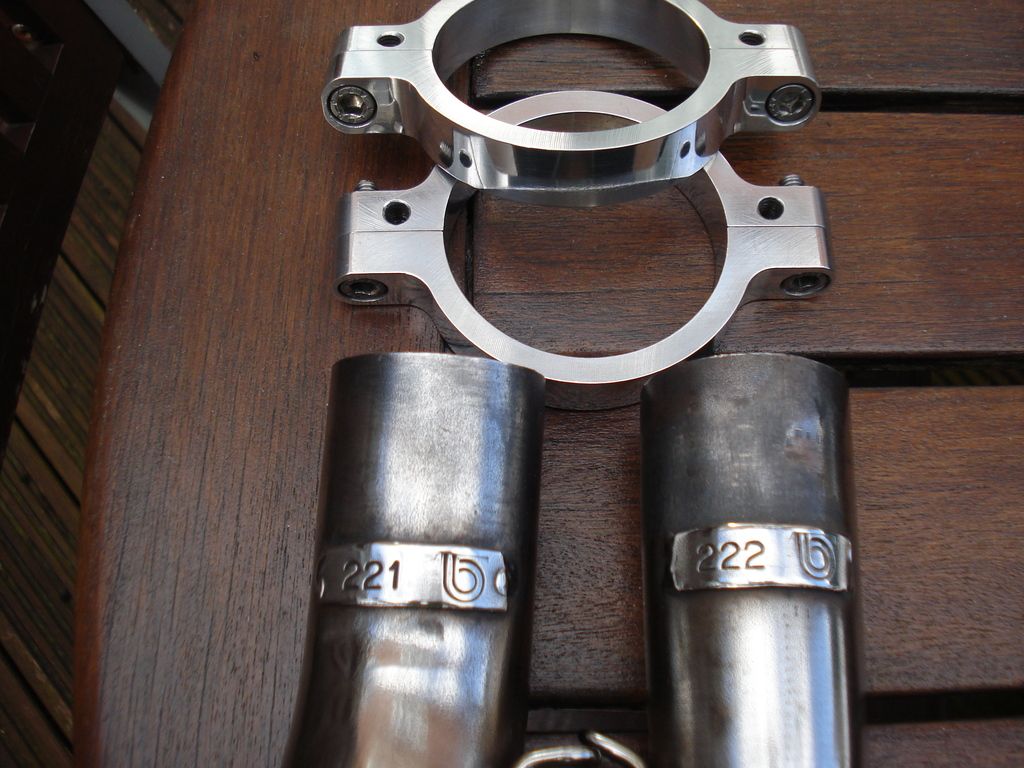
First up was the Exhaust front and rear headers.which have stood up well from their last polish some 6 years ago....Was thinking about ceram coating them...but I still prefer polished SS look....and despite what ceramcoat say...their coating does need polishing from time to time...albeit less work than what I'm about to undertake....
Old headers prior to any work:-
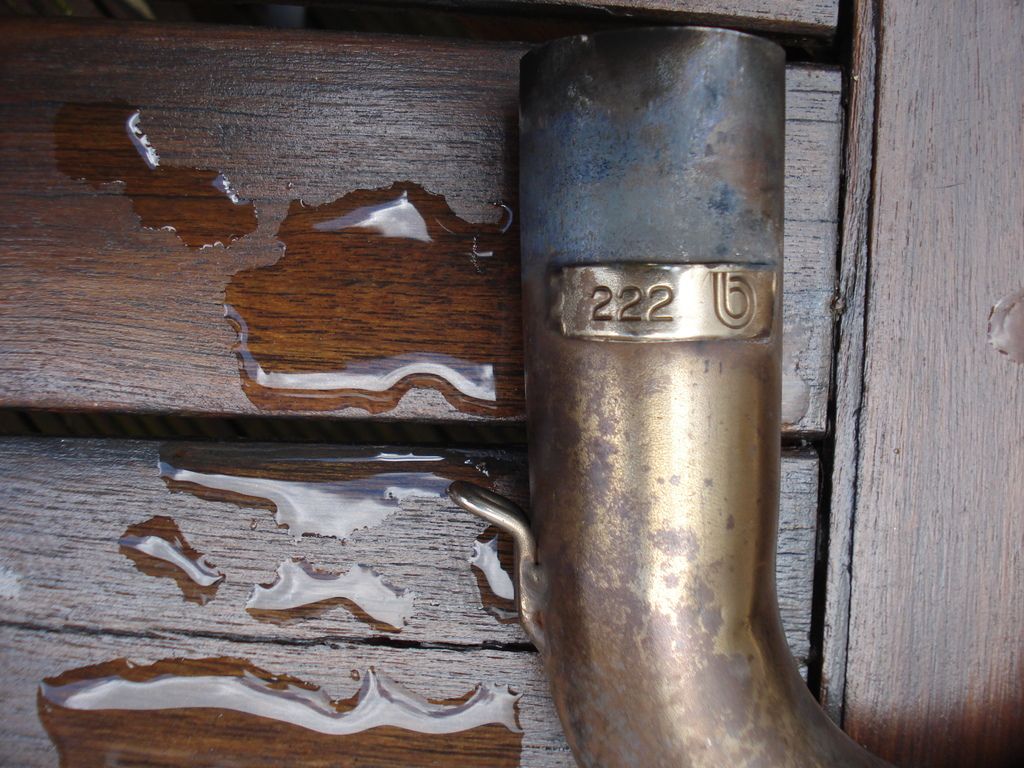
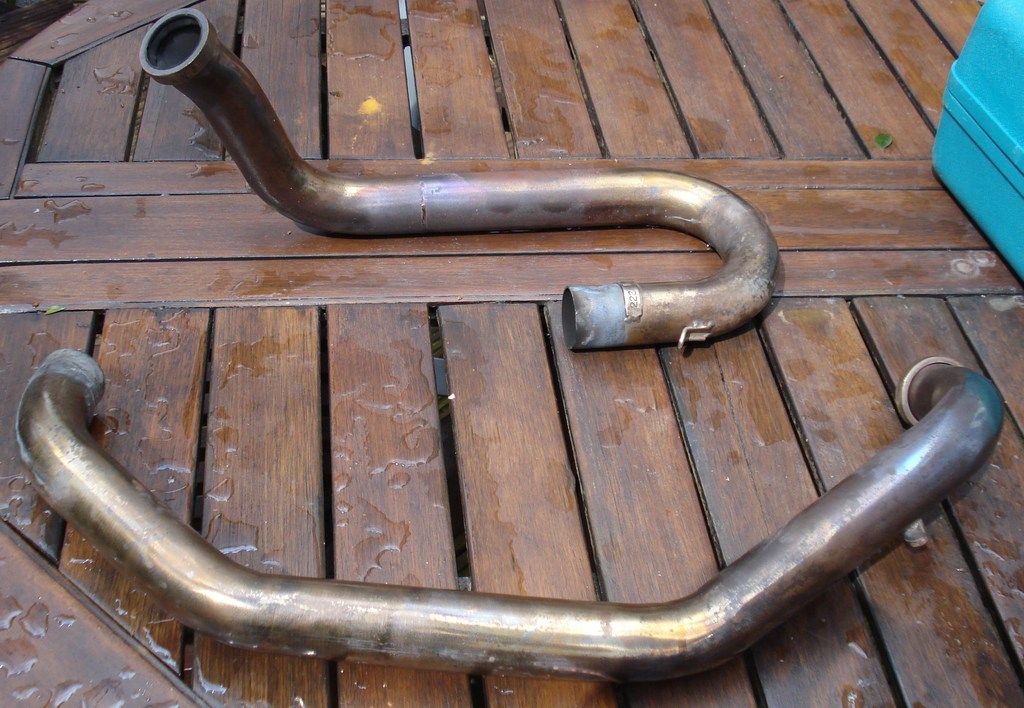
Bimota welds numbered tags onto each header so that they match with the follow on link pipes...evidently showing each one was hand made...and lengths/bends may vary otherwise....the top of the tabs indicates where the next piece pushes down to....so you dont need to polish this part as its not seen...
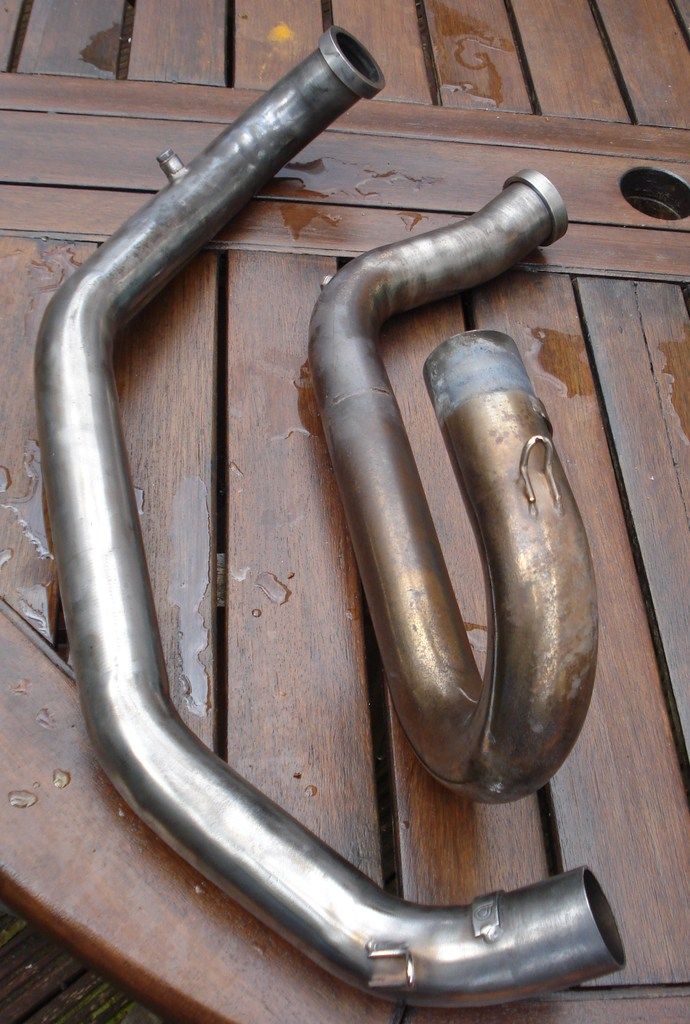
First and 2nd pass of the process...evidently one on the left is "after"...RHS not touched yet
Both sets part way through
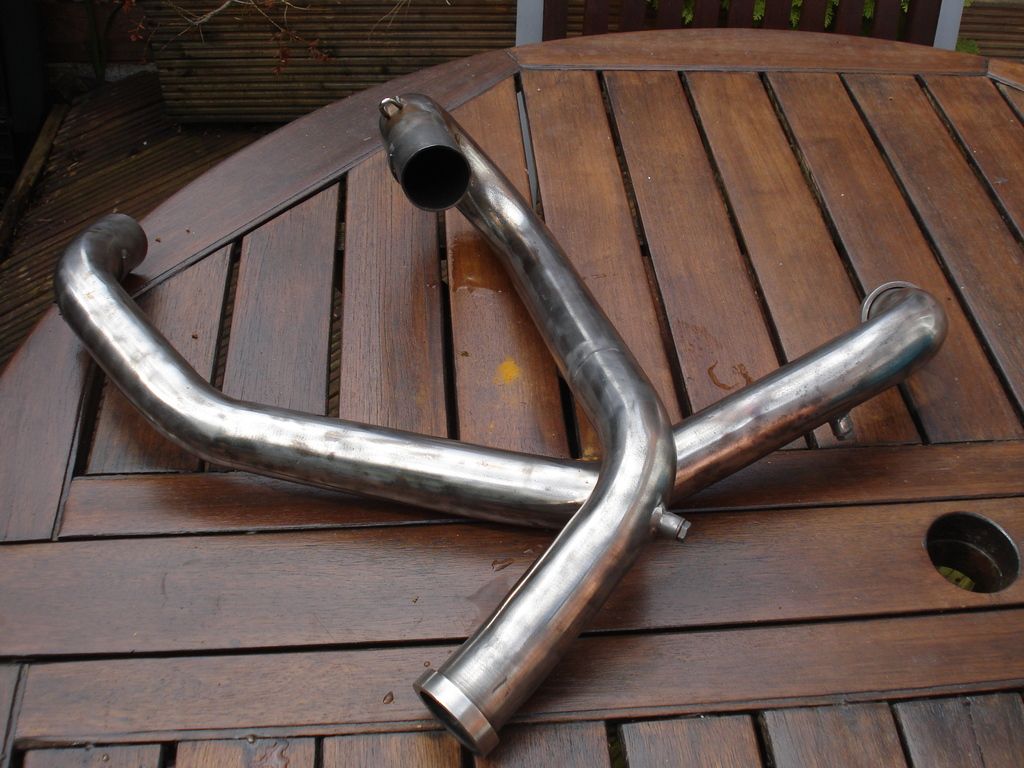
getting closer...just one step left
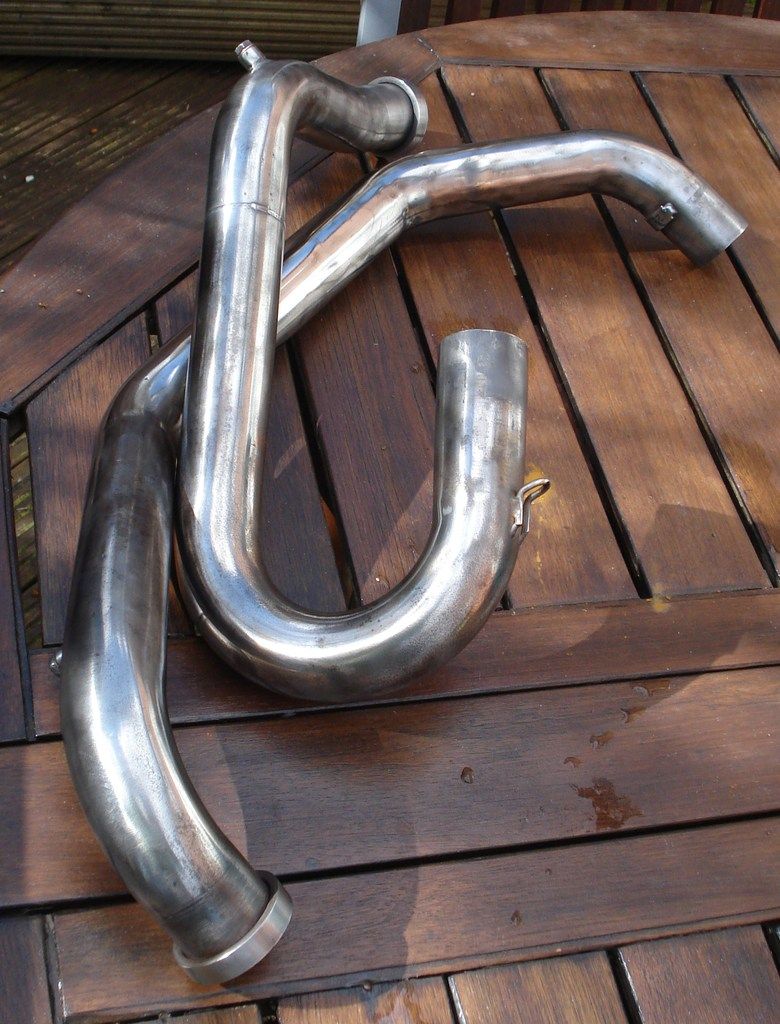
and heres the final items after being hand finished with fine wire wool...
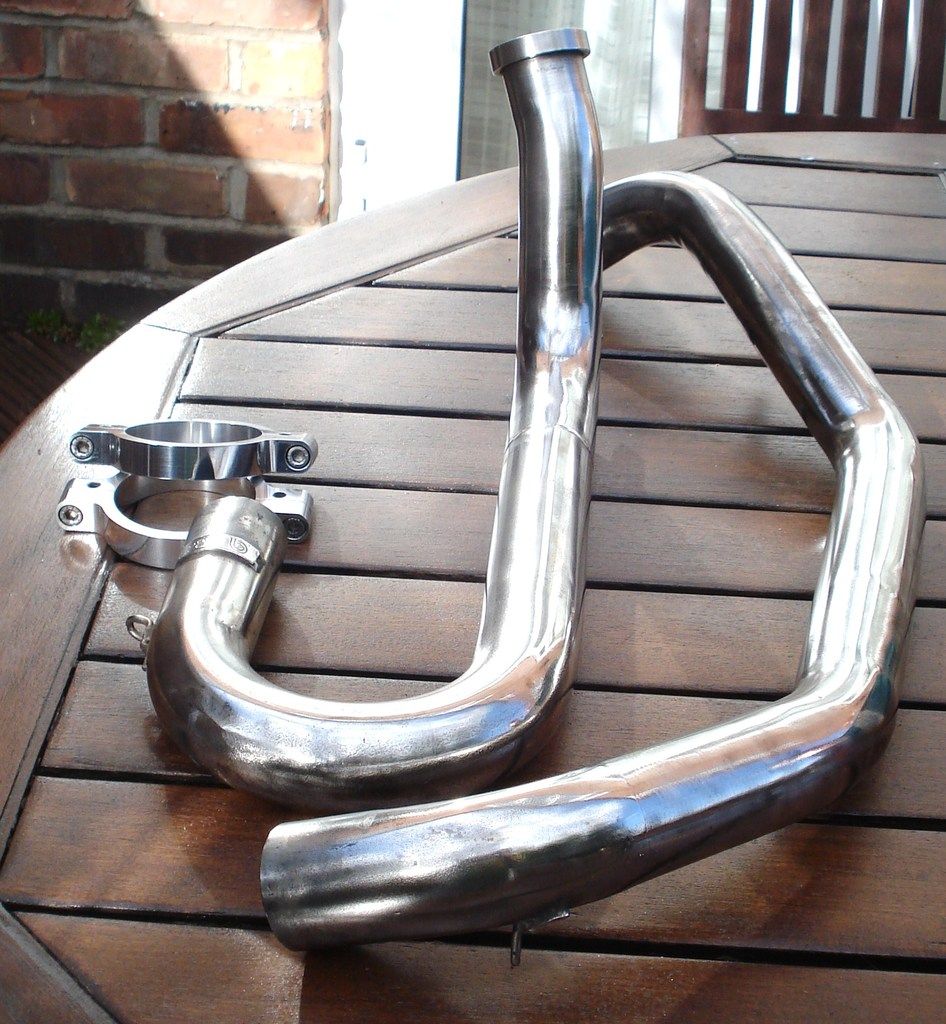
You can also use powdered lime (the white limestone stuff..not the stuff that grows on trees) to clean off any burnt on wax...and it cleans good also...just dont get it in your eyes...or mouth or up your nose...so protection always....
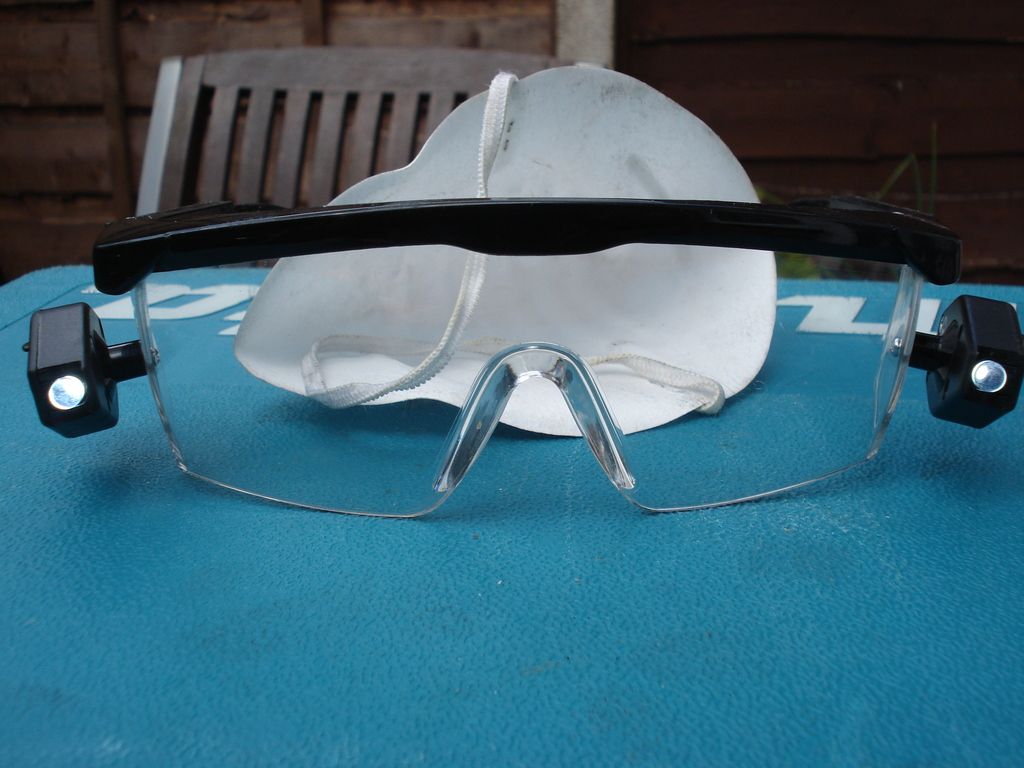
Its these puppies or GUARANTEED conjuctivitus before the morning comes...or worse still.... 
Also polished up the Front mudguard mounts...but only the last 2 steps are needed with ally....the first 2 steps are too aggressive
one part way through and other untouched
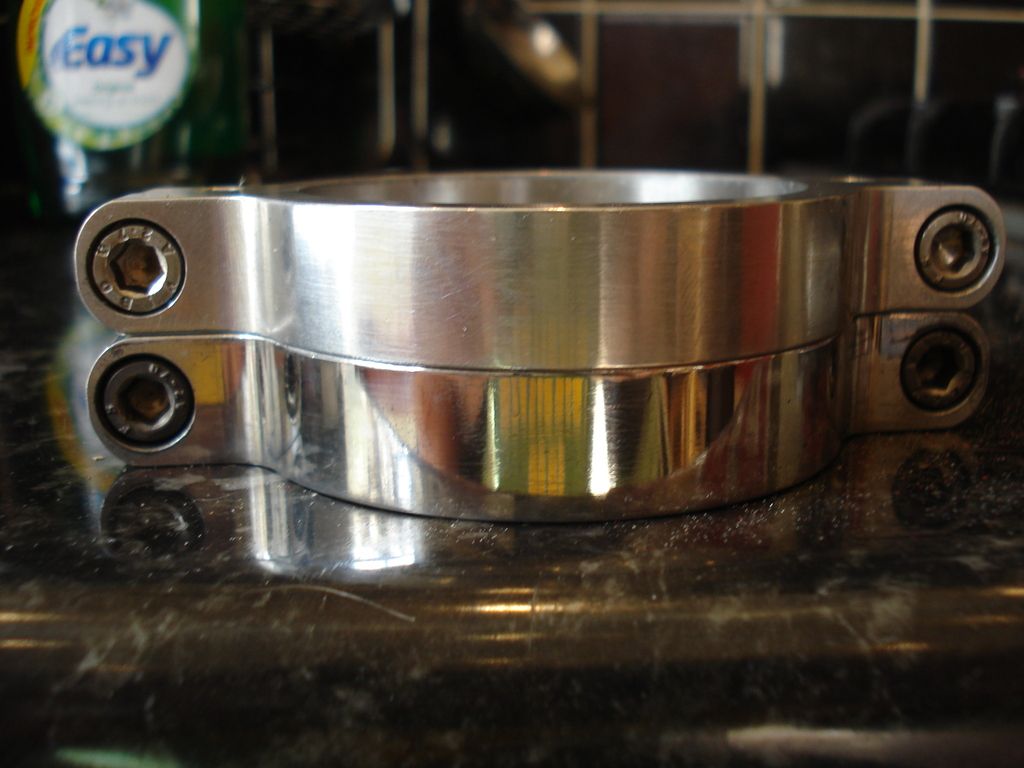
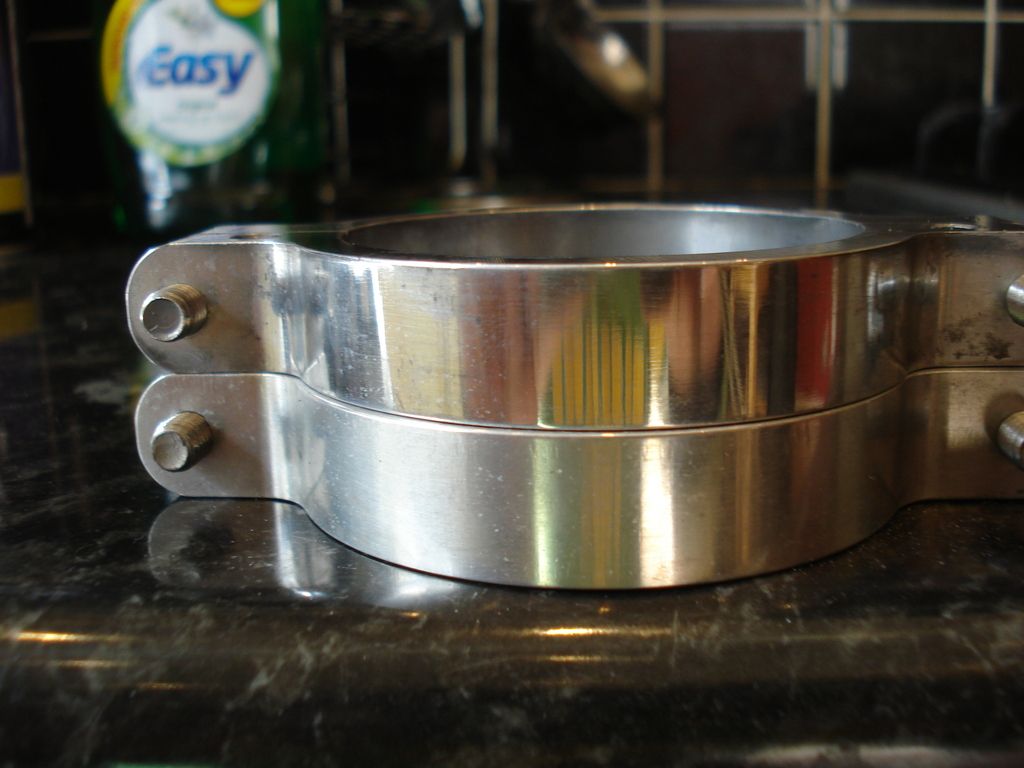
and now both fully done...and after solvol and fine wire wool again...
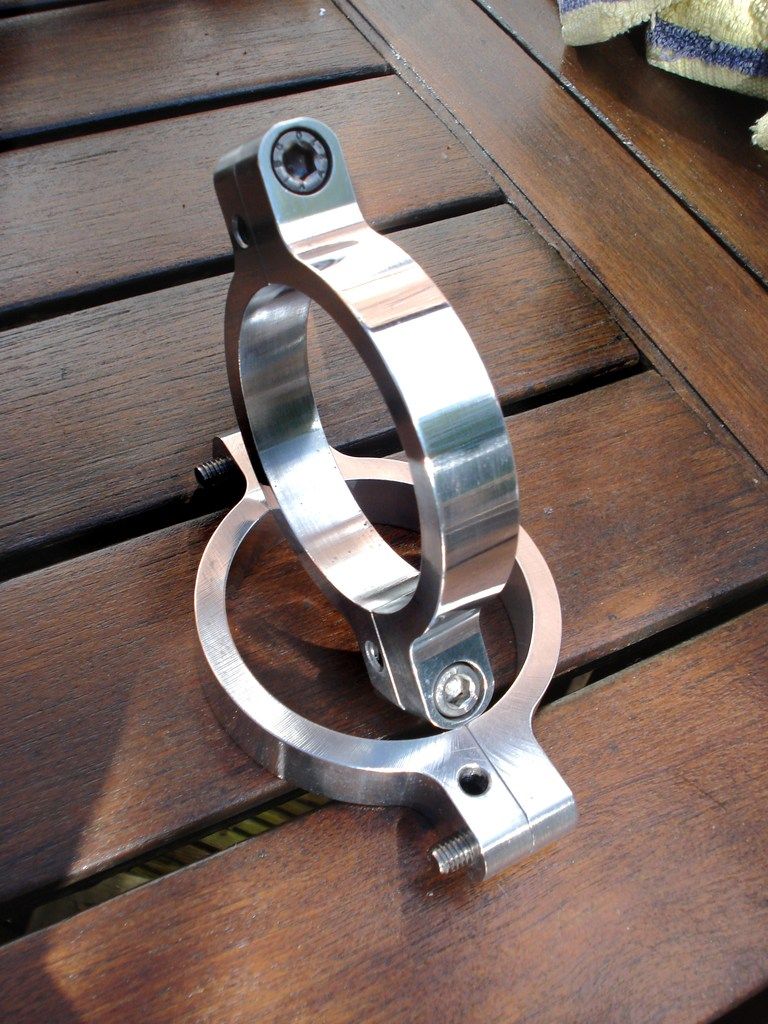
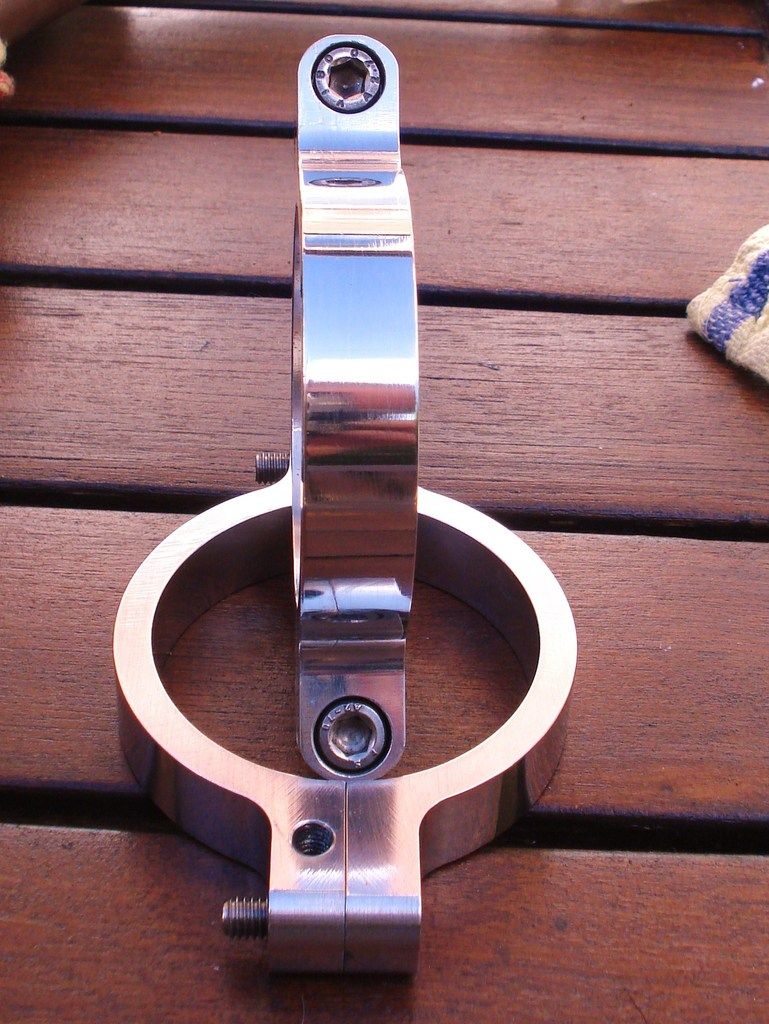
Wouldnt mind getting some more made up for Napkin rings....but then I'd need to clear the dining table of bikes and bits if I was entertaining such... |
|
| Back to top |
|
|
2bims
Joined: 03 Apr 2010
Posts: 7291
|
| Posted: Wed Apr 27, 2016 11:55 pm Post subject: |
|
|
Thats the shiney stuff out of the way for now...so its onto solid steel/cast iron humdrum rusty stuff...
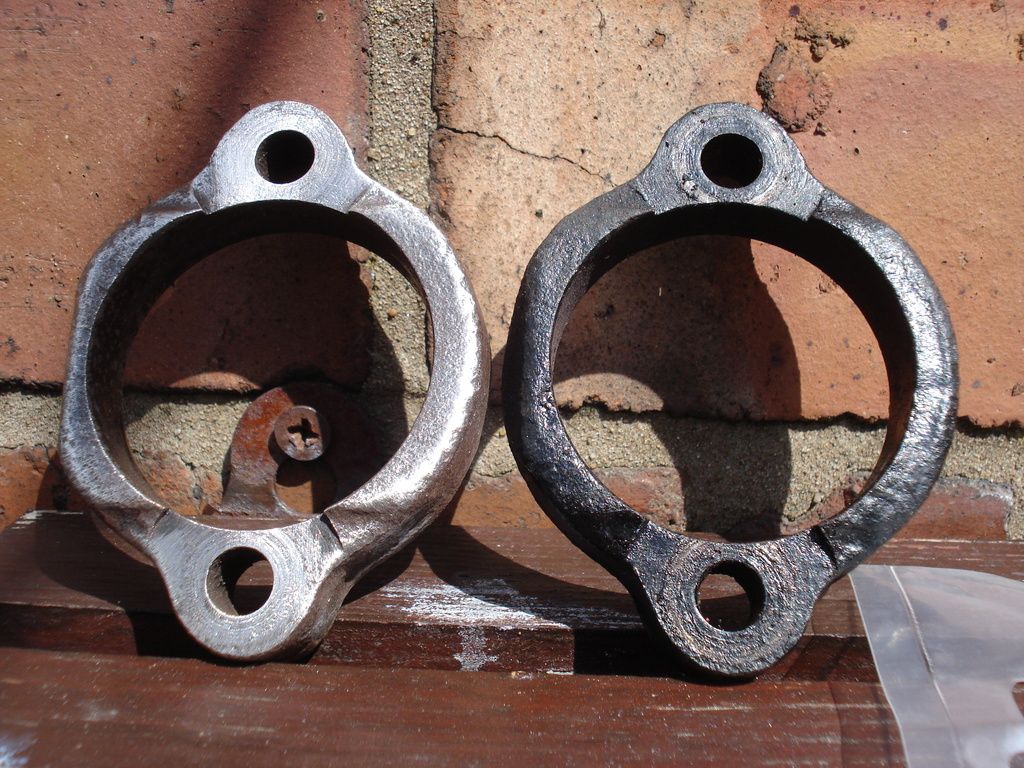
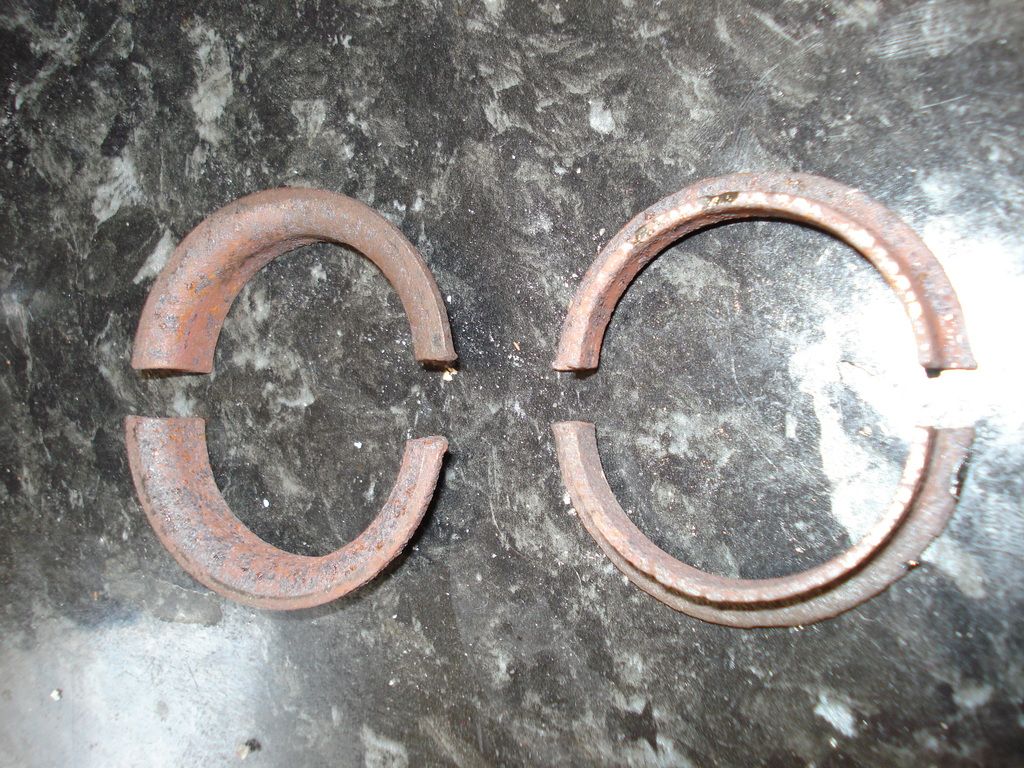
Exhaust header collars and half moon collats that hold them in place...
As straight off the bike:-

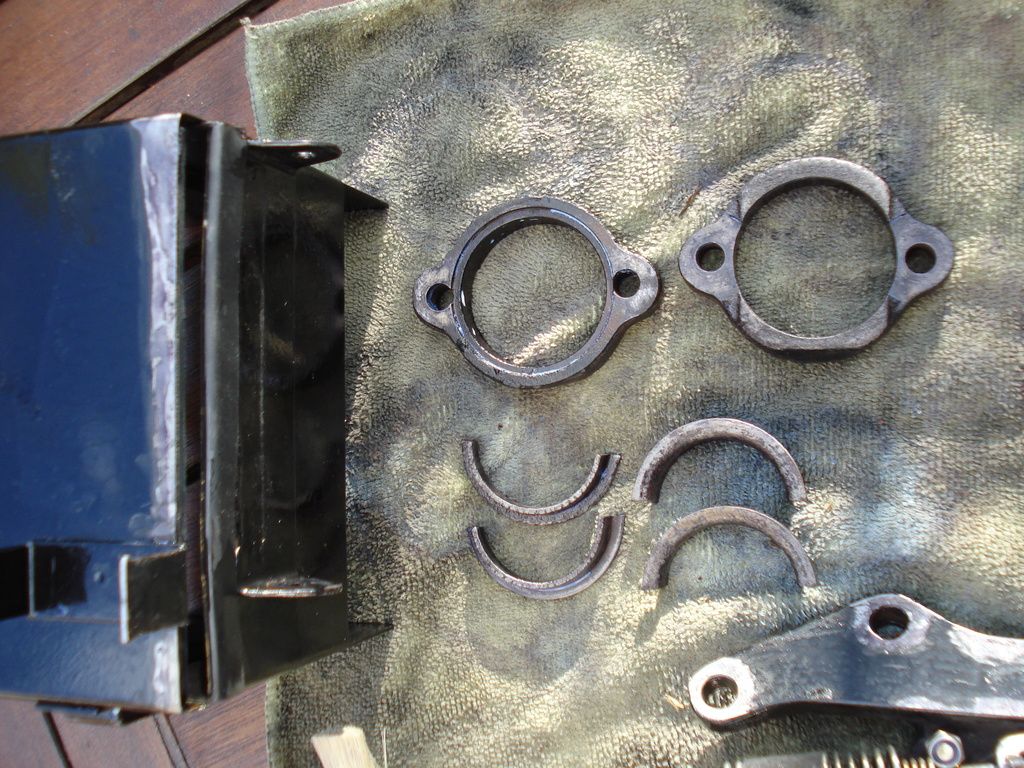
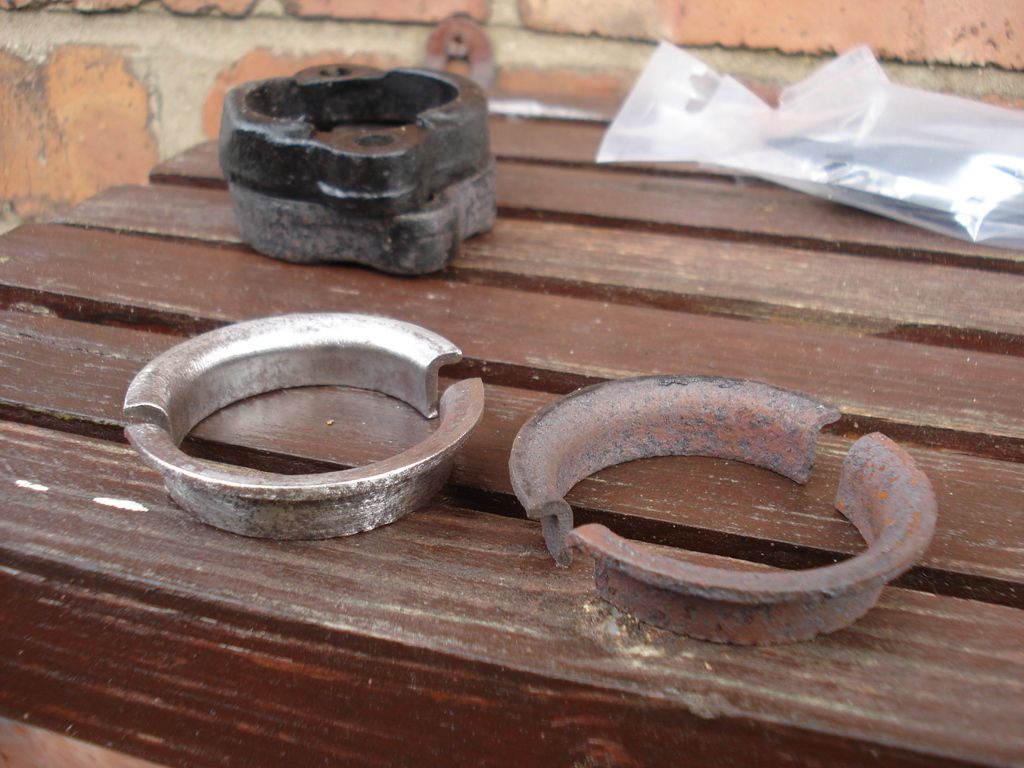
first stage of clean up..one done
Mini dremel again for inside collar
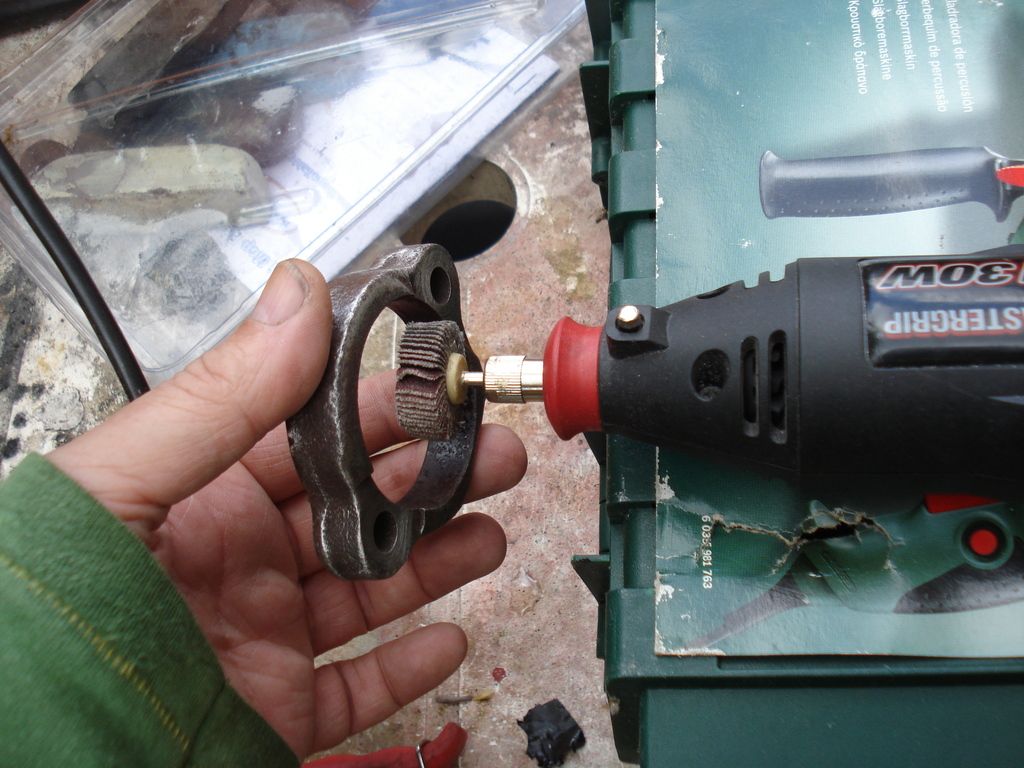
then its rust treatment time...turns rust back to metal (but grind off loose stuff first)
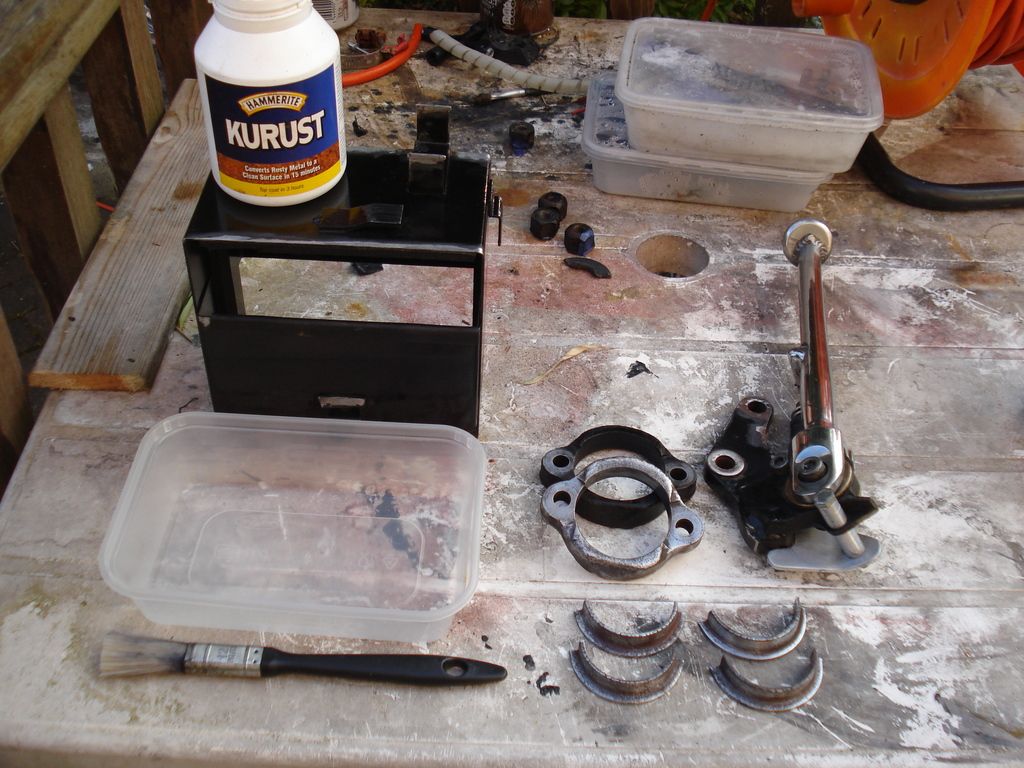
and then its high temp engine coat paint
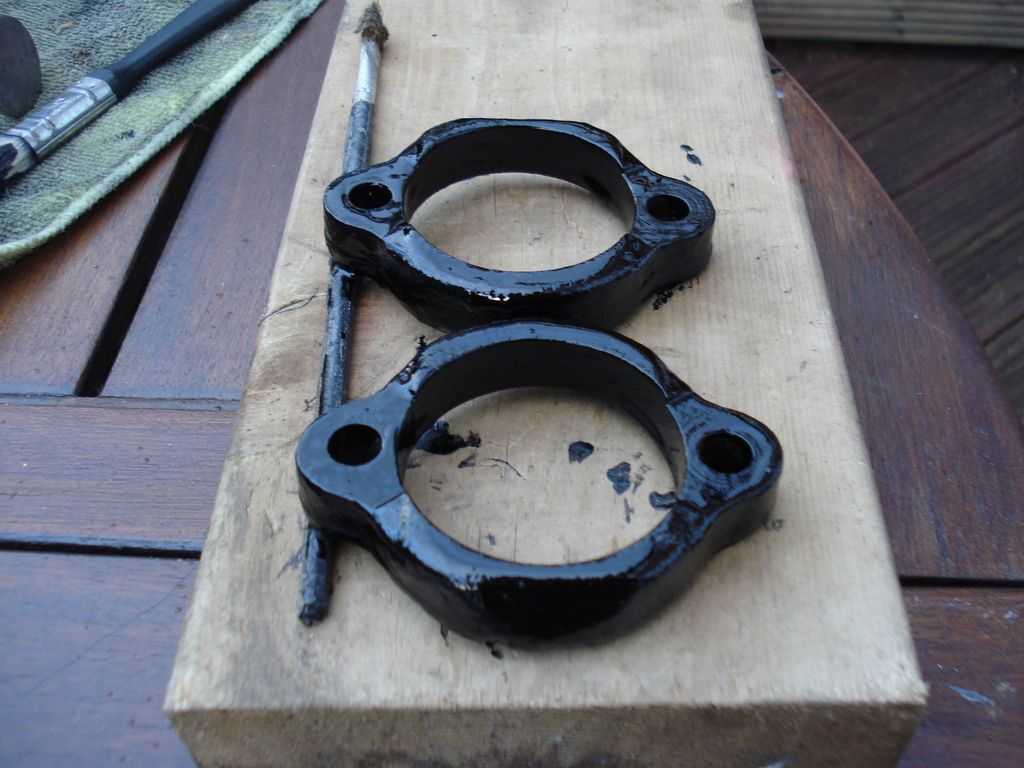
Then its repeat the process for the collats
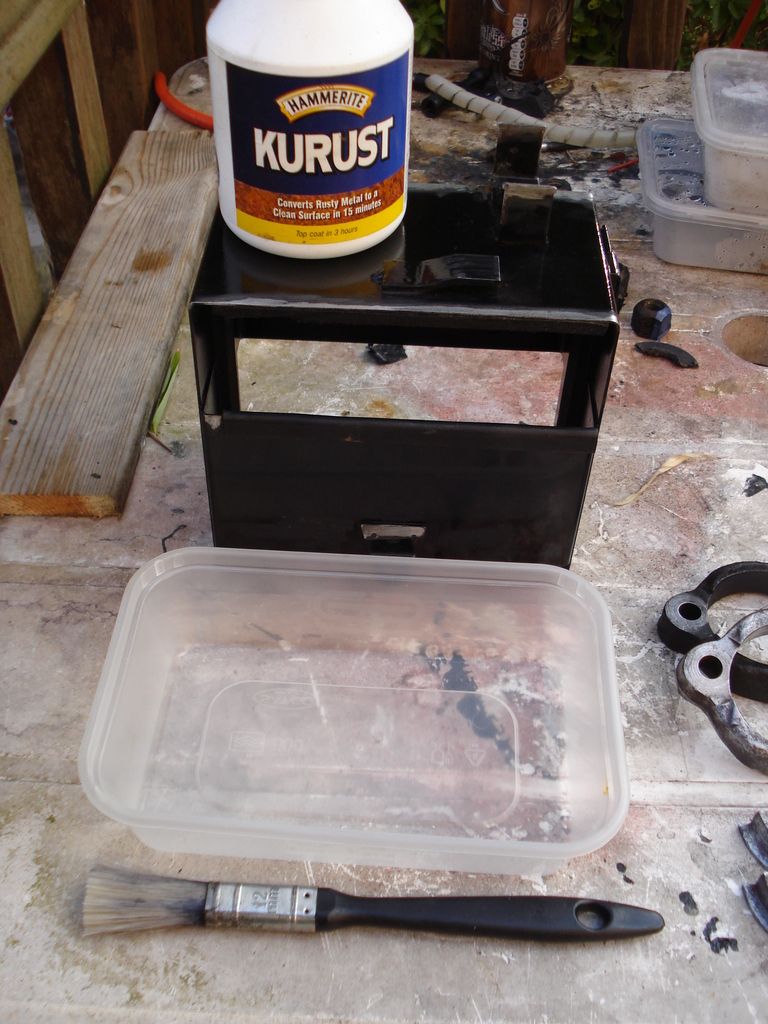
And then same again for the battery box that had some light flaking to a couple of edge and at the fixing points....
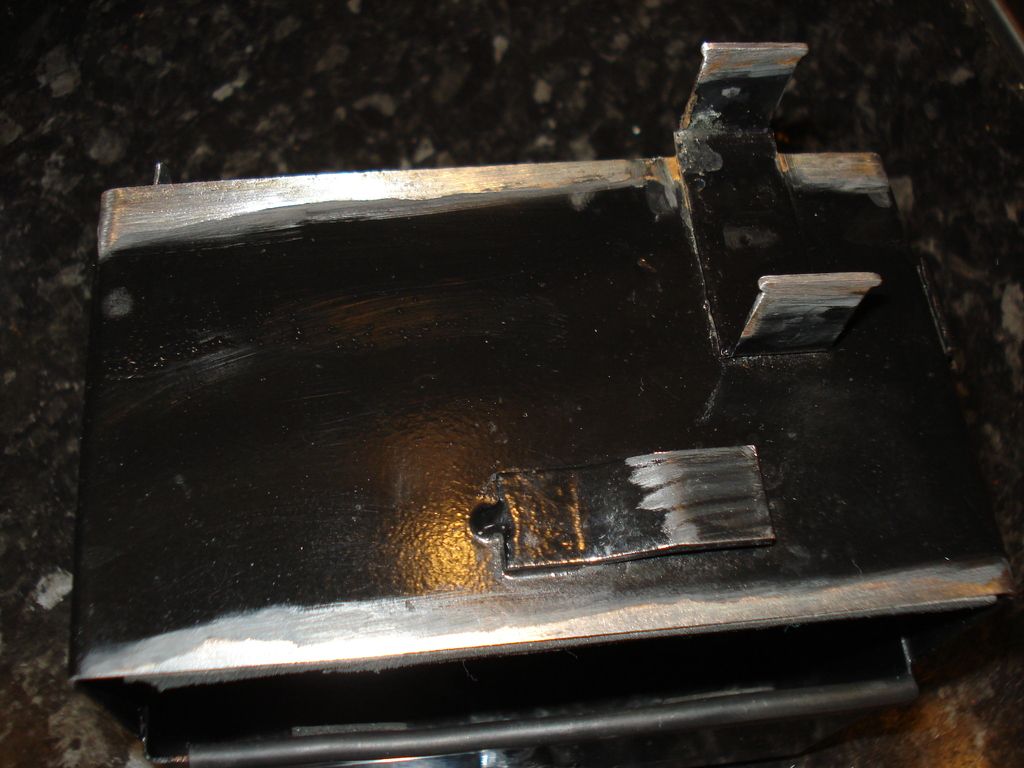
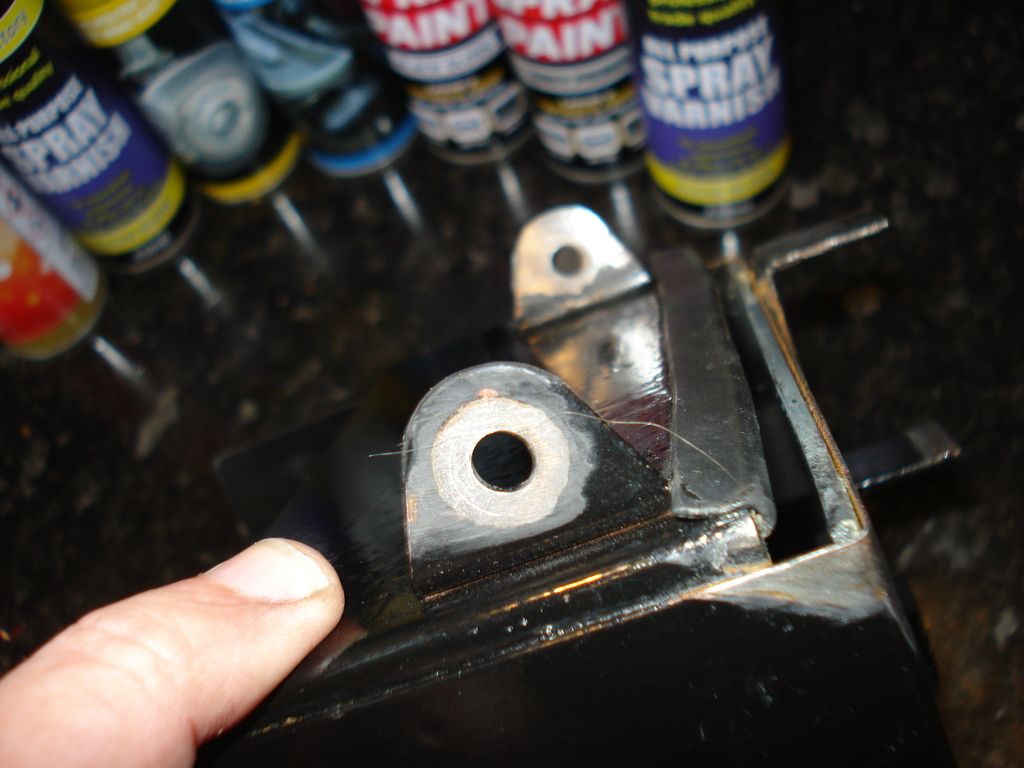
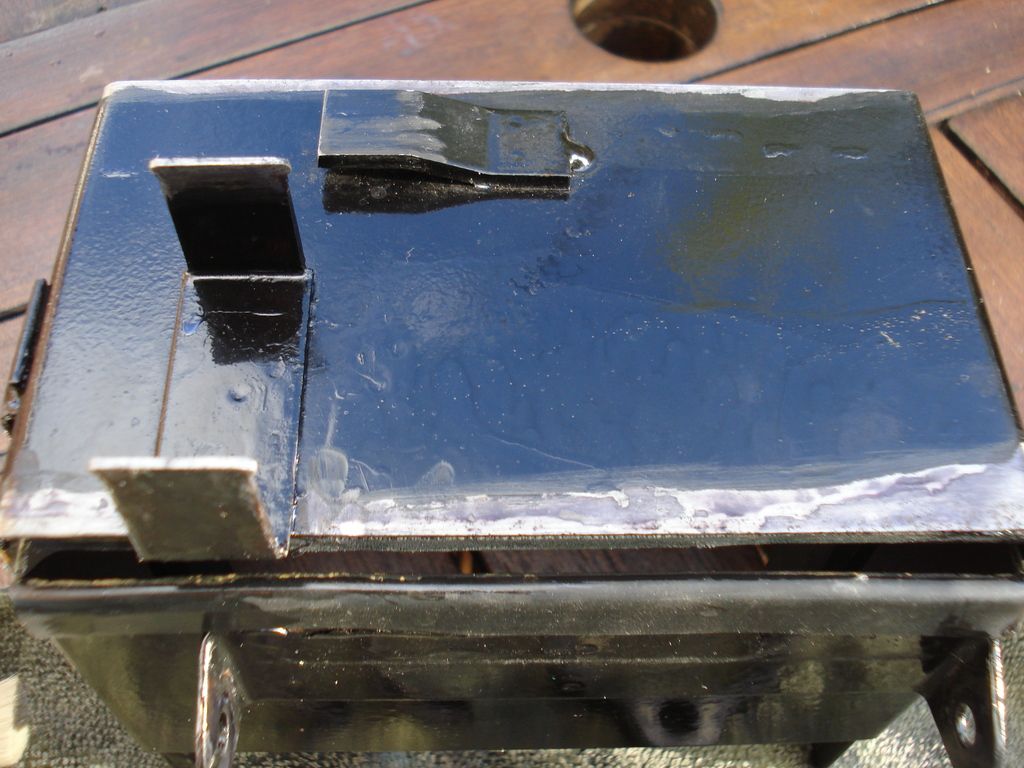
Battery box will be primed, top coated and lacquered by rattle can when the daytime temperature crawls above 10 degrees at least...I have done some before in the dining room but its amazing how much airbourne powder comes out...takes forever to clean...so I use a sheltered draft free space outside for painting with rattle can...
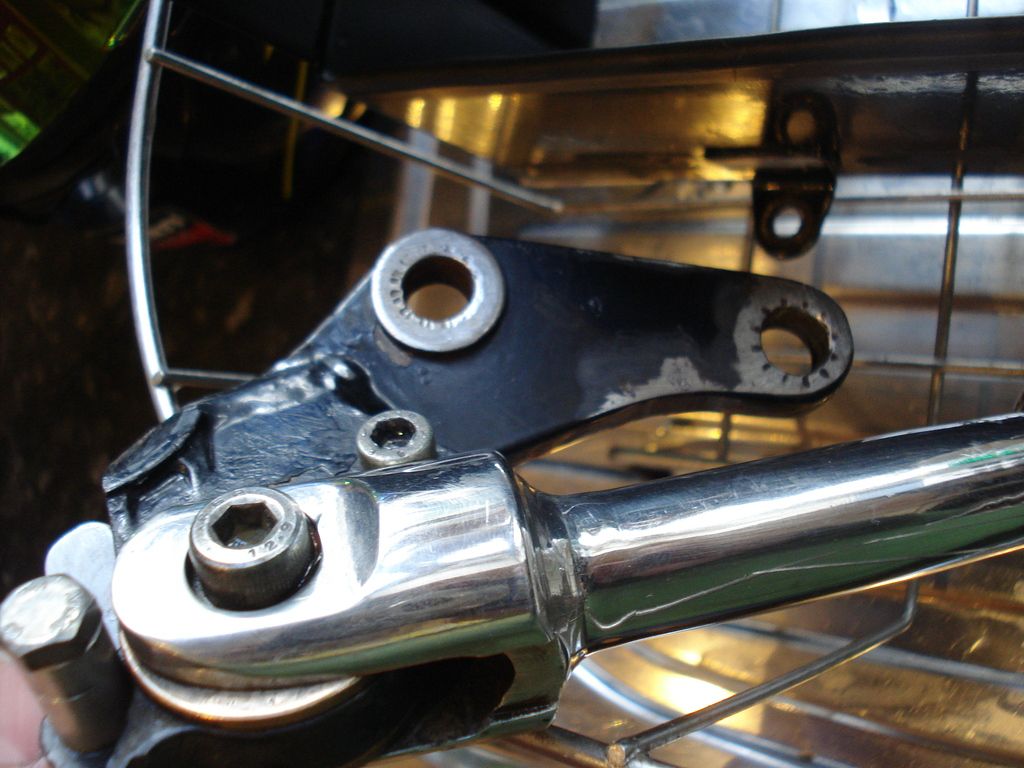
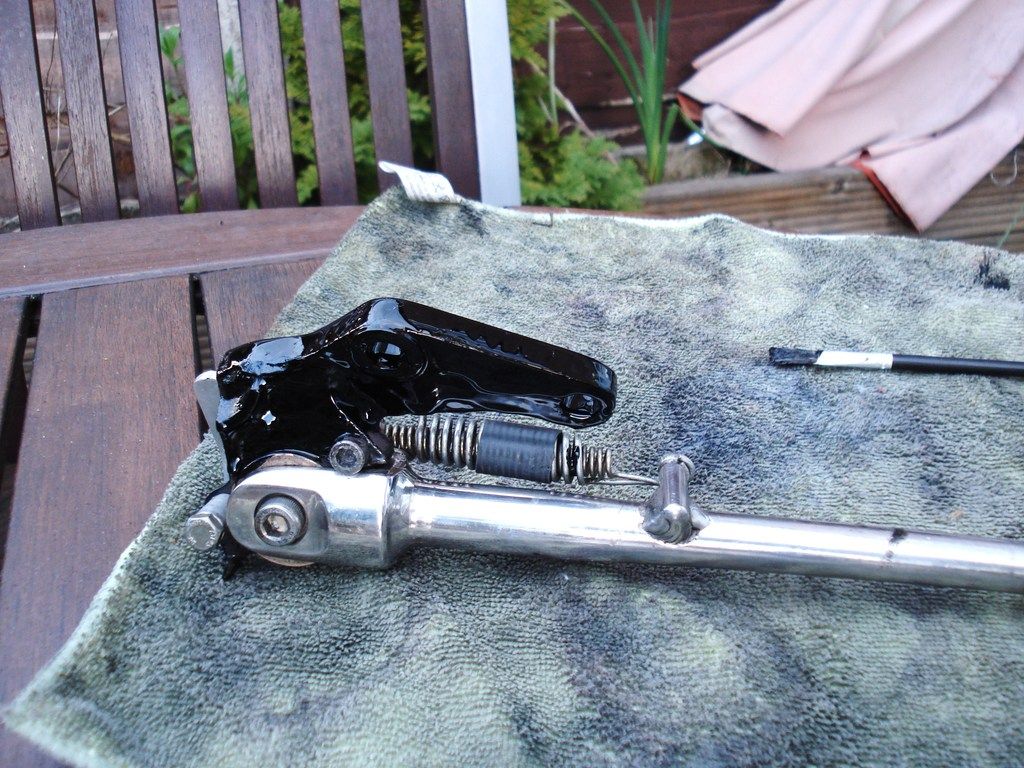
Sidestand same treatment...And I know I'll get slated here...as Bimota sidestands are notoriously heavier than the Titanic....and can often help a bike go down like the very same ship due to wrong lengths/angles etc etc....but the finish and depth of the chroming on the sidestands is beyond reproach.....This things 22 years old and taken the weight of my bike and kicks from my boots over many periods....and really all it needs is a wipedown with a wet rag....Perhaps Bimotas knew that their bikes would still be around in 20/30/40 years time...so at least built the sidestands to last that long...afterll it is the only thing that (most of the time0 keeps your bike off the ground
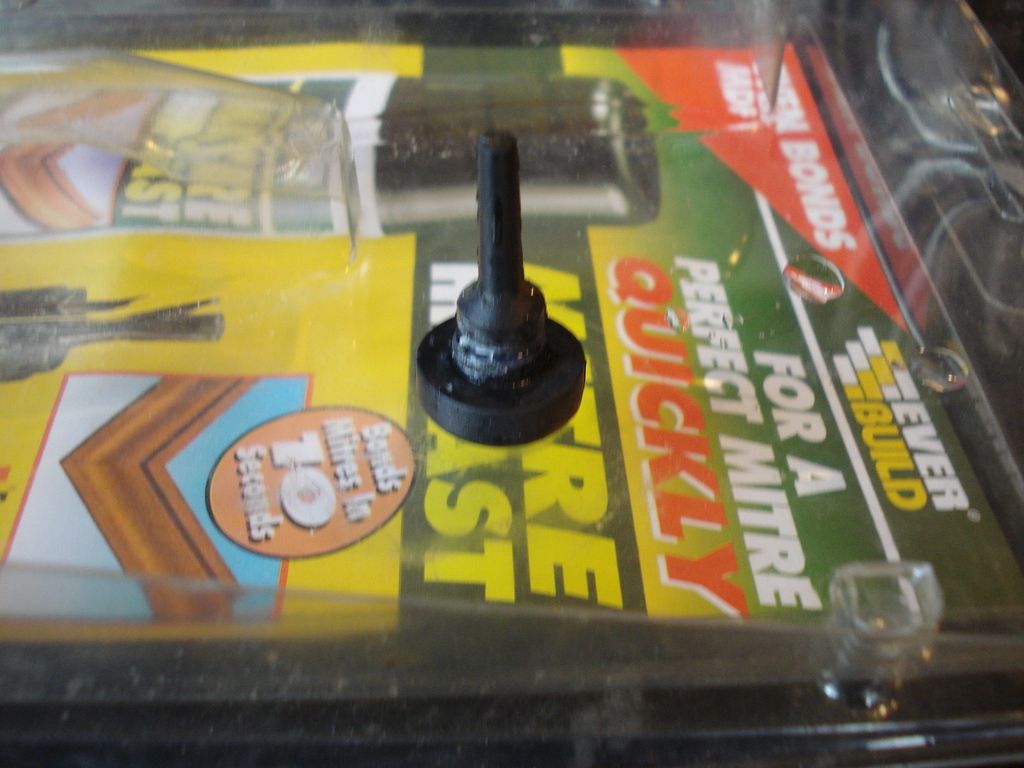
When I was removing the 3 No rubber plugs that the petrol tank sits on ...pushed into the frame....the first one I pulled out I was a little "brutal" and the plug part snapped off and stayed in the frame....I used a small pick to prise the other 2 out...fortunately the one that snapped off was the middle rail where the shock top mount bolts on...and there is a hole in that tube (the other tube for the 2 other mounts is flush welded at both ends)....Fortunately I managed to rattle it out...and superglue works wonders with rubber....

Now just some shiney bits to close for today......
Thats all Folks!....until the next episode that is...Hhmmm....what could that be.....  |
|
| Back to top |
|
|
2bims
Joined: 03 Apr 2010
Posts: 7291
|
| Posted: Thu Apr 28, 2016 12:10 am Post subject: |
|
|
| waggy wrote: |
| Looking great 2bims, your flying along at great pace. I had a similar ohlins shock were the gold finish had all but gone. My cheat was to key the old surface, give it a coat of etch primer, then a coat of silver, then follow several coats of tamiya translucent gold, cant recall its exact name, but its not a solid colour, hence the silver undercoat. Just slowly build up the coats of gold to get a near perfect match. Then finish with lacquer. Simples |
I thought my OCD was bad....but I'm always happy to meet others more affected....that does sound plausible....but it would give me 3 attempts to mess the paint up...What bike did you do that on? Would love to see an "after" picture...but then I may be tempted to give it a go....  |
|
| Back to top |
|
|
2bims
Joined: 03 Apr 2010
Posts: 7291
|
| Posted: Thu Apr 28, 2016 12:11 am Post subject: |
|
|
| PaulDB2 wrote: |
Blimey, at this rate, the resto will be complete by the weekend !
You are putting me to shame, if you have a spare week I might bring my DB1 over for you to fettle ! |
Mates rates...I'd get it sorted for you...but heck...you might have to ride it then though?? |
|
| Back to top |
|
|
2bims
Joined: 03 Apr 2010
Posts: 7291
|
| Posted: Thu Apr 28, 2016 12:15 am Post subject: Re: Restoration |
|
|
| ladolcevita7 wrote: |
Wow now thats how you do a proper restoration.
I hold my hands up and applaud you for your methodical planning.
I also hold my head in shame for not getting stuck into doing mine 😕
I need a bigger garage |
Well...thats one DB4.....PaulDB2's DB1...."Montys" Db1,,,,and Wallamans DB2 needing sorting....Not trying to shame you guys into starting...finishing perhaps as I think most have started...I suppose having the bike in the first place is a good start.....and if my efforts inspire you to pull another finger out then thats a bonus...as long as you publish it up here on the Forum that is...without pictures we dont believe you.... |
|
| Back to top |
|
|
2bims
Joined: 03 Apr 2010
Posts: 7291
|
| Posted: Thu Apr 28, 2016 12:20 am Post subject: |
|
|
| TVRRICH wrote: |
| Steve, I notice you have replaced the 2 plastic screws that hold the seat tank unit on at the rear, what did you replace them with ( size / length material etc), |
Hi Rich....Yeh...the Original Nylon screws were "OK"...but I had one slip and "round" once when I perhaps overtightened with my allen key....and thus found replacement mushroom headed SS allen bolts....that I fit with rubber gromments on the fibreglass seat unit...so theres still flexibility...but the bolts wont turn or round off like the nylon ones did....Whenever theres a Classic Car show on I take all bolts that I need copies of and walk around the bolt suppliers so that I can buy the correct bolt size both in length and pitch...as it is an odd pitch for those 2 bolts....I used to have diamond pointed SS units from Pro-bolts fitted...but my delicate rear could feel the points so I found cheaper and comfier SS mushroom headed bolts instead....I'll measure them up when I get a chance for you....Plastic/nylon bolts have no real place on a bike IMHO...other than maybe screen bolts....like they use on DB4 and Vdue....
Will measure tomorrow as rain is expected to stop play... |
|
| Back to top |
|
|
waggy
Joined: 26 Sep 2011
Posts: 277
Location: Northern Ireland
|
| Posted: Thu Apr 28, 2016 8:38 am Post subject: |
|
|
I thought my OCD was bad....but I'm always happy to meet others more affected....that does sound plausible....but it would give me 3 attempts to mess the paint up...What bike did you do that on? Would love to see an "after" picture...but then I may be tempted to give it a go.... [/quote]
My OCD knows no limits sadly have no pics as l have now sold that ducati. The new owner did comment if l had fitted a new shock though, also had spring powdercoated. If you try it just be patient, lots of light coats. Ok its not annodizing but most people wont know the difference, might last longer too. |
|
| Back to top |
|
|
2bims
Joined: 03 Apr 2010
Posts: 7291
|
| Posted: Thu Apr 28, 2016 8:55 am Post subject: |
|
|
| Did you spray the locking ring threads also or did you mask that part off? |
|
| Back to top |
|
|
waggy
Joined: 26 Sep 2011
Posts: 277
Location: Northern Ireland
|
| Posted: Thu Apr 28, 2016 12:23 pm Post subject: |
|
|
| 2bims wrote: |
| Did you spray the locking ring threads also or did you mask that part off? |
Yup, take the rings off and spray the threads as well. |
|
| Back to top |
|
|
|


