 |
Bimota Forum
Forum for Bimota Owners and Riders
|
| View previous topic :: View next topic |
| Author |
Message |
TVRRICH

Joined: 05 Feb 2016
Posts: 211
Location: Coventry UK
|
 Posted: Sat Sep 16, 2017 1:15 pm Post subject: Posted: Sat Sep 16, 2017 1:15 pm Post subject: |
 |
|
| Really enjoy these updates keep them coming Gavin |
|
| Back to top |
|
 |
Gavin944888
Joined: 29 Jan 2014
Posts: 572
Location: Essex....way South of Scotland
|
| Posted: Fri Oct 13, 2017 3:02 pm Post subject: |
|
|
Ok.............what have I done? Well....I managed to get the front wheel on the bike...correct way round, which could be a euphemism for the project
I had been looking at the ELEFANT hillclimber 999r thingy and was contemplating switching the high-end Brembos (calipers and masters) on that for the cheaper Diavel Brembos on the MULE.
So I set about taking them off the ELEFANT and relocating them, on the MULE...bad idea!
The components are the same but as the 999r Fanty is custom build from the ground up...the offsets and spacings are all different......back to plan A.
This is theme which seems to echo this project......
I had purchased the complete DUCATI DIAVEL loom, ecu, black box, regulator, dash and keyless ignition only to discover it would could not be made to work (without a LOT of money to DUCATI)
I then managed to source (at great cunning, length and difficulty) Real...OEM BIMOTA wiring looms, dash, ECU and arrange a new map for the charger (to be flashed into /onto it)
Only for the wiring guy at ELECTRO34 to short circuit and blow a fuse...it was all too much for him......I then spent weeks cursing him and pointing out ....if you can't ...then don't say you do it.
Stop wasting the time of those that can and just crawl back into your hole....MUPPET
After the anger management course...I had tracked down some custom ECU software guys and sought their advise.
In the end I have chosen...I think...the Italian company who supply VYRUS their ECU and software....I will decide at monthend.
I am a bit out of my comport area as I don't really like wiring a plug!
Electronics is (to me) like like sex with a Dominatrix...expensive and it might hurt......and probably a wee bit disapointing.
So .....at the moment they are writing some stuff, trying to incorporate the Bimota Dash (but really want to use a fancy dash as fitted to the DB11 flat screen thing)
Ohh...they might want to rewire it as well rather than use the (more expensive than gold) OEM BIMOTA DB7 one.
DJT77 is selling is carbon DB7...it might be easier just buying that!
But undeterred...I carry on...my welder has arc eye and cannot go near the torch until Monday and the Metal finishers now have 2 boxes with SCOTISH BLK written on them.
Not only can they not spell, but but I think they are colour blind as I am not Black and some of the bits I wanted Black came back Silver!
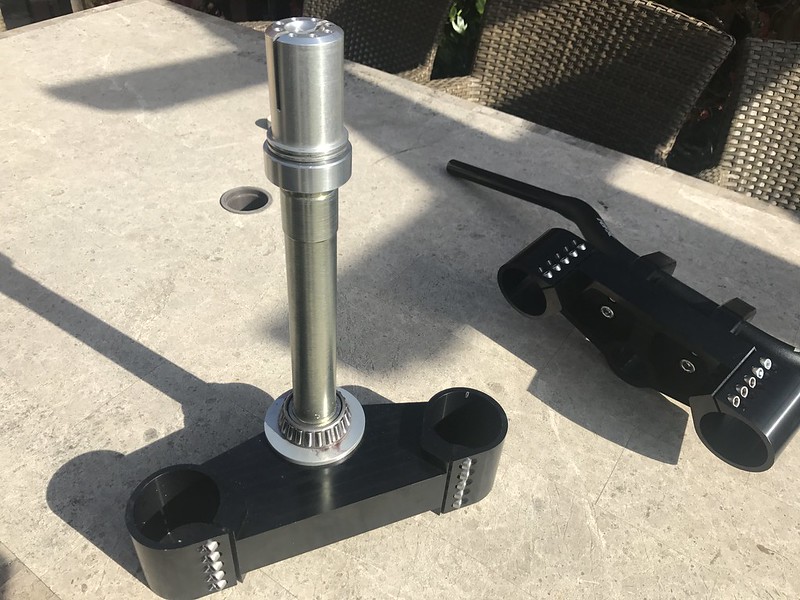
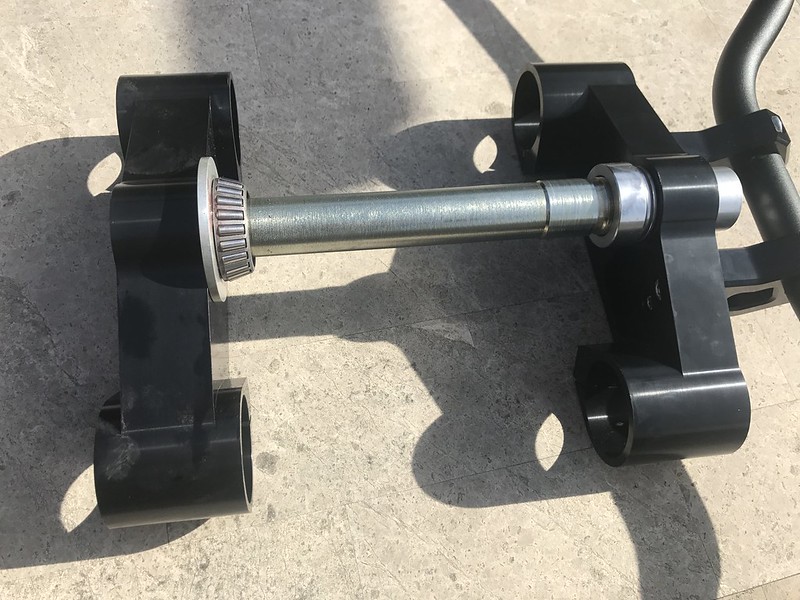
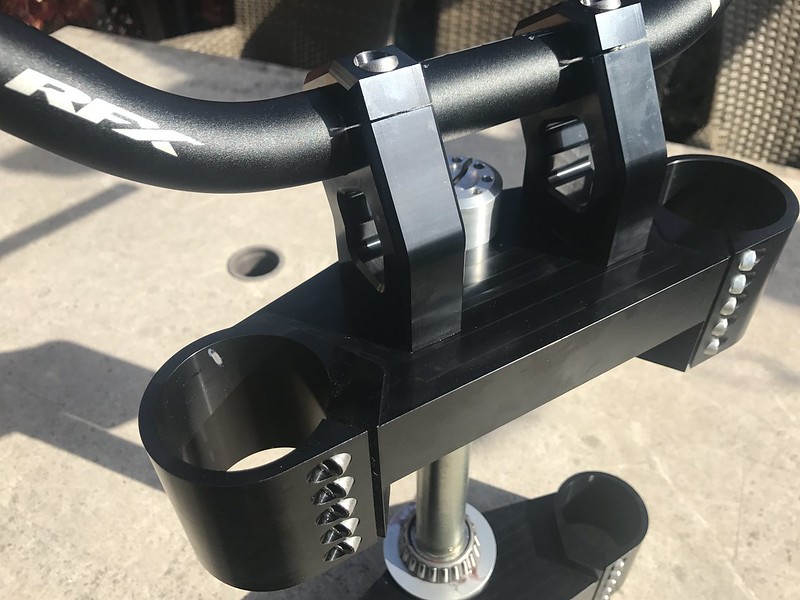
But here is some of the latest work
 IMG_0438 by Gavin Robertson, on Flickr IMG_0438 by Gavin Robertson, on Flickr
Before it went to the finishers ....it went back on the manual mill for some counter-boring.......here it is being centred.
 IMG_0439 by Gavin Robertson, on Flickr IMG_0439 by Gavin Robertson, on Flickr
Let machines start.........
 IMG_0454 by Gavin Robertson, on Flickr IMG_0454 by Gavin Robertson, on Flickr
This is the top yoke after the thinning down.......
 IMG_0453 by Gavin Robertson, on Flickr IMG_0453 by Gavin Robertson, on Flickr
I have a lot of time for designers who can visulize the size of the finished article.
 IMG_0457 by Gavin Robertson, on Flickr IMG_0457 by Gavin Robertson, on Flickr
I can't really judge things until they are made....then I spend even more time getting them to look RIGHT.... However....I keep trying.....
 IMG_0455 by Gavin Robertson, on Flickr IMG_0455 by Gavin Robertson, on Flickr
And sometimes...it just turns out....just right........
 IMG_0456 by Gavin Robertson, on Flickr IMG_0456 by Gavin Robertson, on Flickr
For sure...I would have preferred BIMOTA swivel top handle clamps, but I ordered and PAID for them in MAY....that was 6 months ago.
I have to work with what I have......this is the best I can do without OEM spares, it still looks HEAVY in the photographs but when the forks and frame are all there
......it is just fine......more to follow.
Maybe even wiring...who knows
regards
Gavin
_________________
On an Island in the River Thames!
Cagiva Elefant 888/955 & adventure sidecar
Cagiva Elefant 999r engined
Cagiva BIMOTA Motard Concept
BIMOTA DB9 (with DB11 rear-end)
BIMOTA DB7-11 VLX MULE (build coming to an end)
BIMOTA DB11 VLX Supercharger |
|
| Back to top |
|
|
CBR_DBR
Joined: 19 Sep 2015
Posts: 25
Location: Canberra Australia
|
| Posted: Sat Oct 14, 2017 7:59 am Post subject: |
|
|
| I so hope this sage does not turn into a never-ending one, Gavin! But those pieces are engineering sex on a stick. |
|
| Back to top |
|
|
Gavin944888
Joined: 29 Jan 2014
Posts: 572
Location: Essex....way South of Scotland
|
| Posted: Sat Oct 14, 2017 9:25 am Post subject: |
|
|
CBR DBR
I hope so too.......although I have a plan B...if it all goes wrong
Normally plan B involves running around screaming and crying,....but depending on this build.....it will have a end to it
If all else fails and by that, I mean the electrics (I have no fear with any of the engineering aspects)
I will flip back to normally aspirated and use the OEM Bimota electrics from the DB7
OK...I would have failed in the excecution BUT only from a electronics point of view
What was meant to be finished all bar the electrics ....has actually happened
It is just the bodywork and the testing that cannot be done until the wiring and control ECU has been decided
In fact, SPRINTEX sent another spare supercharger just last week in case the original one fails during testing
Strangely enough the tech director at Sprintex a guy called Jay Upton has been very supportive and informed
me of the failures and the reason of those failures experienced by Bimota and their prototype.
.Bimota then went for a smaller supercharger for the Impeto and changed the gearings to suit.
Bimota then stalled on future payment and all the development work done on the Impeto was lost.
Sprintex are now marketing that same smaller supercharger and methods to another company....in the UK and on a diesel application
If this project fails it will be down to software......which is becoming solely the most important thing in engine development of the 4stroke engine.
Bring back 2 strokes and rotary....or scrap euro4......another fine EU ruling!
Regards
Gavin
_________________
On an Island in the River Thames!
Cagiva Elefant 888/955 & adventure sidecar
Cagiva Elefant 999r engined
Cagiva BIMOTA Motard Concept
BIMOTA DB9 (with DB11 rear-end)
BIMOTA DB7-11 VLX MULE (build coming to an end)
BIMOTA DB11 VLX Supercharger |
|
| Back to top |
|
|
CBR_DBR
Joined: 19 Sep 2015
Posts: 25
Location: Canberra Australia
|
| Posted: Sun Oct 15, 2017 7:16 am Post subject: |
|
|
I hear you Gavin! 
Wiring an Italian is a challenge at the best of times. I have a Ducati 750 Paso sitting in the garage waiting for some TLC. The electrics on these were so diabolical that some of them managed to set themselves alight. Then there's different types of ignition units, etc.
Whether your project ends up a with a charger or normally aspirated, the engineering of your bike is something I, and I think a number of the other people on here, are in absolute awe of.
Summer is on the way here and I just need to get the body work back on the DB5 after a belt change. Finally some time to ride and enjoy it!
Cheers,
Mike |
|
| Back to top |
|
|
Gavin944888
Joined: 29 Jan 2014
Posts: 572
Location: Essex....way South of Scotland
|
| Posted: Thu Nov 02, 2017 2:00 pm Post subject: |
|
|
Right...........I spent a day on the machines last month and managed to get a lot of the unfussy stuff done.
Also had a major 'character defining experience' on the airbox design and application
 IMG_0440 by Gavin Robertson, on Flickr IMG_0440 by Gavin Robertson, on Flickr
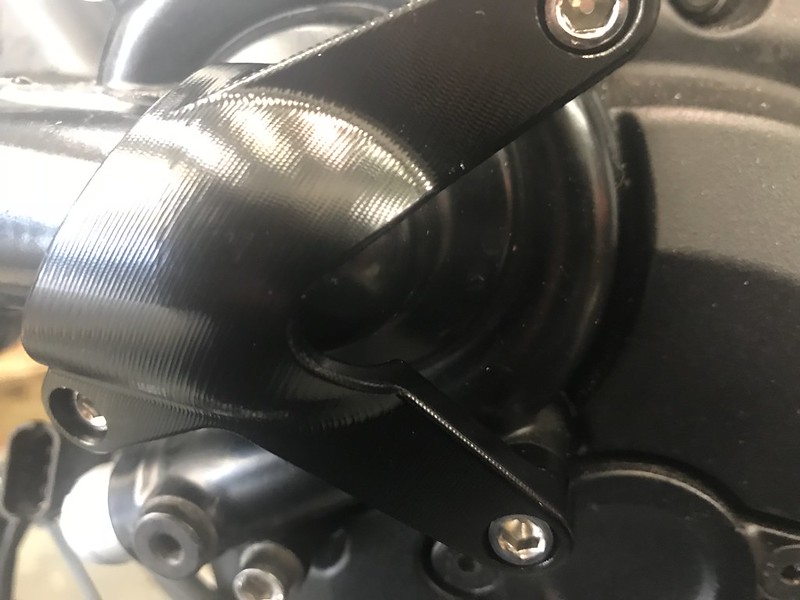
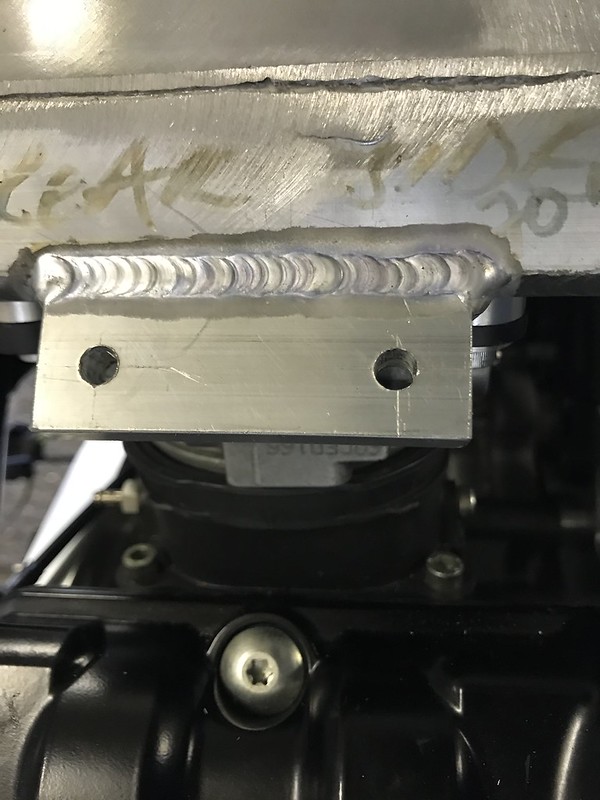
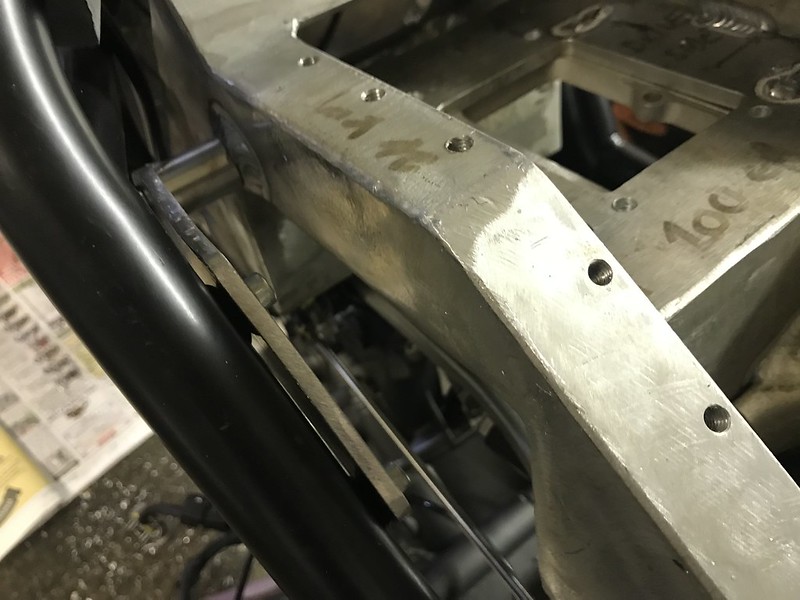
Managed to address the situation with the side stand sprocket cover by using Ducati items and chain alignment by alloy fabrication.
 IMG_0472 by Gavin Robertson, on Flickr IMG_0472 by Gavin Robertson, on Flickr
Once the bike is close to finished I will replace the sidestand with the Bimota one I picked up....but in the meantime the Ducati is just fine
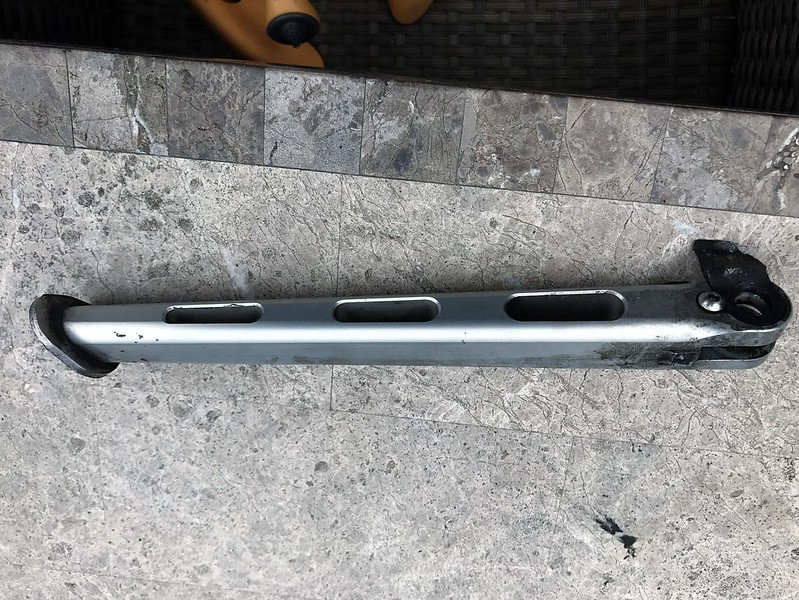 IMG_0257 by Gavin Robertson, on Flickr IMG_0257 by Gavin Robertson, on Flickr
An after market water pump protector was added
 IMG_0475 by Gavin Robertson, on Flickr IMG_0475 by Gavin Robertson, on Flickr
The sprocket cover was a modified unit (to clear the Bimota frame and Diavel clutch cylinder from the 999 hillclimber which was lying about the garage
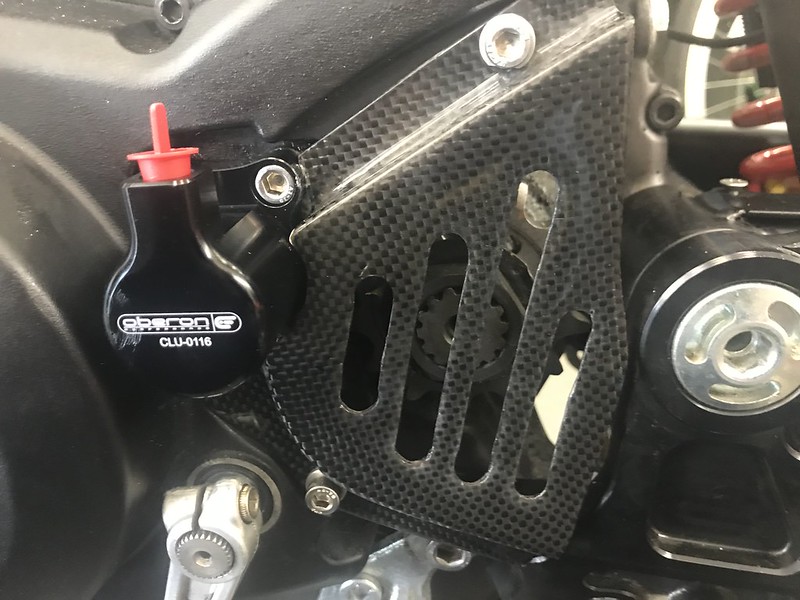 IMG_0474 by Gavin Robertson, on Flickr IMG_0474 by Gavin Robertson, on Flickr
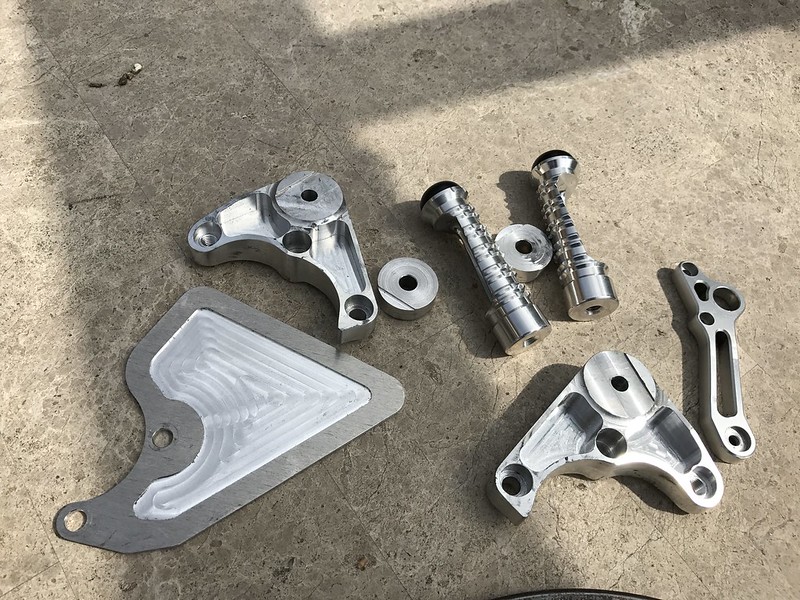
The pegs were already made for the DB9...so the machine programme had been written and I just copied what had been before.
 IMG_0098 (2) by Gavin Robertson, on Flickr IMG_0098 (2) by Gavin Robertson, on Flickr
The finished look prior to the gear controls etc going on.
 IMG_0480 by Gavin Robertson, on Flickr IMG_0480 by Gavin Robertson, on Flickr
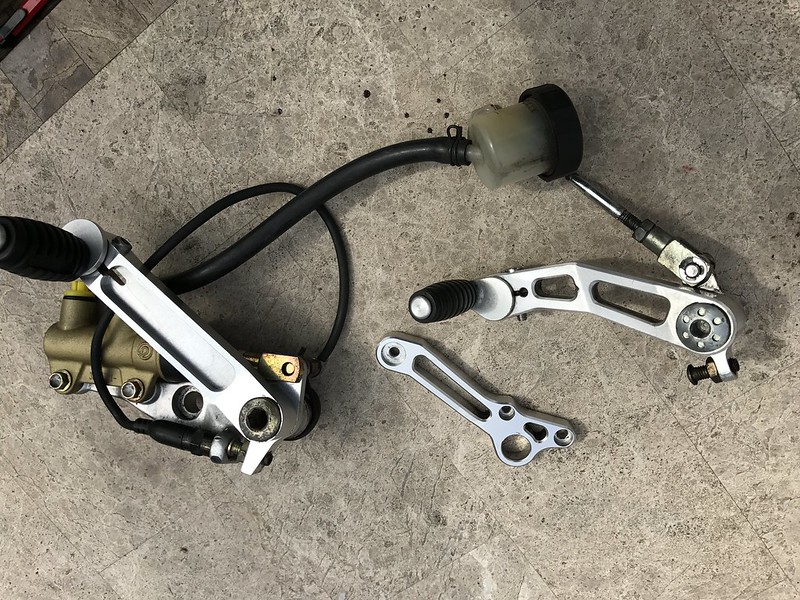
The foot controls were picked up via various sources and comprise of Ducati and Bimota along with spare Bimota pedals
 Untitled by Gavin Robertson, on Flickr Untitled by Gavin Robertson, on Flickr
The wheels are Benelli, heavier but a fraction of the cost of OZ wheels. I can always buy some OZ wheels when my target weight is achieved at weight watchers.
..and I win the prize money...until then it is the Benelli TNT1130 versions
Using the Benelli wheels meant a different offset for chain run and a different diameter rear disc.
The rear disc is no real issue ...but the chain run needed a different approach.
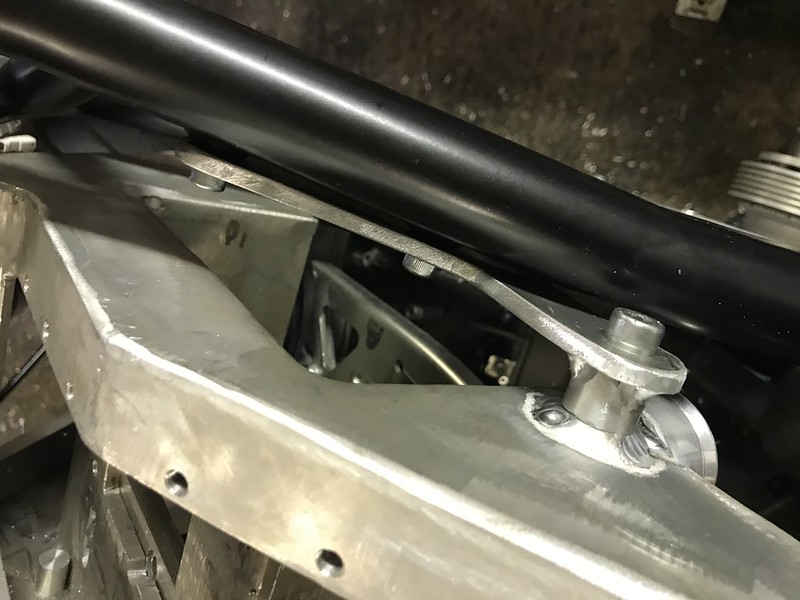
 IMG_0477 by Gavin Robertson, on Flickr IMG_0477 by Gavin Robertson, on Flickr
Above you can see the standard run and fixing points for the chain runner.
 IMG_0478 by Gavin Robertson, on Flickr IMG_0478 by Gavin Robertson, on Flickr
Above you can see the offset needed and the actual chain runner from Bimota.
So........a bit of 4mm thick alloy and cut and bend into shape to accept the fixing holes and runner in a different position.
 IMG_0479 by Gavin Robertson, on Flickr IMG_0479 by Gavin Robertson, on Flickr
The alloy, sprayed with etch primer, is now painted black and awaiting final fixing once the chain has been fitted and bought!
The new yokes were fitted and replaced these.
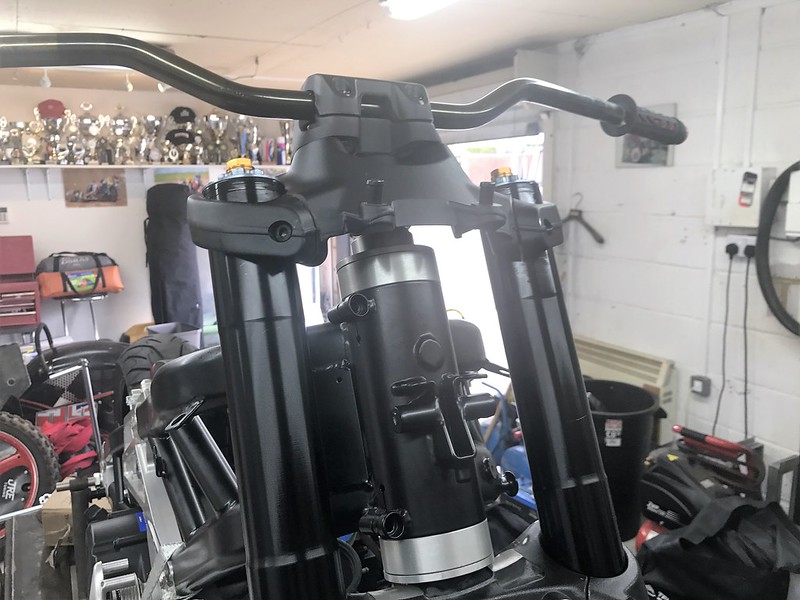 IMG_0244 by Gavin Robertson, on Flickr IMG_0244 by Gavin Robertson, on Flickr
t IMG_0485 by Gavin Robertson, on Flickr IMG_0485 by Gavin Robertson, on Flickr
New Venhill brake and clutch lines were made using their DIY power-hose units...all in black...Oh and the front wheel is now the correct way round.
 IMG_0473 by Gavin Robertson, on Flickr IMG_0473 by Gavin Robertson, on Flickr
So there we are........the bike ready for belt and pulley fitment aswell as air-box final measurements.
This is now where I have to pause for a momment
regards
Gavin
_________________
On an Island in the River Thames!
Cagiva Elefant 888/955 & adventure sidecar
Cagiva Elefant 999r engined
Cagiva BIMOTA Motard Concept
BIMOTA DB9 (with DB11 rear-end)
BIMOTA DB7-11 VLX MULE (build coming to an end)
BIMOTA DB11 VLX Supercharger |
|
| Back to top |
|
|
Gavin944888
Joined: 29 Jan 2014
Posts: 572
Location: Essex....way South of Scotland
|
| Posted: Thu Nov 02, 2017 4:25 pm Post subject: |
|
|
'Have you seen a puddin?' ......asks James
'Of course, I've seen a puddin....what type.... chocolate? sponge? or rice?' came my reply
Were any of them... straight? he quized
What...as in liking other puddings? or as in...their physical appearance?
Don't be cocky...I meant as in flat....James answered
'My attitude.... cocky or not .....makes little or no difference to the flatness of my pudding'
I responded, whilst pointing out that this months monthly payment for machine time used...had just be transferred into his bank prior to leaving my office
Well ..........its NOT flat.....and I can't get it flat.
Of course you can get it flat.......we just have to get 3 faces, flat and square to each other...and anyway...can't is a posh persons swear word in Glasgow!
The airbox of which many man hours were invested had been held up, by James.. as the weak link in whole operation.
Like a snotty nosed kid with an elasaplast over one lense of his/her glasses ....the air box was a bit of a minger!
But so much time had gone into it.....probably over £1200 in money
First it had slip lid...then an external flange lid ...and finally an internal flange lid....and over 96 M5-M6 tapped holes added and then subtracted.
Then the volume was wrong...so it had to be extended....then the volume split was wrong...followed by the overall distance between inlets tracts shrinking 1.5mm in length and it not fitting on the engine throttle body .
The airbox which started in just 2 sections of laser cut ovals in a 150mm X 150mm plates 6mm thick, had added 10mm slotted manifold and a further 8mm plate to take the O ring groove.
A machined moving sliding plate to create a air tight seal (using the O ring) whilst being able to move back and forth for belt adjustmnet.
Now ...he was telling me that all the welding had twisted and distorted the basic strure of the air box.
 IMG_0402 by Gavin Robertson, on Flickr IMG_0402 by Gavin Robertson, on Flickr
From this ...to this..
 IMG_0468 by Gavin Robertson, on Flickr IMG_0468 by Gavin Robertson, on Flickr
extra volume space..........dictated a extended triangular area to thr front injector volume
 IMG_0490 by Gavin Robertson, on Flickr IMG_0490 by Gavin Robertson, on Flickr
To the welding of an addition location lug (one front and back)....these locate via triangular section to lthe torq heaed engine bolt in the image
Bimota used thiis method...so there is a bit of common ground there.
 IMG_0493 by Gavin Robertson, on Flickr IMG_0493 by Gavin Robertson, on Flickr
To the sliding manifold of the supercharger.......(AIRTIGHT)
 IMG_0492 by Gavin Robertson, on Flickr IMG_0492 by Gavin Robertson, on Flickr
All this work...back and forth...on the bike...off the bike....this is how it stands
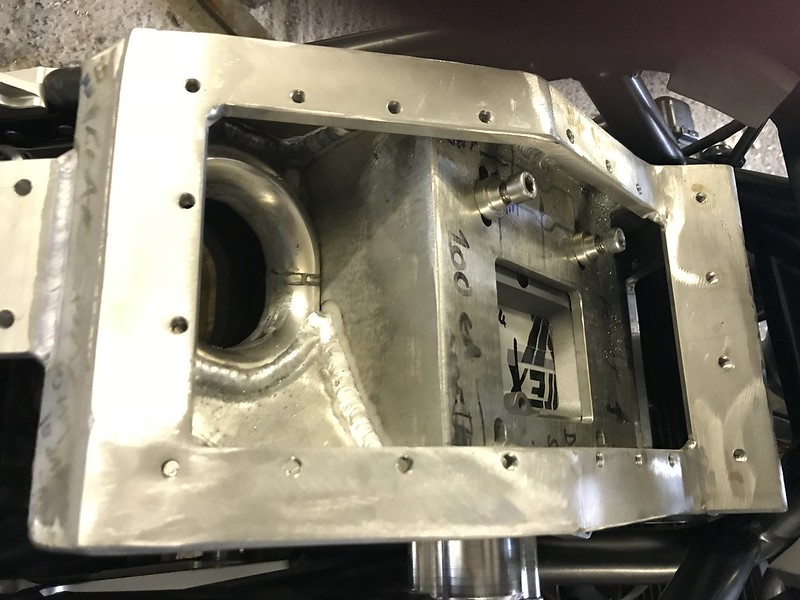 IMG_0491 by Gavin Robertson, on Flickr IMG_0491 by Gavin Robertson, on Flickr
But then ...there is the internal vanes.....sections of alloy bent and welded in place to help air flow direct.
 IMG_0471 by Gavin Robertson, on Flickr IMG_0471 by Gavin Robertson, on Flickr
With every vane came more welding...but there also had to be 'free areas' for the sensors...air pressure...air temp....and a bypass valve
 IMG_0469 by Gavin Robertson, on Flickr IMG_0469 by Gavin Robertson, on Flickr
So when it was all finished...it was little wonder it had distorted.
 IMG_0467 by Gavin Robertson, on Flickr IMG_0467 by Gavin Robertson, on Flickr
One good thing with 6mm plate... is that you can machine it...and although it looks impossible ....this thing was bolted to a surface table.
Where, it was compromised to take the mean average of the three areas and machine the underside of the airbox.
Mainly...the supercharger location and the inlet throttle body location....to the best flatness possible.
Each lid had to have blanks machined in them to accept auxillary injectors incase the calculation were wrong and extra injectors were neded
I was using Diavel inlet injectors instead of the Bimota shower injector .
The positioning was majorly different....Ducati calulate that the atomisation of the fuel charge on the back of the inlet valves is preferrable to the shower type of Bimota or the 1098s and r variants.
The ECU guy is planning on 2 then 3 then possibly 4 injectors stages and writiing a programe accordingly.
I think that the Diavel units will do just fine....I reduced the fuelling in most areas by 23-29% when remapping the DB9....I did not do it X Bikes did it..but you see what I mean.......and we are adding up to 33% more air under the low tune of the supercharger.
Boost is set at about 6psi bypass and the engine rev range is set at 9000rpm max safety with a charger rpm of 18000 at 6500 engine speed.
This might be wrong as I had to change fag packets midway through calculations............I think it is correct though...time will tell
All the carbon stuff has been readied....I have found a source of Bimota carbon bits....more to follow.
By November..........the bike should be heading to Wisbeach for ECU stuff
See you in a couple of weeks or so
regards
Gavin
_________________
On an Island in the River Thames!
Cagiva Elefant 888/955 & adventure sidecar
Cagiva Elefant 999r engined
Cagiva BIMOTA Motard Concept
BIMOTA DB9 (with DB11 rear-end)
BIMOTA DB7-11 VLX MULE (build coming to an end)
BIMOTA DB11 VLX Supercharger |
|
| Back to top |
|
|
djt77
Joined: 27 Feb 2008
Posts: 413
Location: Perth, Western Australia
|
| Posted: Fri Nov 03, 2017 12:57 am Post subject: |
|
|
| Great to hear things are progressing Gavin, you are doing an amazing job |
|
| Back to top |
|
|
Gavin944888
Joined: 29 Jan 2014
Posts: 572
Location: Essex....way South of Scotland
|
| Posted: Fri Nov 03, 2017 1:22 pm Post subject: |
|
|
Thank you DJT77
none of this would have happened had it not for you guys down under and you in particular
Well actually.... none of it would happened if bimota had not reneged on our deal but you get my drift.
But...I am not bitter at all.
The bug has taken and I am being asked by a friend to build a full carbon DB9s......as in DB7 rear seat and carbon tank....we shall see.
I understand that your full carbon version DB7 is for sale....I hope it goes well...if not please pm me...I may be able to assist
regards
Gavin
_________________
On an Island in the River Thames!
Cagiva Elefant 888/955 & adventure sidecar
Cagiva Elefant 999r engined
Cagiva BIMOTA Motard Concept
BIMOTA DB9 (with DB11 rear-end)
BIMOTA DB7-11 VLX MULE (build coming to an end)
BIMOTA DB11 VLX Supercharger |
|
| Back to top |
|
|
Gavin944888
Joined: 29 Jan 2014
Posts: 572
Location: Essex....way South of Scotland
|
| Posted: Wed Nov 15, 2017 5:06 pm Post subject: |
|
|
Right...like a dog sniffing a post, here we go once more.
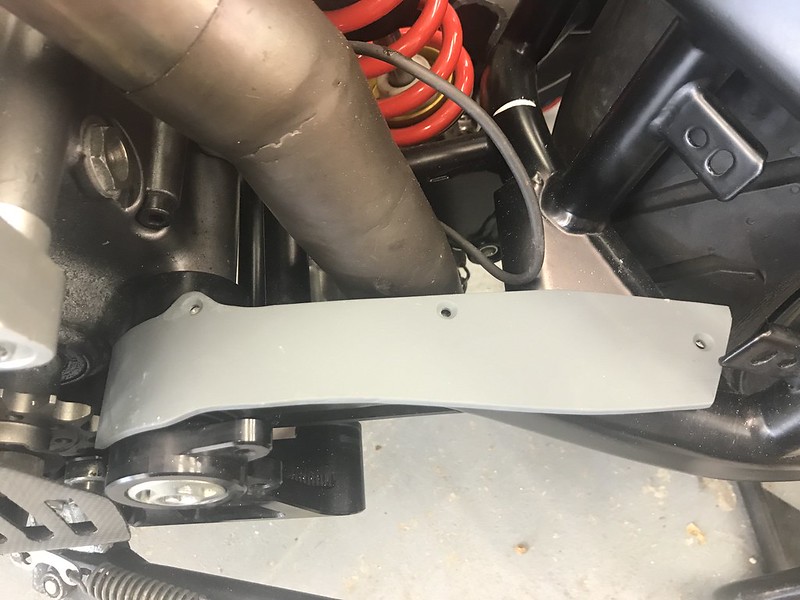
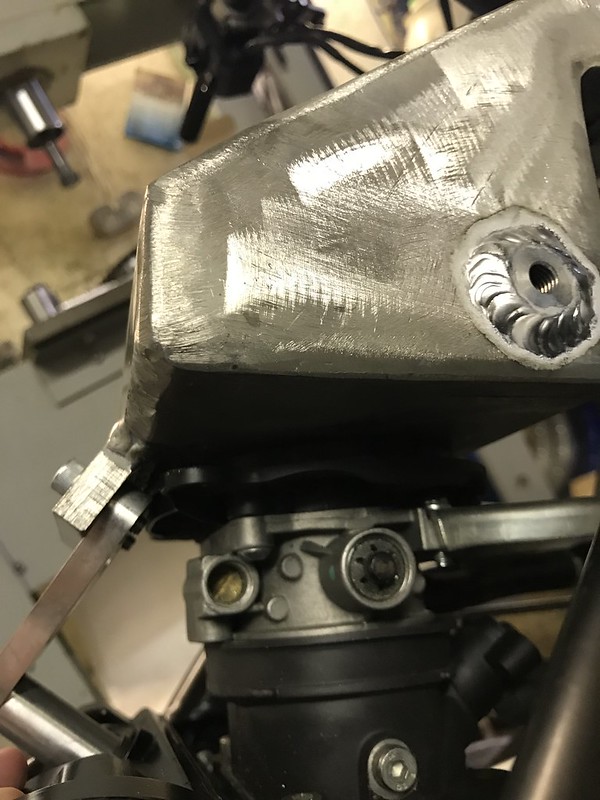
The alloy extension plate was painted after etch priming and the OEM slider added to it.
 IMG_0509 by Gavin Robertson, on Flickr IMG_0509 by Gavin Robertson, on Flickr
Here you can see the finished item complete with the location holes as per BIMOTA intended.
 IMG_0510 by Gavin Robertson, on Flickr IMG_0510 by Gavin Robertson, on Flickr
The air-box unit was mounted on a angle plate and machined to be squre on the important points
 IMG_0503 by Gavin Robertson, on Flickr IMG_0503 by Gavin Robertson, on Flickr
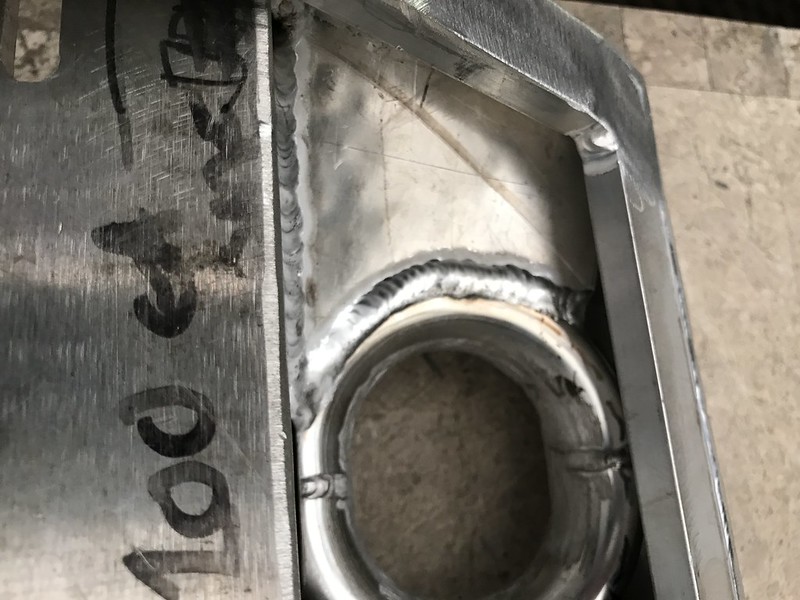
This managed to do away with the slotted adjustable manifold and the new manifold was welded into the required position.
The slots were welded up after the final location of the supercharger had been established.
And location points were machined into the opening to help locate the supercharger.
 IMG_0517 by Gavin Robertson, on Flickr IMG_0517 by Gavin Robertson, on Flickr
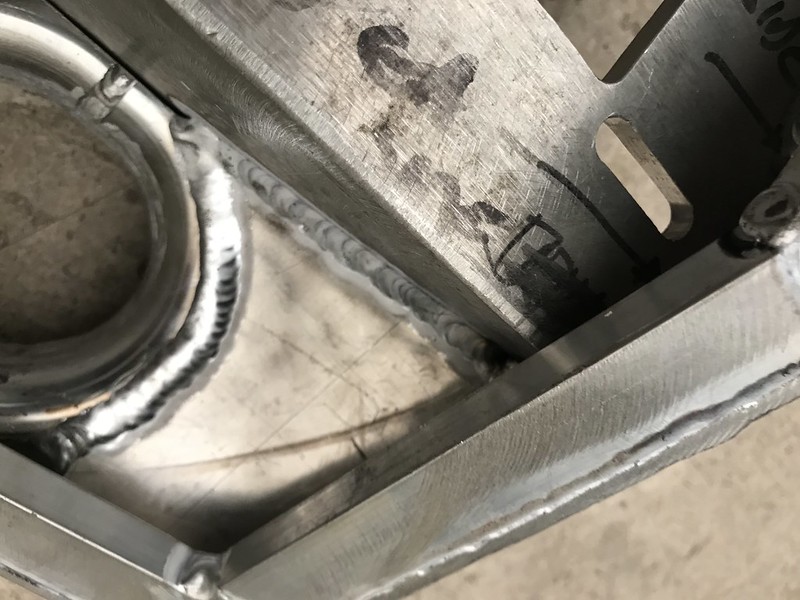
Addition lugs were machined into and welded onto the air box, from where alloy brackets held the box in place....one each side....they are still to be finished on their edges.
 IMG_0518 by Gavin Robertson, on Flickr IMG_0518 by Gavin Robertson, on Flickr
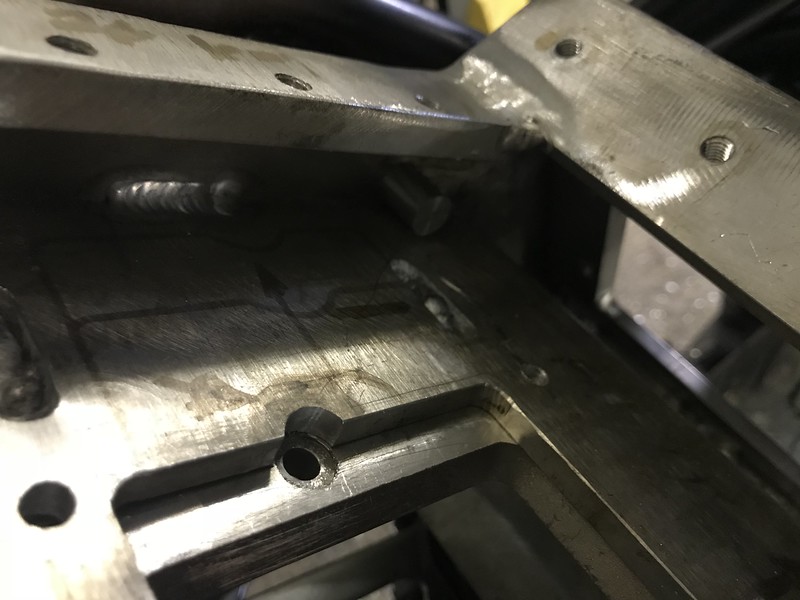
The frame had already had threaded lugs welded into it prior to powder coating.
At the same time sensor positions were sought for the air temp and air pressure sensors
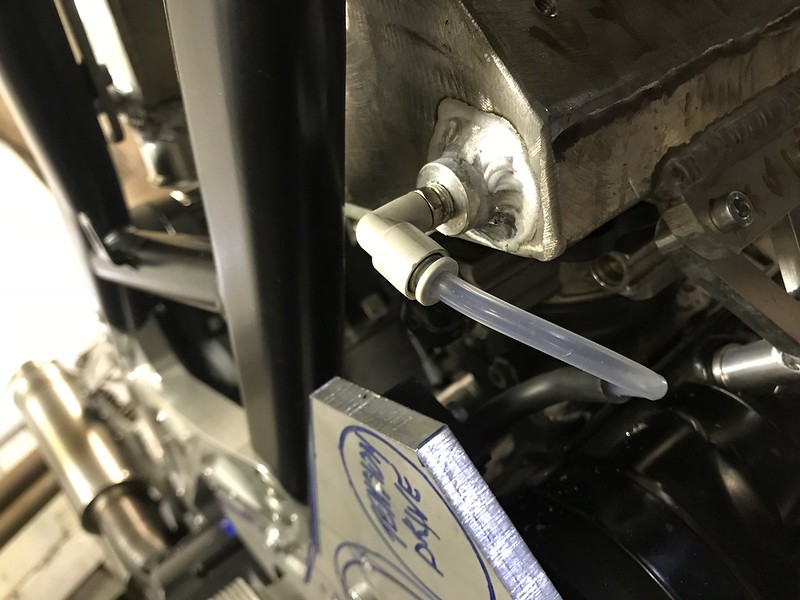 IMG_0521 by Gavin Robertson, on Flickr IMG_0521 by Gavin Robertson, on Flickr
_________________
On an Island in the River Thames!
Cagiva Elefant 888/955 & adventure sidecar
Cagiva Elefant 999r engined
Cagiva BIMOTA Motard Concept
BIMOTA DB9 (with DB11 rear-end)
BIMOTA DB7-11 VLX MULE (build coming to an end)
BIMOTA DB11 VLX Supercharger |
|
| Back to top |
|
|
2bims

Joined: 03 Apr 2010
Posts: 7289
|
| Posted: Wed Nov 15, 2017 5:28 pm Post subject: |
|
|
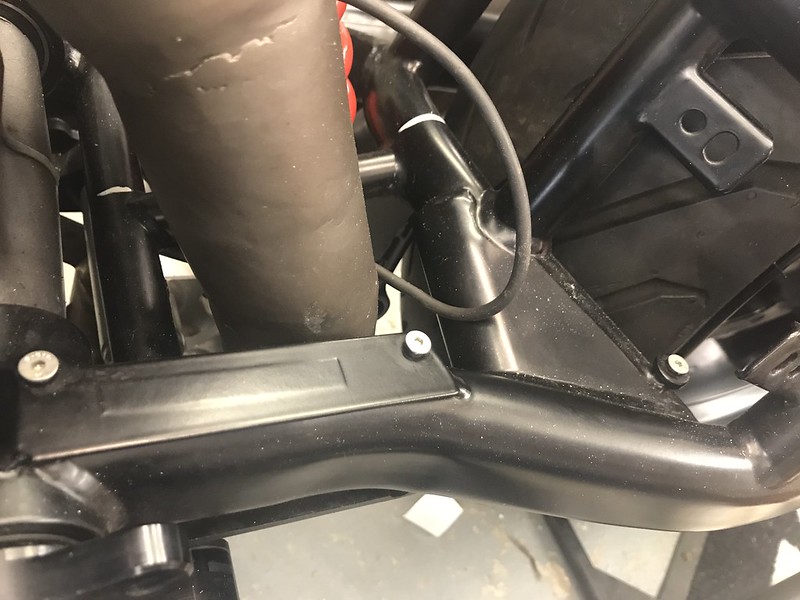
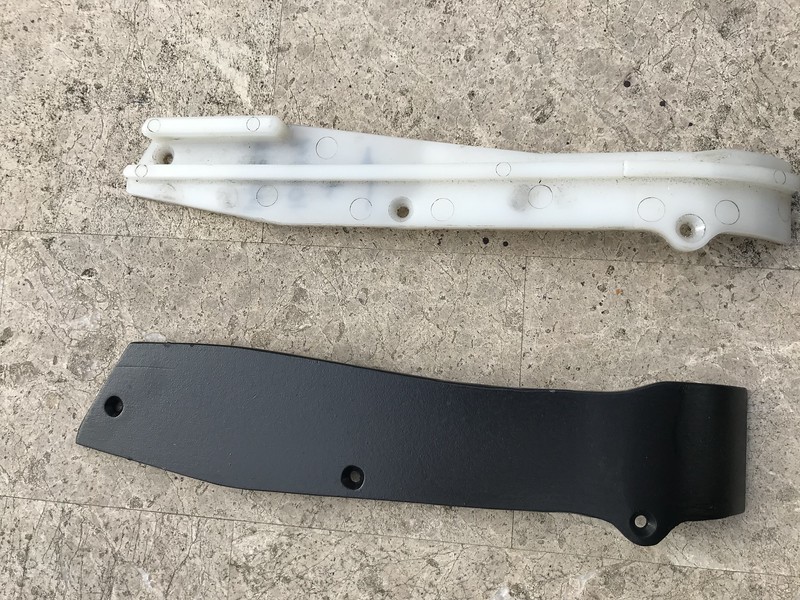
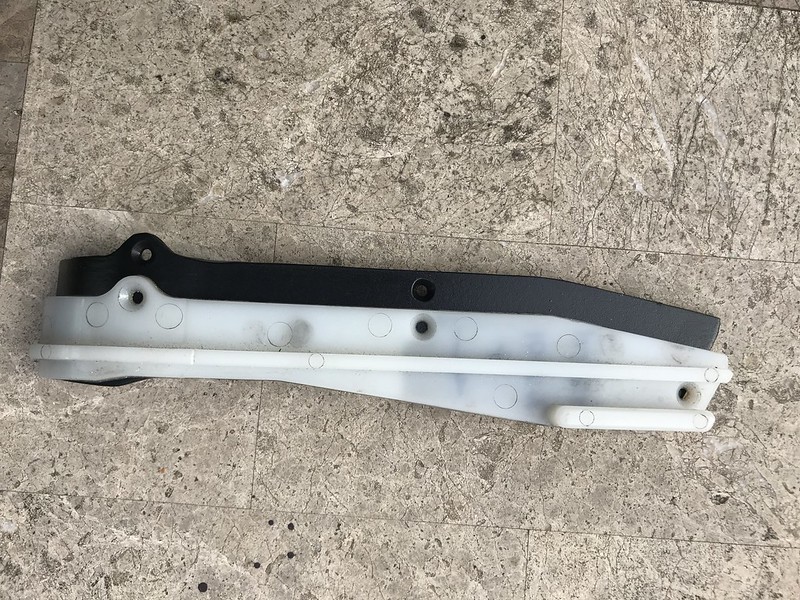
Nice update Gav.....How does the alloy extension of width plate help?...yeh sure the original swingarm fixings were far too far to the right...so make up an alloy extended one...but shouldn't that be drilled twice over to fit the plastic one on top of the alloy one in a position further left? Or are you intending on just fixing the alloy plate as a much needed protecter for the swingarm and not utilise the plastic one at all?...
I'd have thought that plastic 3D printing was perfect for making a plastic widened version of the existing plate? |
|
| Back to top |
|
|
Gavin944888
Joined: 29 Jan 2014
Posts: 572
Location: Essex....way South of Scotland
|
| Posted: Wed Nov 15, 2017 6:00 pm Post subject: |
|
|
.
Sorry about that ......hit the submit instead of preview button!
 IMG_0520 by Gavin Robertson, on Flickr IMG_0520 by Gavin Robertson, on Flickr
The air temp sensor was screwed into a threaded boss which was weld to the air box....it is approx 15mm dia with a tapped blind M6 thread through the air box side plate
All edges have to be finished and buffed and all welds to be dressed.....this is step by step photographs!
 IMG_0516 by Gavin Robertson, on Flickr IMG_0516 by Gavin Robertson, on Flickr
But you can see what is happening and how it is coming together.
Here is a lug welded to the box then trimmed and relieved to a better appearance.....likewise the spacers are welded captive...so that they don't roll on the floor!
 IMG_0522 by Gavin Robertson, on Flickr IMG_0522 by Gavin Robertson, on Flickr
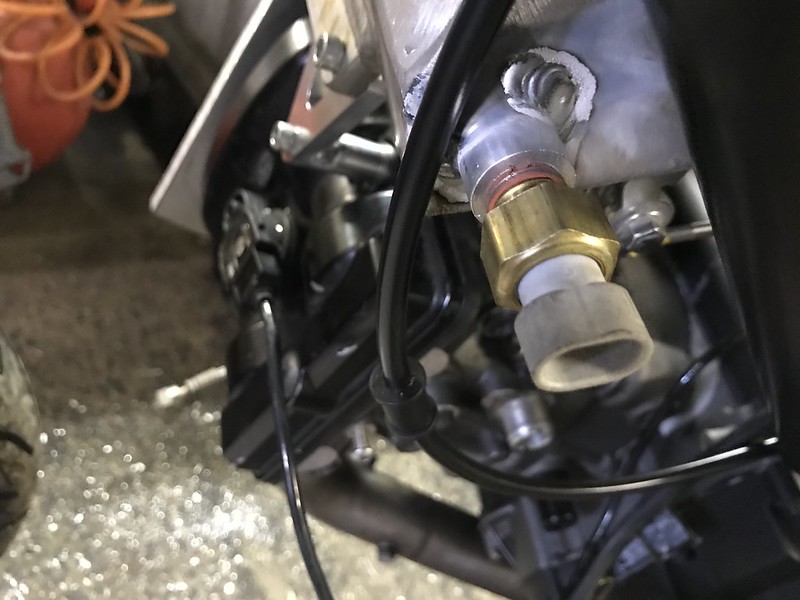
On the above shot you can just make out the air by pass outlet.
Here it is in all of its glory ....waiting to be coupled to the vacuum activated valve.
 IMG_0526 by Gavin Robertson, on Flickr IMG_0526 by Gavin Robertson, on Flickr
The air outlet from the bypass spigot locates onto this which is opened by a pressure drop from one side of the manifold to the other
This is created by the throttle opening and shutting ....the excess pressure or air is vented out via this to the inlet tract outside the supercharger loop.
 IMG_0507 by Gavin Robertson, on Flickr IMG_0507 by Gavin Robertson, on Flickr
Machined lugs drilled and tapped were let into the air box and welded to take the side frame positioning brackets.
IMG_0517 by Gavin Robertson, on Flickr
Also to be fitted into that gap between the inlets is this
 IMG_0506 by Gavin Robertson, on Flickr IMG_0506 by Gavin Robertson, on Flickr
This gets bolted to the supercharger air intake side and links up with the air intake throttle and bypass valves before sealing in the air and sending it into the twin screw rotors.
It is all getting a bit tight for space..........
IMG_0518 by Gavin Robertson, on Flickr
In total there are 4 location fixings on the air box/supercharger with an addition 2 others on the air intake unit and actual supercharger snout at the pulley end.
These six fixing points isolate the charger from the engine and should counter act movement for and aft as well as sideways...
Bottom left of the last image is the threaded support boss let into the air-box....it is the 18mm diam boss (blind tapped M6) let through and welded into the air box side plate
 IMG_0501 by Gavin Robertson, on Flickr IMG_0501 by Gavin Robertson, on Flickr
And this is the other side of that lug mounting method.
My thoughts are that the airbox is now complete but I struggling for technical information of metal treatment.
Ideally powder coating but heat and fuel may have to dictate Ceracote but I am unsure.
Anodizing is out of the question and it may be a mix of both Ceracote inside and Powder coating outside the box.
A mould has been made of the Carbon rear mud guard and these will be available by month end.
I have a contact in Italy who will make the dash front section and number plate assemblies at about 50% if not 40% of what they can be bought at via usual sources
I will post images and prices soon.
Next up is the pulley assembly and belts.
regards
Gavin
_________________
On an Island in the River Thames!
Cagiva Elefant 888/955 & adventure sidecar
Cagiva Elefant 999r engined
Cagiva BIMOTA Motard Concept
BIMOTA DB9 (with DB11 rear-end)
BIMOTA DB7-11 VLX MULE (build coming to an end)
BIMOTA DB11 VLX Supercharger |
|
| Back to top |
|
|
Gavin944888
Joined: 29 Jan 2014
Posts: 572
Location: Essex....way South of Scotland
|
| Posted: Wed Nov 15, 2017 8:59 pm Post subject: |
|
|
Ahhhhh...2Bims...nice to hear from you
Anyway the alloy plate mounts on original Bimota holes and the white plastic chain slide thing sits on top
Probably with double sided tape...the chain alines and the holes are spotted through the plastic white thing into the alloy plate
Two choices....pop rivet in situ or drill and tap new M3 holes in alloy and stick with black goo sikaflex
Either way ...I will decide once the chain is on.
Everything is cracking on at a pace (now) and a new alloy subframe is next on the agenda.
It might even be ready for Manchester .........if you fancy doin another?
Regards
Gavin
_________________
On an Island in the River Thames!
Cagiva Elefant 888/955 & adventure sidecar
Cagiva Elefant 999r engined
Cagiva BIMOTA Motard Concept
BIMOTA DB9 (with DB11 rear-end)
BIMOTA DB7-11 VLX MULE (build coming to an end)
BIMOTA DB11 VLX Supercharger |
|
| Back to top |
|
|
2bims
Joined: 03 Apr 2010
Posts: 7289
|
| Posted: Wed Nov 15, 2017 9:17 pm Post subject: |
|
|
Manchester? MANCHESTER?....Doing it Again? ....I'm not aware of any such place or what you or I may have done at such fictitious place...if in fact such place does indeed exist.... 
Double sided tape to stick it on???????????????...Have you never been flailed alive with a 520 chain thrashed across your loins at breakneck speed, ferocity and repetition???.....Rivets sound good until you recall whats normally on the back face standing proud but not normally visible keeping the rivet in place and meaning it wouldn't sit flat on your alloy plate...merely drill 3 new holes stepped equally back from the previously drilled holes...and thread them..then doubly glue and screw in countersunk bolts and grind them off flush on the back face....factory style
Evidently theydont need countersinking as they would be only taking the bolt and not the head...and would give you a bit more thickness to turn a thread into... |
|
| Back to top |
|
|
2bims
Joined: 03 Apr 2010
Posts: 7289
|
| Posted: Wed Nov 15, 2017 9:24 pm Post subject: |
|
|
| I can confirm that Cercote is Fuel and oil resistant and great for headers without diminishing in coating....and they now do clear colourless lacquer coats in ceracote..so keeping the alloy look would be fine....they also do all the colours under the rainbow now also....got it on my DB5R and DB6R headers and systems....been going for 4-5 years with no sign of deterioration......... |
|
| Back to top |
|
|
|
|
You cannot post new topics in this forum
You cannot reply to topics in this forum
You cannot edit your posts in this forum
You cannot delete your posts in this forum
You cannot vote in polls in this forum
|
Powered by phpBB © 2001, 2005 phpBB Group
The Bimota Forum has no official connection to Bimota S.p.A.. We just ride or are interested in their motorcycles and support the brand. All trademarks are acknowledged |

