| View previous topic :: View next topic |
| Author |
Message |
TVRRICH

Joined: 05 Feb 2016
Posts: 211
Location: Coventry UK
|
 Posted: Tue Jul 05, 2016 7:00 pm Post subject: side stand plate Posted: Tue Jul 05, 2016 7:00 pm Post subject: side stand plate |
 |
|
 [img]Found this on the www.mdinaitalia.co.uk site, is this an equivalent to your anti-flick up sidestand plate 2Bims ?[/img] [img]Found this on the www.mdinaitalia.co.uk site, is this an equivalent to your anti-flick up sidestand plate 2Bims ?[/img] |
|
| Back to top |
|
 |
2bims

Joined: 03 Apr 2010
Posts: 7289
|
| Posted: Tue Jul 05, 2016 11:20 pm Post subject: |
|
|
| Hi Rich......found the part on MDINA parts site....for a 750/900ss.....sort of looks the same as fitted to those bikes.....but on those bikes the spring is infront of the side stand....plate fits to a bolt above the retaining bolt of the sidestand...and spring loops onto it and then the spring fits to a lug on the outside face of the sidestand...so its really just a replacement part for that bike and that sidestand.....On BImota DB2's the spring is on the back of the sidestand....so something different is needed to move the fixing part of the spring further forward...so that when the stand is pushed forward the pull direction of the spring changes to holding it open rather than auto always pulling back.....I can post piccies of what was done to mine if you like as I have it off the bike at the moment.....mine also had longer bolts put in and spacers behind the fixing plate to push the whole sidestand further out as I have recently found....(Didnt have a previous example to compare to previous...) |
|
| Back to top |
|
|
TVRRICH
Joined: 05 Feb 2016
Posts: 211
Location: Coventry UK
|
| Posted: Wed Jul 06, 2016 12:05 pm Post subject: |
|
|
Hi Steve,
Thanks for clearing that up. You have already sent me pics and a drawing of your plate thanks, I did wonder about the spacers and bolts though, could you tell me info on the bolts and spacers please, diameters/lengths etc,
cheers
Rich. |
|
| Back to top |
|
|
2bims
Joined: 03 Apr 2010
Posts: 7289
|
| Posted: Thu Jul 07, 2016 10:44 am Post subject: |
|
|
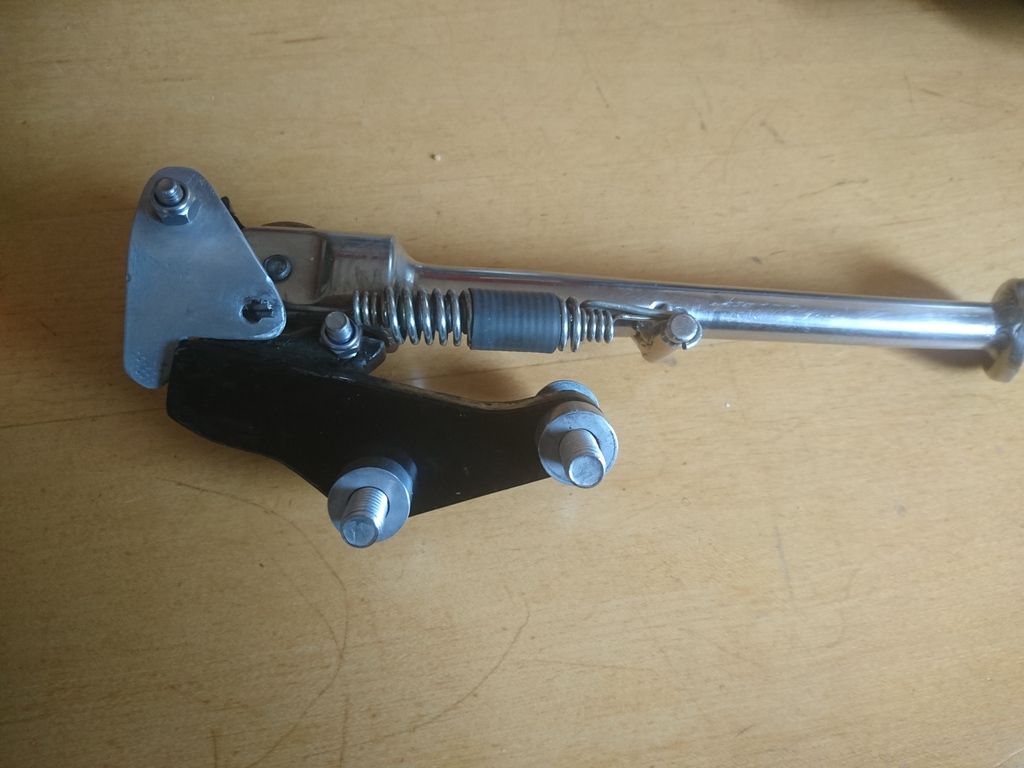
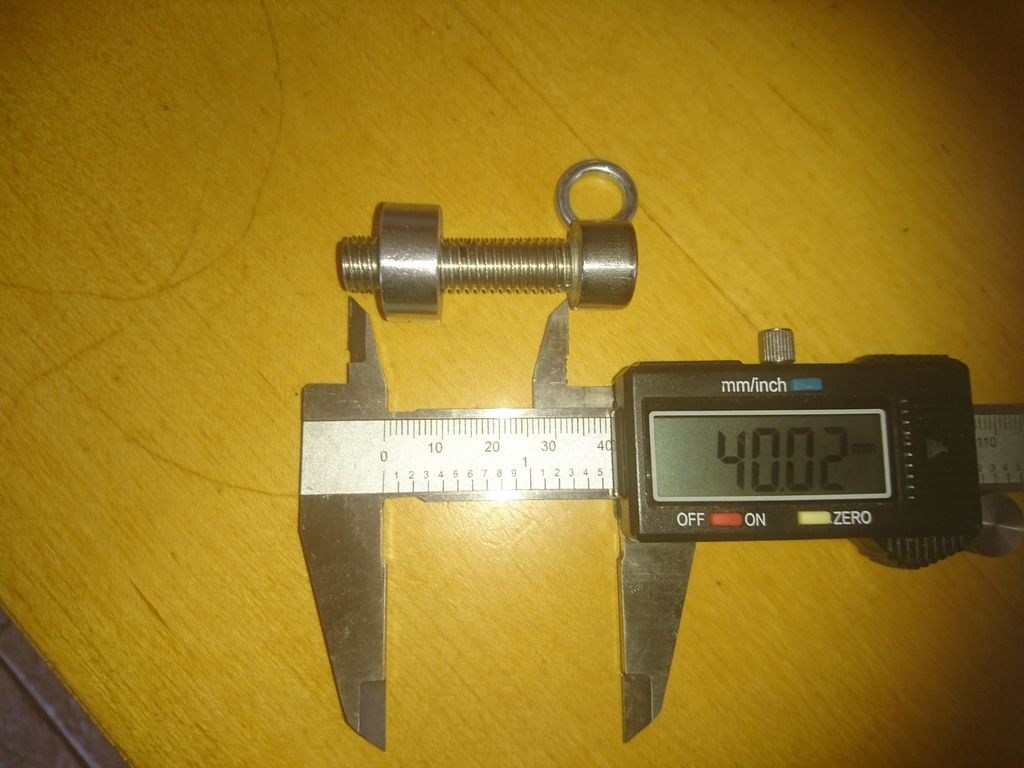
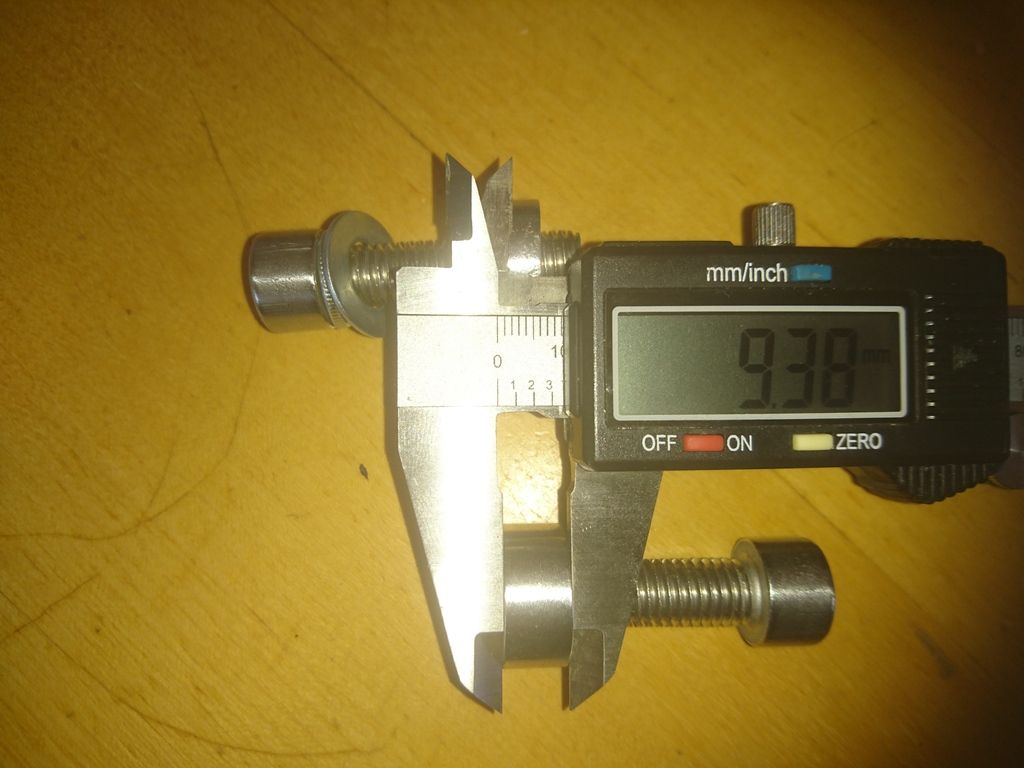
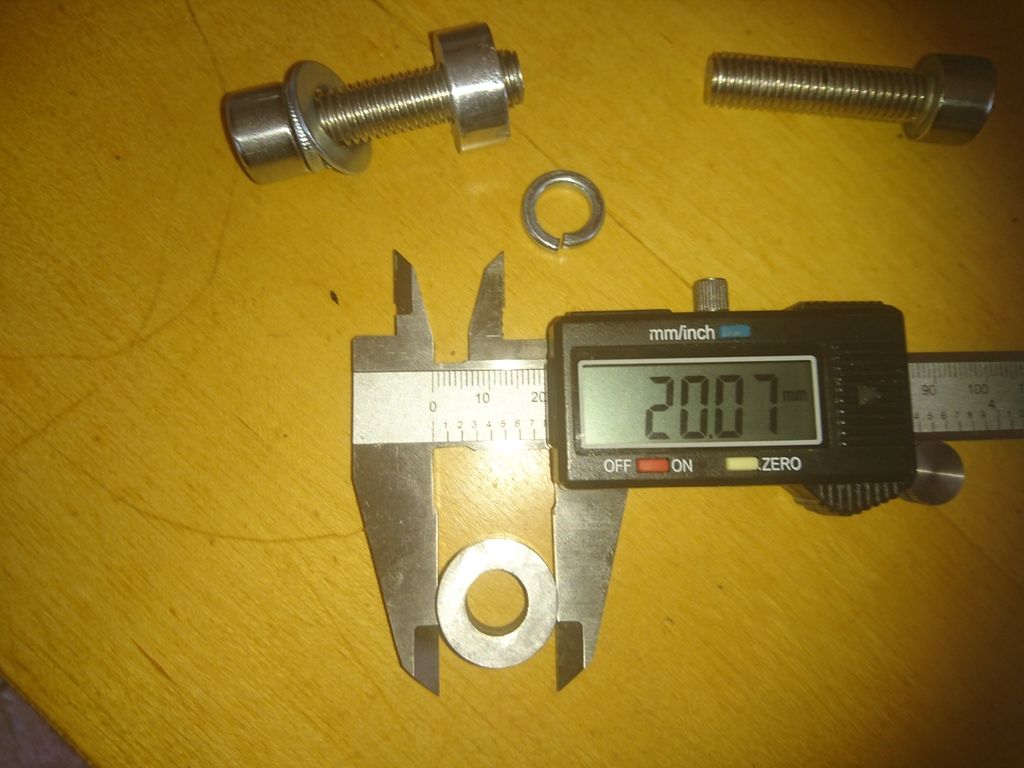
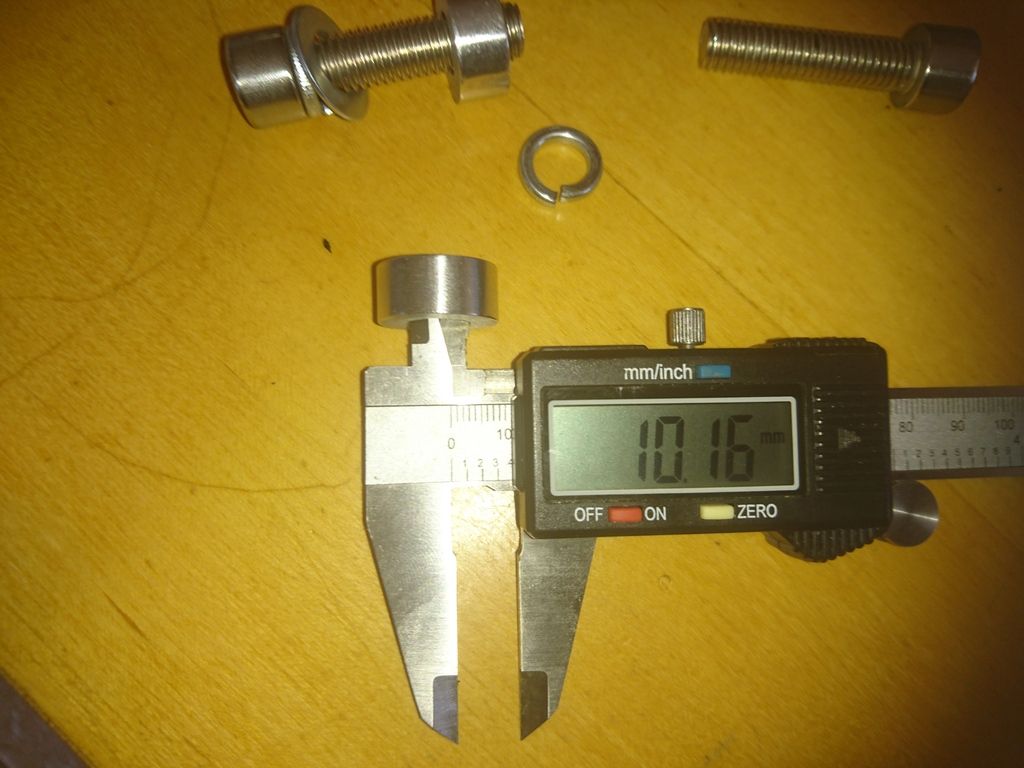
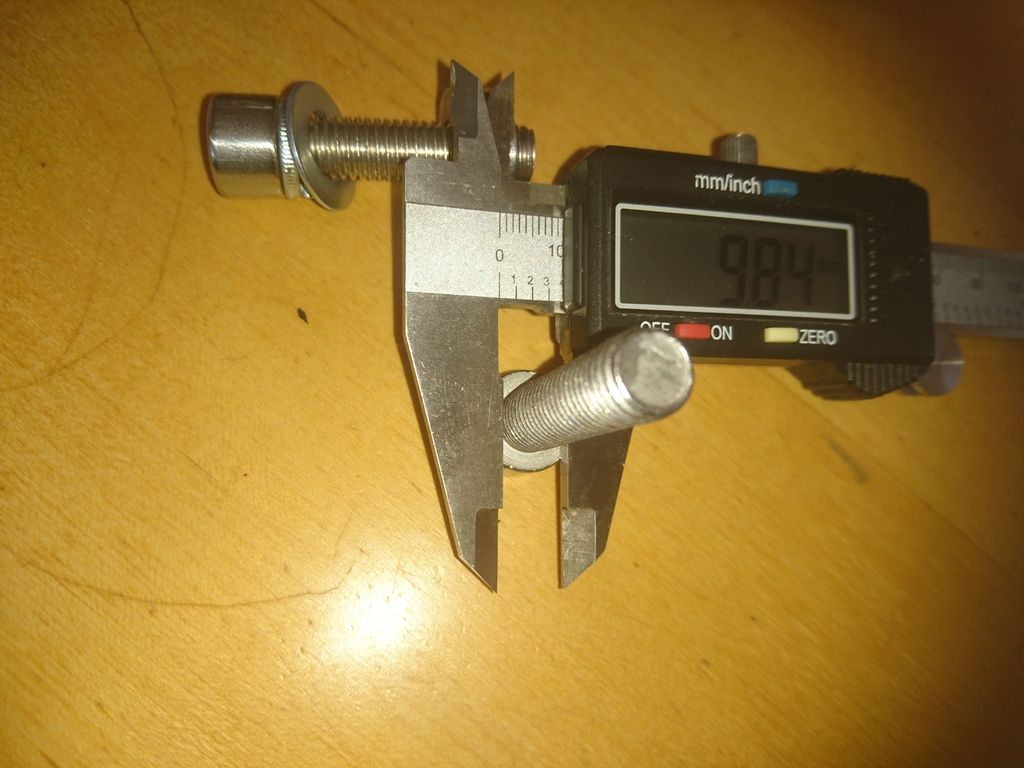
The "New" longer bolts (2 No.) that screw into the crankcase LHS of the engine are M10x40mm (threaded length is 40mm)....and the spacers are ally 10mm thick, 20mm OD and 10mm ID....and I use a locking washer on the front face....so its locking washer, bolt through this and through the sidestand plate/bracket, then the 10mm thick ally spacer and into the engine casing.
Looking at it closer with it off the bike I can see that the back alloy tube spacers are there to allow the repositioned spring to "travel without hitting the engine casing....and that these spacers could in effect be just 5mm max really
Sidestand in "open" stand out position....held all by itself...as the spring has been relocated past its pulling point in one direction and into a pulling position in another direction to keep it open...
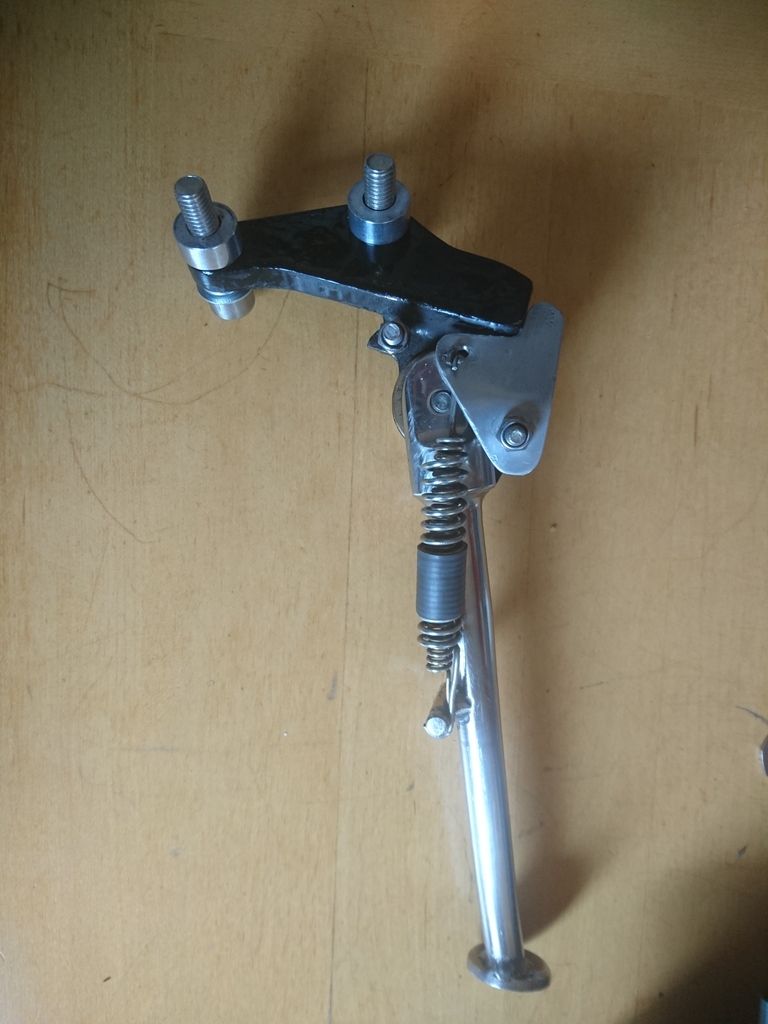
Sidestand in its closed position "up"...a simple tap with your left boot pushes it back to its closed position and retracts and stays up....
I'm assuming that the same original springs are used....and that the top spring fixing is simply being relocated some 20mm or so from the hole on the black steel plate onto the added ally plate 20mm or so further along to give it its "2-way" holding position....so that it can stay open or closed/retracted..
 |
|
| Back to top |
|
|
MRLost
Joined: 27 Jun 2015
Posts: 19
Location: Cloudcuckooland
|
| Posted: Thu Jul 07, 2016 5:50 pm Post subject: |
|
|
I love this forum.
And I have long pondered exactly how to modify my wacky Italian side-stand so it would stay down rather than self-retract at the slightest whim. The only scratch worth mentioning on my tri-colore DB2 is the direct result of that damn self-retracting side-stand.
So thanks a bundle, 2bims, for posting these excellent photos that make it quite clear how even a klutz like myself, working with a hand drill and a file, can fabricate a clever bit of alloy into the required shape.
This really helps.
_________________
2013 retro Italian agricultural device
2011 gigantic German go-anywhere motorad
2006 sensible Japanese dual-sport
1994 over-the-top Italian super-sport thriller |
|
| Back to top |
|
|
2bims
Joined: 03 Apr 2010
Posts: 7289
|
| Posted: Thu Jul 07, 2016 7:04 pm Post subject: |
|
|
| I didnt realise when I bought my DB2 that originally it would have had a suicide stand....only when I rode anothers DB2 at the Isle of Man did I know....I'll dig out another thread I put up somewhere where I dimensioned up the ally plate that I fabricated to make the mod for another person.....which is then held by the "spare" hole at the front of the sidestand where Ducati would have put a sidestand switch....the right angle on the plate holds it against the plate of the sidestand... |
|
| Back to top |
|
|
2bims
Joined: 03 Apr 2010
Posts: 7289
|
|
| Back to top |
|
|
TVRRICH
Joined: 05 Feb 2016
Posts: 211
Location: Coventry UK
|
| Posted: Thu Jul 07, 2016 7:08 pm Post subject: |
|
|
Hi Steve,
Thanks for the pics and explanation great stuff. Just one question, what are the sizes of the long spacers and the bolt on the one which attaches the ally plate to the steel plate the stand is pivoted from?, is the spacer on the front side a stop for the stand when fully out ?
Cheers
Rich. |
|
| Back to top |
|
|
2bims
Joined: 03 Apr 2010
Posts: 7289
|
| Posted: Thu Jul 07, 2016 7:37 pm Post subject: |
|
|
Forgot to mention TVRich....on the photo here of your carbs, LHS you see a steel plate going horizintal across the FCR41 logo....and to the right of this a spring with a cable attached pointing vertically down.......Flip up this black brake cable lined unit and you should find this is your idle adjust for the Keihin Carbs.....should be a loose cable with a knurled adjuster on the end....I cable tie mine up and to the left so that I can adjust the idle on the go at traffic lights etc or use as a "choke" when cold....you'll find the running increases the idle when the carbs are hot on a hot day....goes from say 1500rpm to 2300rpm....
 |
|
| Back to top |
|
|
2bims
Joined: 03 Apr 2010
Posts: 7289
|
| Posted: Thu Jul 07, 2016 7:52 pm Post subject: |
|
|
| TVRRICH wrote: |
Hi Steve,
Thanks for the pics and explanation great stuff. Just one question, what are the sizes of the long spacers and the bolt on the one which attaches the ally plate to the steel plate the stand is pivoted from?, is the spacer on the front side a stop for the stand when fully out ?
Cheers
Rich. |
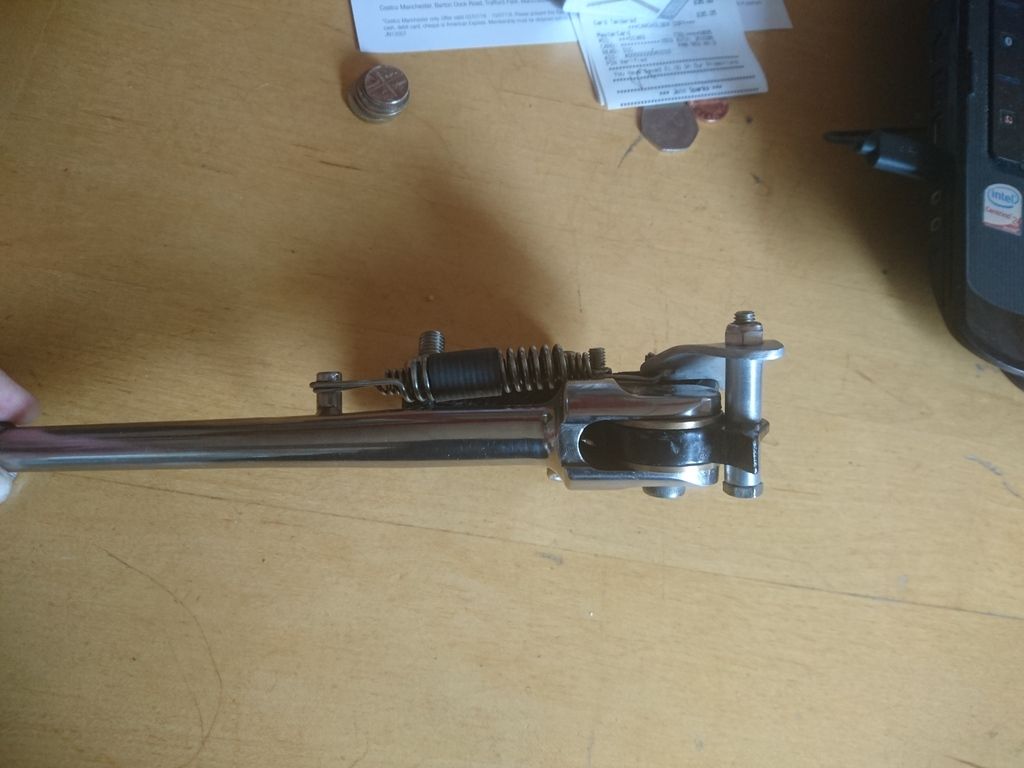
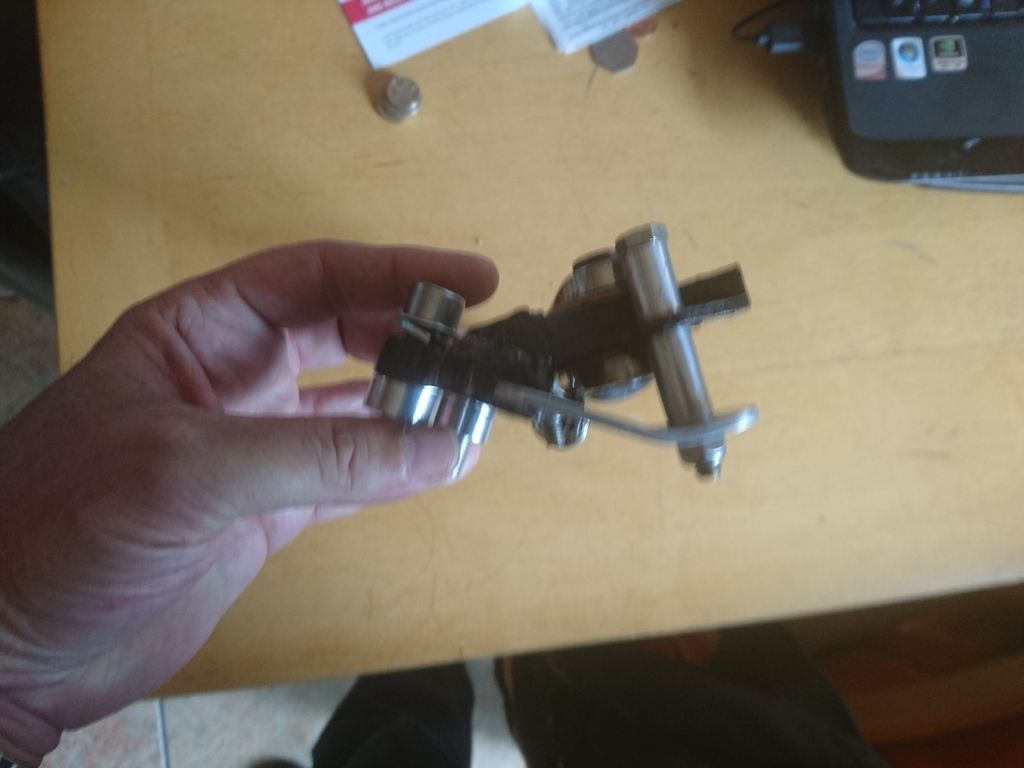
That hole on the original sidetand is threaded....the bolt is an M6x50mm long bolt...and each of the spacers are 10mm OD and 15mm long at the front and 20mm long at the back.....spacers not a necessity...you could just use a further couple of nuts to lock it either side of the sidestand main plate...and one each again either side of the ally additional plate....the front part extension for me is a bit of engineering overkill...it just means you can locate a spanner on it to check and keep tight the nut on the bottom of the bolt under the alloy fabbed bracket...but if you used an allen headed bolt you can forget the "extension" long bolt and just use a M6x30 bolt with the lock nut behind the black steel original plate and a further 2 nuts either side of the alloy plate beneath that...that would do its job....as the extended length on the front face isnt a stop for the stand when fully out....the stand still stops in its original suicide stand position.....and hold there as the relocated spring now works in a different direction as the opening of the stand has pulled the spring past the pivot point of the stand...keeping it open....and with safety of a good 15-20 degrees of movement back before it auto retracts back.....a video may be the best way of showing you its action...so I'll see what I can do...maybe eve with a commentary.....a simple solution when you see it in action...although I take no credit for coming up with the mod to make it work.... |
|
| Back to top |
|
|
TVRRICH
Joined: 05 Feb 2016
Posts: 211
Location: Coventry UK
|
| Posted: Thu Jul 07, 2016 8:00 pm Post subject: |
|
|
Hi Steve,
Thanks for the further explanation, good stuff again. Thanks also for the carb info. You putting this up has reminded me I hav'nt looked at the throttle cable routing that you asked me about, must remember to have a look! |
|
| Back to top |
|
|
Darmah

Joined: 11 Oct 2017
Posts: 15
Location: Canada
|
| Posted: Thu Oct 12, 2017 4:07 am Post subject: Photos are gone |
|
|
| It's been a while since anyone posted on this topic. I recently bought a DB2 and it has the self retracting stand which I want to correct. I'm not sure if the photos can be reloaded or not but I'd sure be interested in seeing them. Thanks! |
|
| Back to top |
|
|
MRLost
Joined: 27 Jun 2015
Posts: 19
Location: Cloudcuckooland
|
| Posted: Sun Nov 19, 2017 2:43 am Post subject: |
|
|
2bims -
Thanks for reposting the photos! That really helps.
Just one more question about the side stand mod - does this use the original springs or are those slightly longer springs? They appear to be about 20 mm longer than the original but it's hard to tell from the photos.
Thanks again.
_________________
2013 retro Italian agricultural device
2011 gigantic German go-anywhere motorad
2006 sensible Japanese dual-sport
1994 over-the-top Italian super-sport thriller |
|
| Back to top |
|
|
2bims
Joined: 03 Apr 2010
Posts: 7289
|
| Posted: Sun Nov 19, 2017 1:19 pm Post subject: |
|
|
Not so sure Mr Lost....as to what is original and what isn't...as it was a previous owner who did the Mod...or at least paid someone to do it...I would say they are the "same" as original as the revised fixing point isn't so far adrift from the old one...its merely moved forward...here is the other thread that gives the dimensions of the alloy plate that was added to the arrangement to relocate the springs....If you don't have a spring puller...some folk extend the spring in-situ...and place small coins into the spring...then retract the stand and the spring falls off...if you get my drift...makes it easier to relocate if you don't have a spring puller
http://www.bimotaforum.co.uk/viewtopic.php?t=4513&postdays=0&postorder=asc&start=0 |
|
| Back to top |
|
|
|


