| View previous topic :: View next topic |
| Author |
Message |
Frank.61

Joined: 28 Nov 2013
Posts: 108
Location: Maasmechelen, Belgium
|
 Posted: Tue Feb 25, 2014 2:21 pm Post subject: Posted: Tue Feb 25, 2014 2:21 pm Post subject: |
 |
|
Hi Les,
Here some pics of the "removing the B*****D bolt"project 

1st try with the hexagonal bit welded in the head of the bolt 
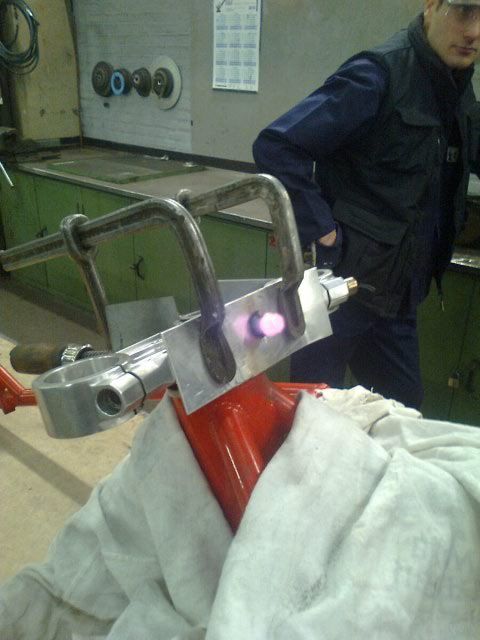
2nd bit which worked fine!
Steel plate is to avoid that the arc "jumps" to the aluminium plate instead of the bolt (no damage whatsoever). 
Frank |
|
| Back to top |
|
 |
Les Caddaye
Joined: 17 Dec 2010
Posts: 61
Location: Australia
|
| Posted: Fri Feb 28, 2014 10:40 pm Post subject: |
|
|
Frank,
That is definately the same bolt that is stuck in mine. Unfortunately I'm not much of a welder. Great stuff with the ingenuity, that would be the last method I would have thought of.
Looking forward to further resto photos.
Cheers |
|
| Back to top |
|
|
Frank.61
Joined: 28 Nov 2013
Posts: 108
Location: Maasmechelen, Belgium
|
| Posted: Fri Feb 28, 2014 10:56 pm Post subject: |
|
|
Hi Les,
Could use an epoxy resin to glue an eight mm. bit in the hexagonal allen bolt and when all has hardened use a power impact wrench .....
Should do the trick.
Would heath the upper clamp slightly before starting it.
The alloy is a serious one and the 8.8 bolt is also strong enough to survive the beating.
Frank |
|
| Back to top |
|
|
SiBag

Joined: 03 Mar 2012
Posts: 251
Location: Cheshire
|
| Posted: Sat Mar 01, 2014 6:58 pm Post subject: |
|
|
Had a quick measure up of the res clamps.
They are 12.6mm so I must have made them out of 1/2" ally.
_________________
Si...
SB6..CCM R30...GSXR-750-M...RGV-250-VJ22.. GSX-1100-EFE Project....Harris Magnum II project...
If its got Ti#s or Wheels its gona give you trouble |
|
| Back to top |
|
|
Frank.61
Joined: 28 Nov 2013
Posts: 108
Location: Maasmechelen, Belgium
|
| Posted: Sat Mar 01, 2014 8:50 pm Post subject: |
|
|
Hi SiBag,
Thanks, if you don't mind I will kind of copy your design 
When ready (think in a month or 3) I will show you the pics.
If possible I will anodize it so it looks like a real Bimota bracket (love the simplicity of your design).
First I need to powdercoat the frame and order the new shockabsorber to measure the precise dimensions for the bracket.
Again thanks for the picture of your bracket!
Frank  |
|
| Back to top |
|
|
Frank.61
Joined: 28 Nov 2013
Posts: 108
Location: Maasmechelen, Belgium
|
| Posted: Sat Mar 01, 2014 9:02 pm Post subject: HELP aluminium gusset plates & footrests brackets |
|
|
Hi,
Has anyone an idea how to take care of the aluminium gusset plates and the footrest brackets 
Mine are more/less damaged by previous owners and I do have to file and subsequently sand and polish them to get those brackets backets back in the original state.
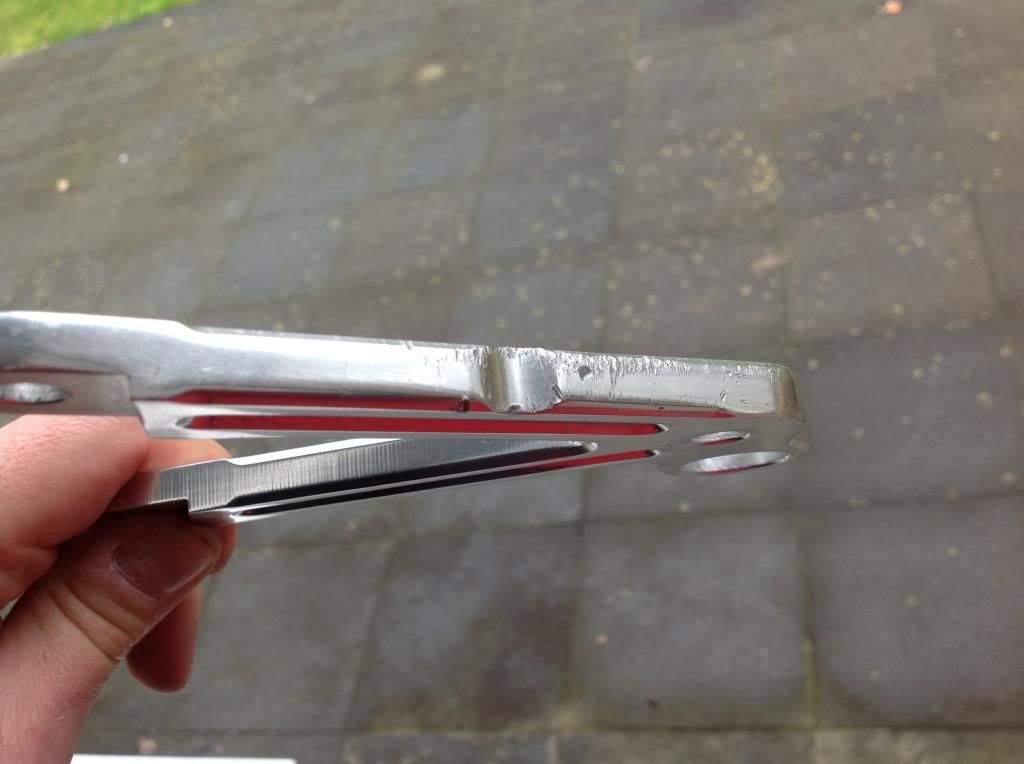
Problem: they are anodized and I do not want to distroy/ruin them .......
Definitely want to keep the milling signs visible though.
Who has experience how to make them as new?
Do's and don't's are very wellcome!
Frank |
|
| Back to top |
|
|
waggy

Joined: 26 Sep 2011
Posts: 277
Location: Northern Ireland
|
| Posted: Sat Mar 01, 2014 9:28 pm Post subject: |
|
|
| Hi Frank, its a shame they were damaged, but by the looks of it not too deep. Its something i havent had to do, but i imagine you can carefully sand the scores away and find a good firm to annodize them. Annodizing will easily show any imperfection, so preparation is the key. |
|
| Back to top |
|
|
Frank.61
Joined: 28 Nov 2013
Posts: 108
Location: Maasmechelen, Belgium
|
| Posted: Sun Mar 02, 2014 7:49 am Post subject: |
|
|
Hi keith,
Well to be honest I have some of these (stupid) damages.
Both sides the footrest brackets, but also the 2 clip-on clamps (assume they were put in a bench vise without any protection).
Mine is dropped or has crashed mildly somewhere in time and they have tried to repair it in the least possible professional way 
Want to remove the current anodic film before I start sanding etc. but am afraid to ruin the surface.
I have seen pics of a DB1 with fully polished parts so it must be possible but really the only experience I have with polishing aluminium parts is when I did it with engine covers of my moped when I was 17

Maybe someone knows how to do it sensible or where to send it to 
Frank |
|
| Back to top |
|
|
Evilchicken0

Joined: 12 May 2010
Posts: 2996
Location: London
|
| Posted: Sun Mar 02, 2014 9:59 am Post subject: |
|
|
Have a look on the web or pick up a classic / custom magazine. The ads in them will turn up something
A good UK site for products is http://www.frost.co.uk/
_________________
Don't read everything you believe |
|
| Back to top |
|
|
2bims

Joined: 03 Apr 2010
Posts: 7292
|
| Posted: Sun Mar 02, 2014 11:24 am Post subject: |
|
|
Hi Frank...i recognise that Db1 as being Steve of LoudBikes in Canada...alloy polishing is really quite simple and cheap....buffing wheels and a power drill or grinding wheel on a bench is all you need...and yes, Frosts are good for these things on this thread you can see my polishing wheels and the compounds, grey, green and blue waxes, 3 stages of cleaning with one coarse sizel mop, a medium mop and then a polishing mop....first mop is done in multidirections...2nd and third in one direction...use lime compound inbetween to clean off the wax at each stage...does Stainless steel or alloy
http://www.bimotaforum.co.uk/viewtopic.php?t=3316&postdays=0&postorder=asc&start=0
Kits here
http://www.ebay.co.uk/sch/i.html?_trksid=p2055119.m570.l1313&_nkw=alloy+polishing+kit&_sacat=0&_from=R40
The coarse nylon black one you can see in my thread removes the anodising....give it a go on something else first, little by little....trick is to use a little wax compound often and not a lot a little...
If theres any deeper scratches etc I start with wet and dry sanding paper...from 600 gauge up to around 1200 gauge...you can go the softest 1500 gauge, but if you were polishing the first mop would cut that back anyhow...
Last edited by 2bims on Sun Mar 02, 2014 3:27 pm; edited 1 time in total |
|
| Back to top |
|
|
Frank.61
Joined: 28 Nov 2013
Posts: 108
Location: Maasmechelen, Belgium
|
| Posted: Sun Mar 02, 2014 1:05 pm Post subject: |
|
|
Hi Steve,
Thanks (can't imagine you have much time left seeing all your Motorcycle related activities)!
How do you propose I should start?
Removing the anodized layer?
Frank |
|
| Back to top |
|
|
2bims
Joined: 03 Apr 2010
Posts: 7292
|
| Posted: Sun Mar 02, 2014 2:10 pm Post subject: |
|
|
Well if you want to start removing the scratches from that one edge plate face then I would use say 350/400/600 grade wet and dry paper, wrapped around a flat edge and ran up and down the surface to keep it flat...this alones will take the anodisinf off...and remove most of the scratches...then grade down to 1000/1200/1500 wet and dry...later stages you can use it wet,,,run under a tap...and add washing up liquid to the 1200/1500 stage...as really this will in itself bring to a polish..as a polish is really just very fine abrasion unseen by the eye...you will see each stage get cleaner and cleaner and know when to move onto the next stage
Scroll down this thread and you will see the starter solenoid, bracket and airbox clips that I cleaned up...jsut using various grades of wet and dry...alloy is easier to clean abrasions than these...as they were steel brackets....you can use emery flap wheels in a power drill, or mini dremel...but too much pressure and they really cut away at the surface
The damage on your plates isnt too bad and should come out...with pieces like that its easier to put the wet and dry paper on a flat surface and hold and run the piece up and down it is a planing motion...when theres less resistance you'll find its because the wet and dry surface has worn down so move to a fresh area and check your progress
If you get down in the heart or apprehensive...then see here what I first contended with as my introduction to Bimota Ownership....a Db2 and YB11 at the same time...untouched in a garage for some 8 years...and they both cleaned up nicely.......
http://www.bimotaforum.co.uk/viewtopic.php?t=1196&postdays=0&postorder=asc&start=0 |
|
| Back to top |
|
|
waggy
Joined: 26 Sep 2011
Posts: 277
Location: Northern Ireland
|
| Posted: Sun Mar 02, 2014 3:25 pm Post subject: |
|
|
| Hi Frank, another option might be to powder coat them, have seen some mates who had similar damage who used one of those car wheel repair places who repaired the gouges and then powdercoated them. They have a quite impressive range of chrome and alloy powders, the finish is quite impressive. I am thinking of getting my horrible yellow HB2 sidestand done in a chrome or nice alloy finish. Will let you know how it turns out. |
|
| Back to top |
|
|
Frank.61
Joined: 28 Nov 2013
Posts: 108
Location: Maasmechelen, Belgium
|
| Posted: Sun Mar 02, 2014 5:08 pm Post subject: |
|
|
Hi Waggy,
Thanks for your advice.
I feel a little scarry but will most likely try what 2Bims sugested with the sanding paper etc.
Would chrome your sidestand, is one of those parts which remained the same in several Bimota designs (pre and post Tamburini).
Frank |
|
| Back to top |
|
|
Frank.61
Joined: 28 Nov 2013
Posts: 108
Location: Maasmechelen, Belgium
|
| Posted: Sun Mar 02, 2014 5:41 pm Post subject: |
|
|
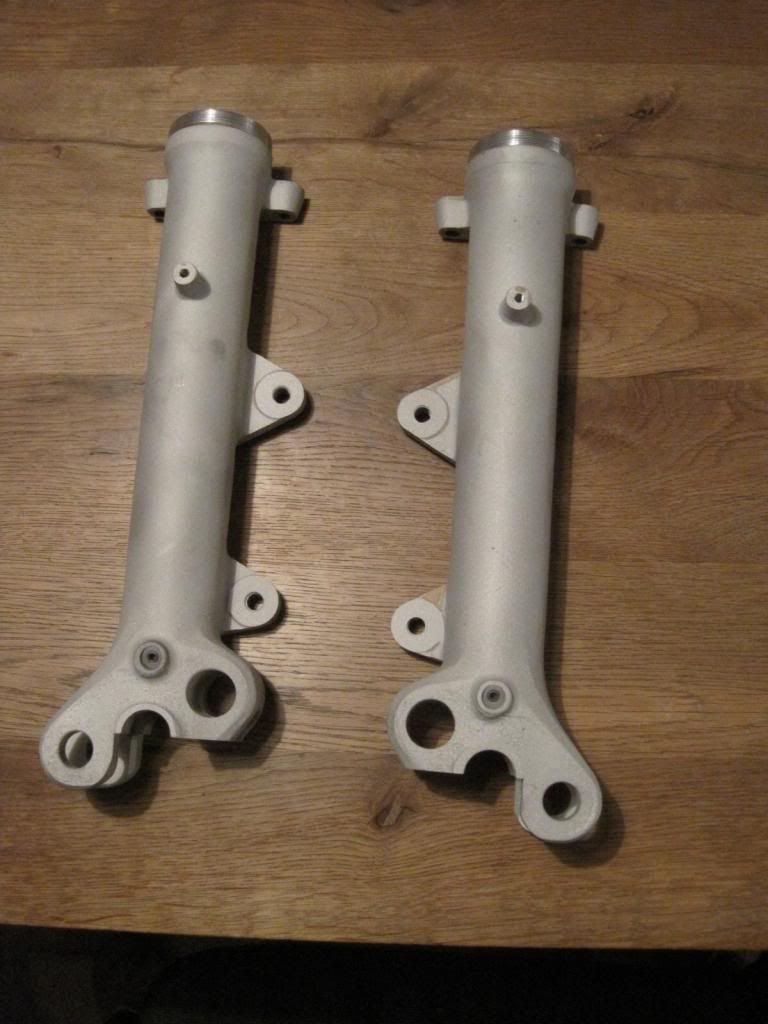
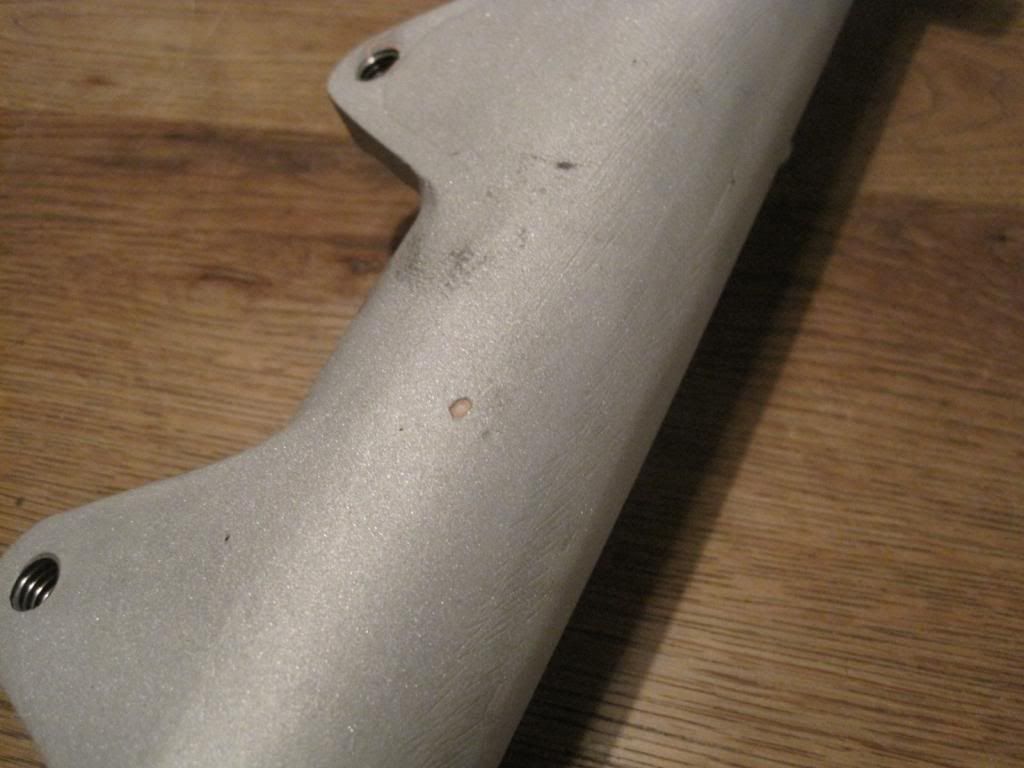
Hi,
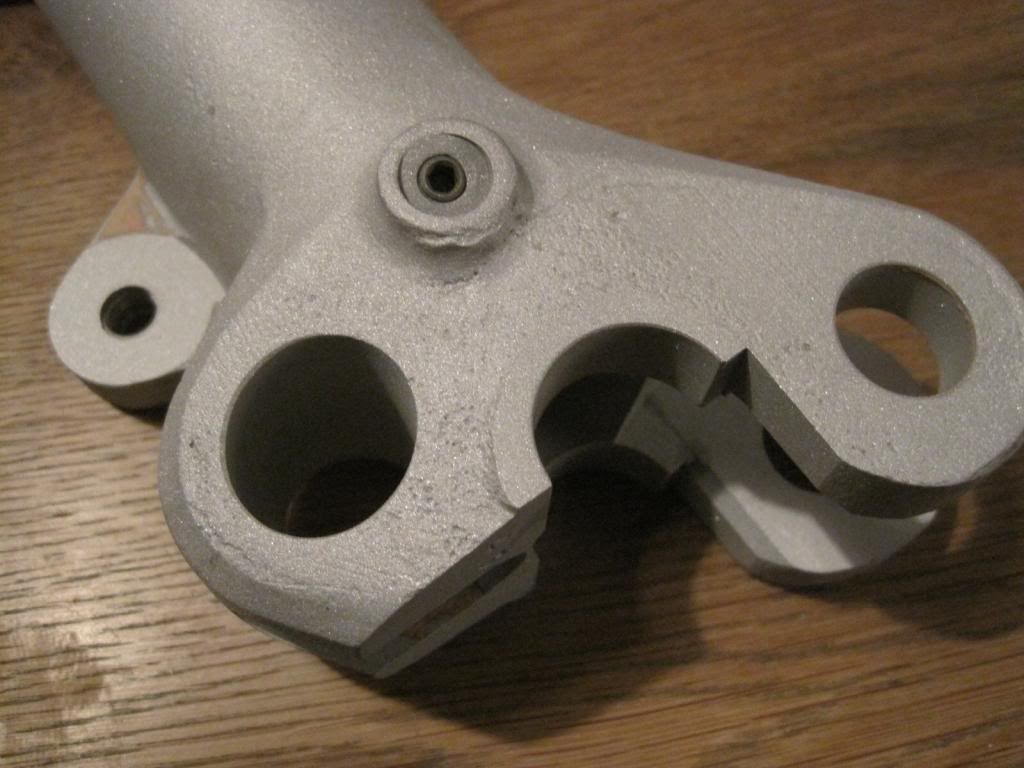
Front fork lowers are (carefully) sandblasted and here you see the result.
Remarkable is to see that the lowers were first drilled through and through and later the lower end "closed" with a 42 mm. Aluminium plug.
You can see this easily as also without paint there is some (very little) fluid that comes through the "cracks" (similar as in those penetration fluid used for crack investigation).
Clearly a sandcast piece which to be honest was not that well finished ( reason why Forcella Italia used a decent amount of filler).
Well will sand it first as good as possible give it a thin layer of 2K filler and subsequently paint it Gold.
First wanted to file the 2 nipples off but in name of originality I'll keep them and will bend a stainless steel wire bracket for the brake hoses and attach them to the lowers (have see a milled bracket but consider that an opticall "to heavy").
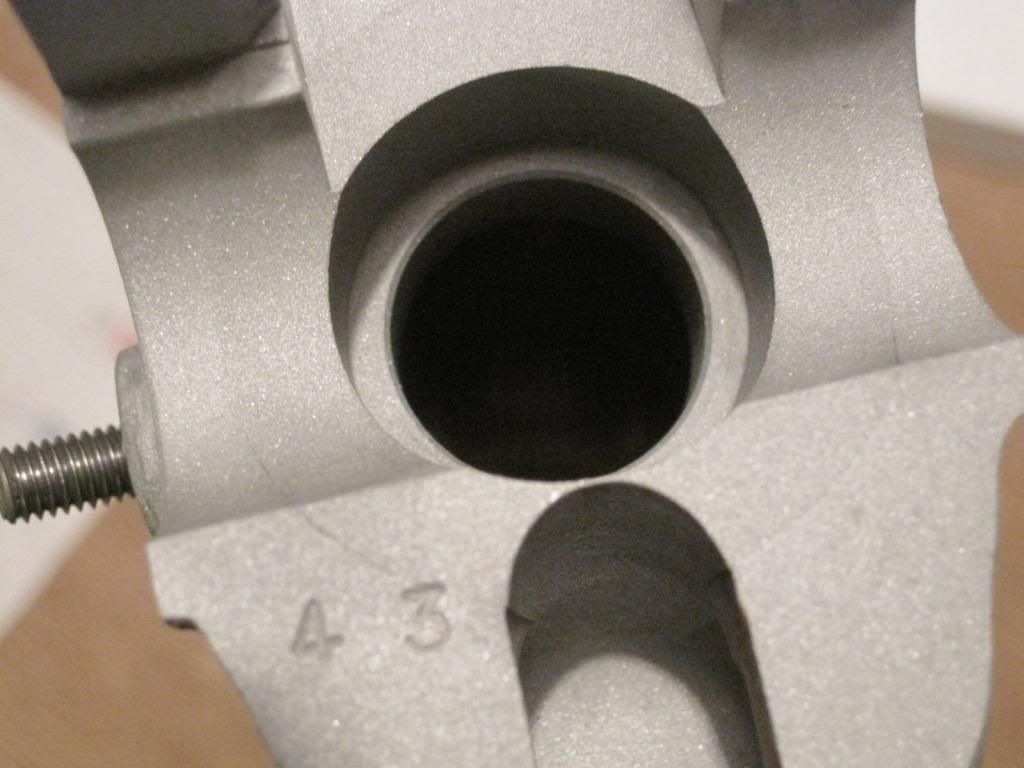
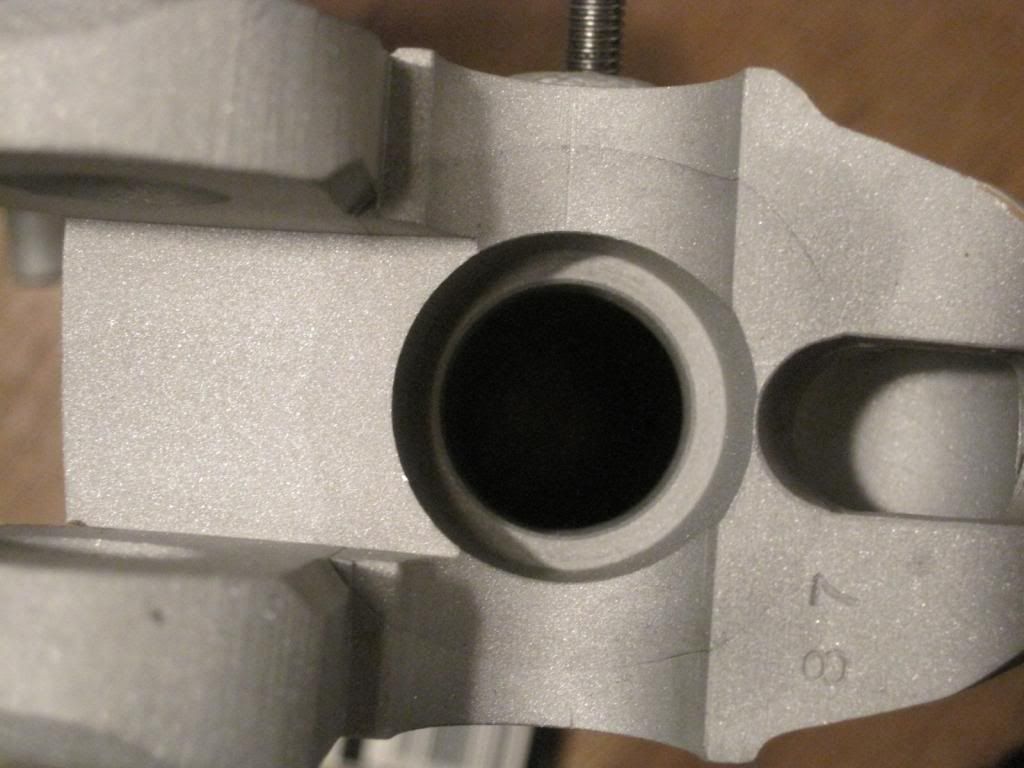
You can still see the original grinding marks on the Aluminium lowers!
Yep that's sandcasting (small series as opposed to the Japanese Showa etc.)
Ditto
Got my work cut out!
Frank |
|
| Back to top |
|
|
|


