 |
Bimota Forum
Forum for Bimota Owners and Riders
|
| View previous topic :: View next topic |
| Author |
Message |
Admin
Site Admin

Joined: 22 Oct 2007
Posts: 508
Location: Stafford, UK
|
 Posted: Mon Jun 19, 2017 7:31 pm Post subject: Posted: Mon Jun 19, 2017 7:31 pm Post subject: |
 |
|
Hiya
Err, wow. That is a lot of work. Impressive
All the best
Katy |
|
| Back to top |
|
 |
who

Joined: 10 Nov 2010
Posts: 402
Location: Melbourne Australia
|
| Posted: Tue Jun 20, 2017 9:04 am Post subject: |
|
|
Just read the post from the beginning. Can't believe Bimota sold the bike you had paid a deposit on?
Anyway tagged.
And intriguing |
|
| Back to top |
|
|
Gavin944888
Joined: 29 Jan 2014
Posts: 572
Location: Essex....way South of Scotland
|
| Posted: Fri Jun 30, 2017 3:24 pm Post subject: |
|
|
Okay, just got back from the Elefant rally in Luxembourg and back to see where and who the bits have got on. Made the trip on a much modified 999r engined Cagiva Elefant ......another Tamburini designed bike.
The Ducati Stepper motor was deemed redundant after discussions with folk of Supercharger knowledge.
Truth be told non of them have ever encountered a Euro 4 or 5 engine with and supercharger conversion BUT after studying even more Internet sites BIMOTA did not use the Stepper motor.
 IMG_0188 by Gavin Robertson, on Flickr IMG_0188 by Gavin Robertson, on Flickr
The Stepper motor sits between the cylinders (underneath the injection throttle bodies) and takes....some of....the excess air or un-burnt mixture and sucks and pumps into the next cylinder on the next cycle and so and so on...thus reducing emissions.
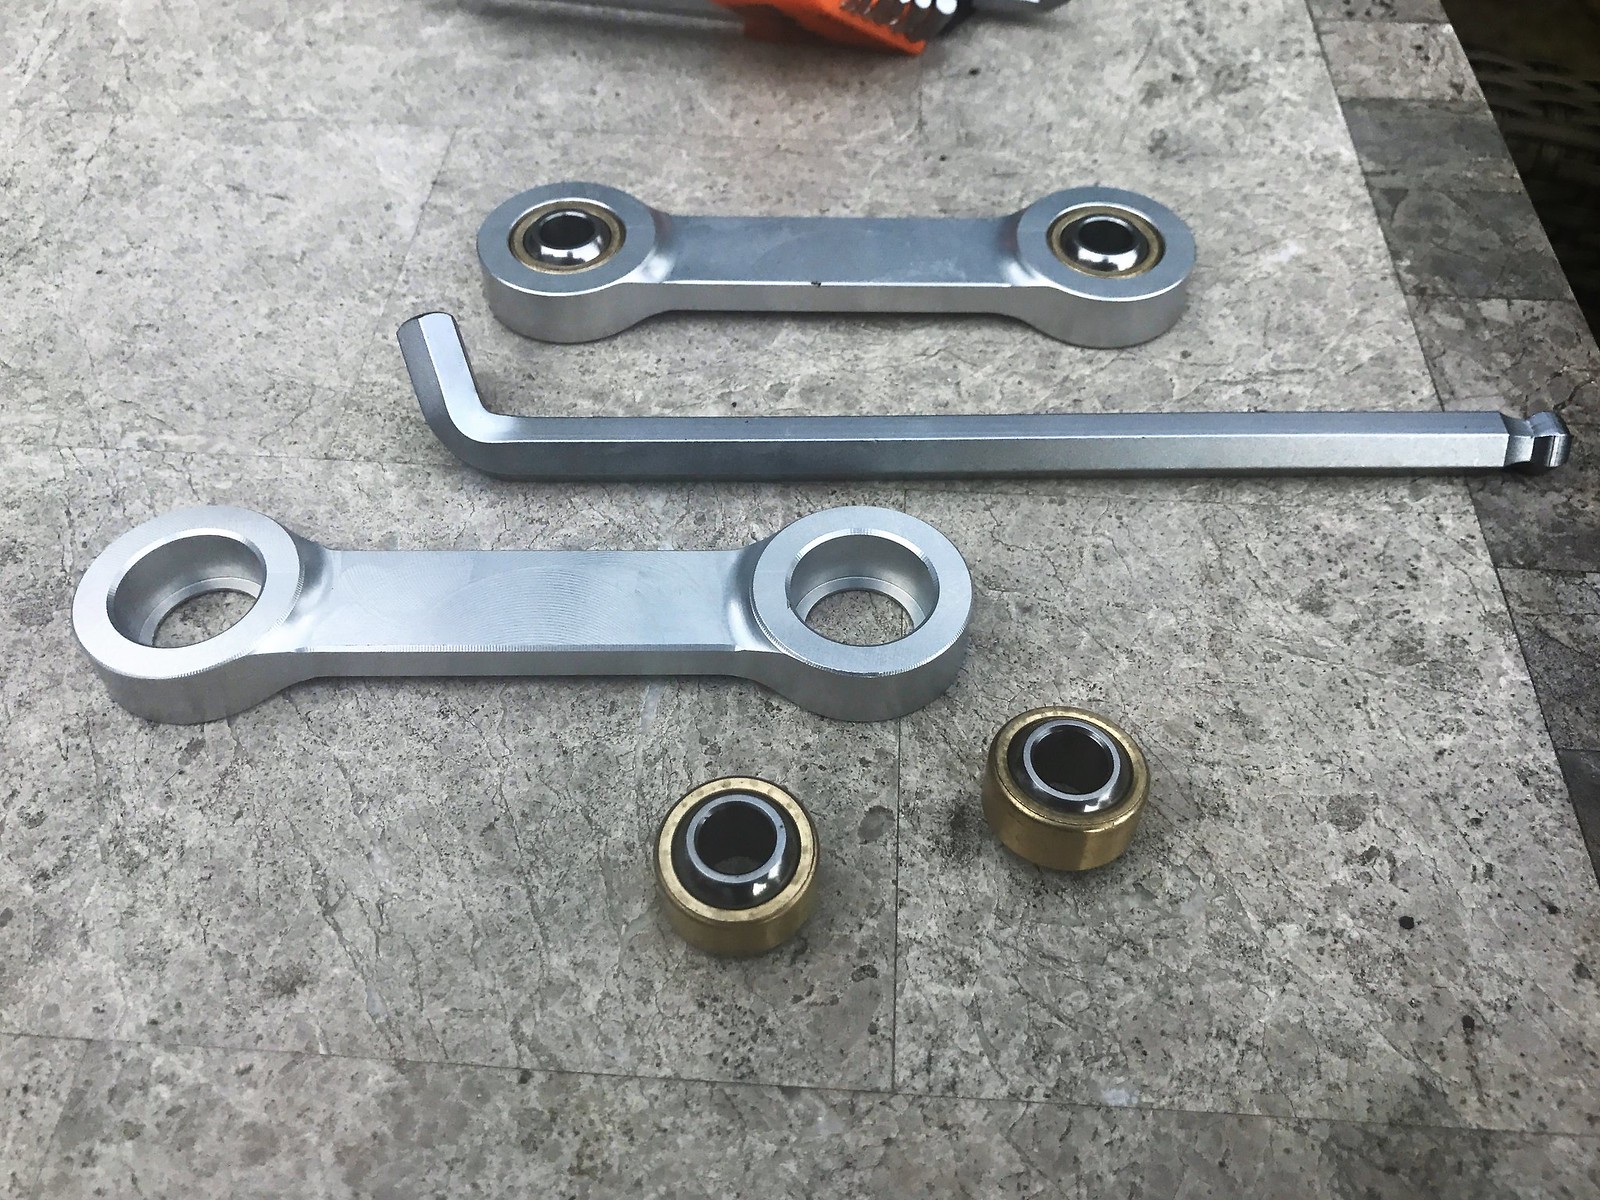
The rear section of the swinging arm - rear shock - engine interface had arrived from Italy and I took all the bearings, screw adjusters and part assembled.
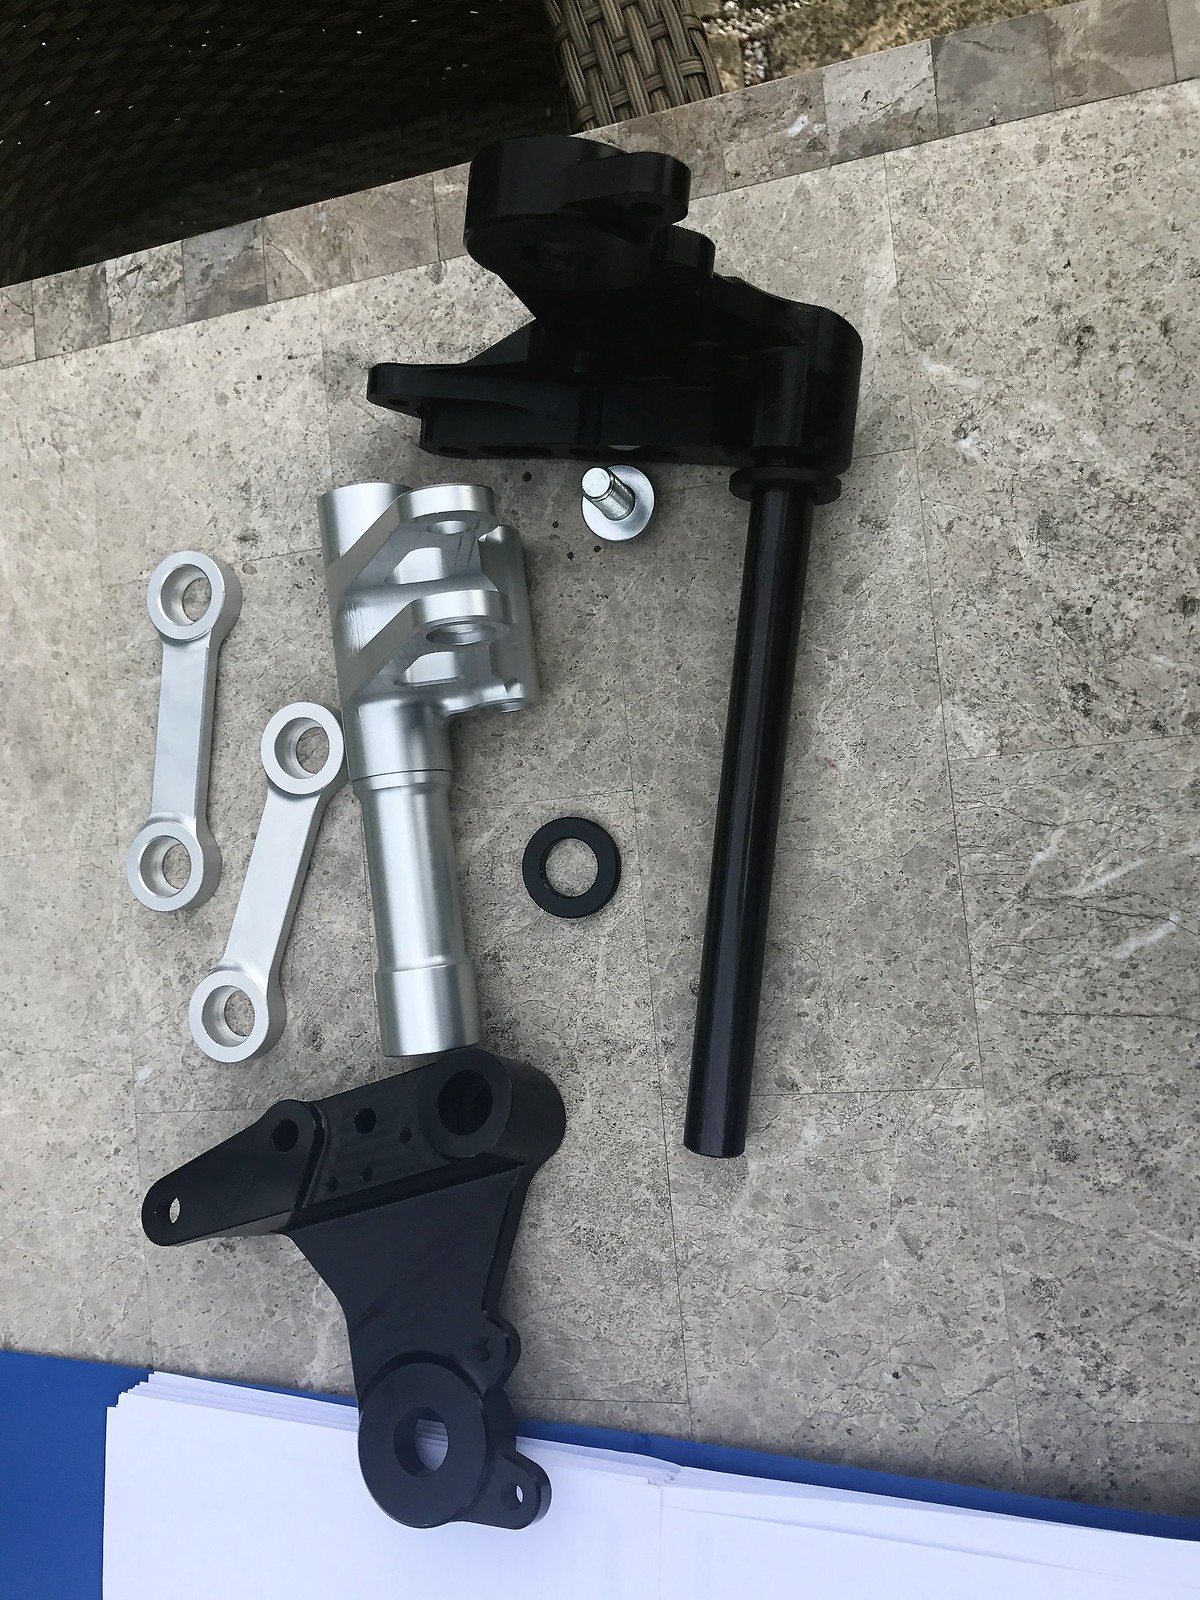 IMG_0158 (1) by Gavin Robertson, on Flickr IMG_0158 (1) by Gavin Robertson, on Flickr
Thanks to the DB7 and DB9 workshop manual it took SOME but only some of the guessing out af the assembly.
 IMG_0159 by Gavin Robertson, on Flickr IMG_0159 by Gavin Robertson, on Flickr
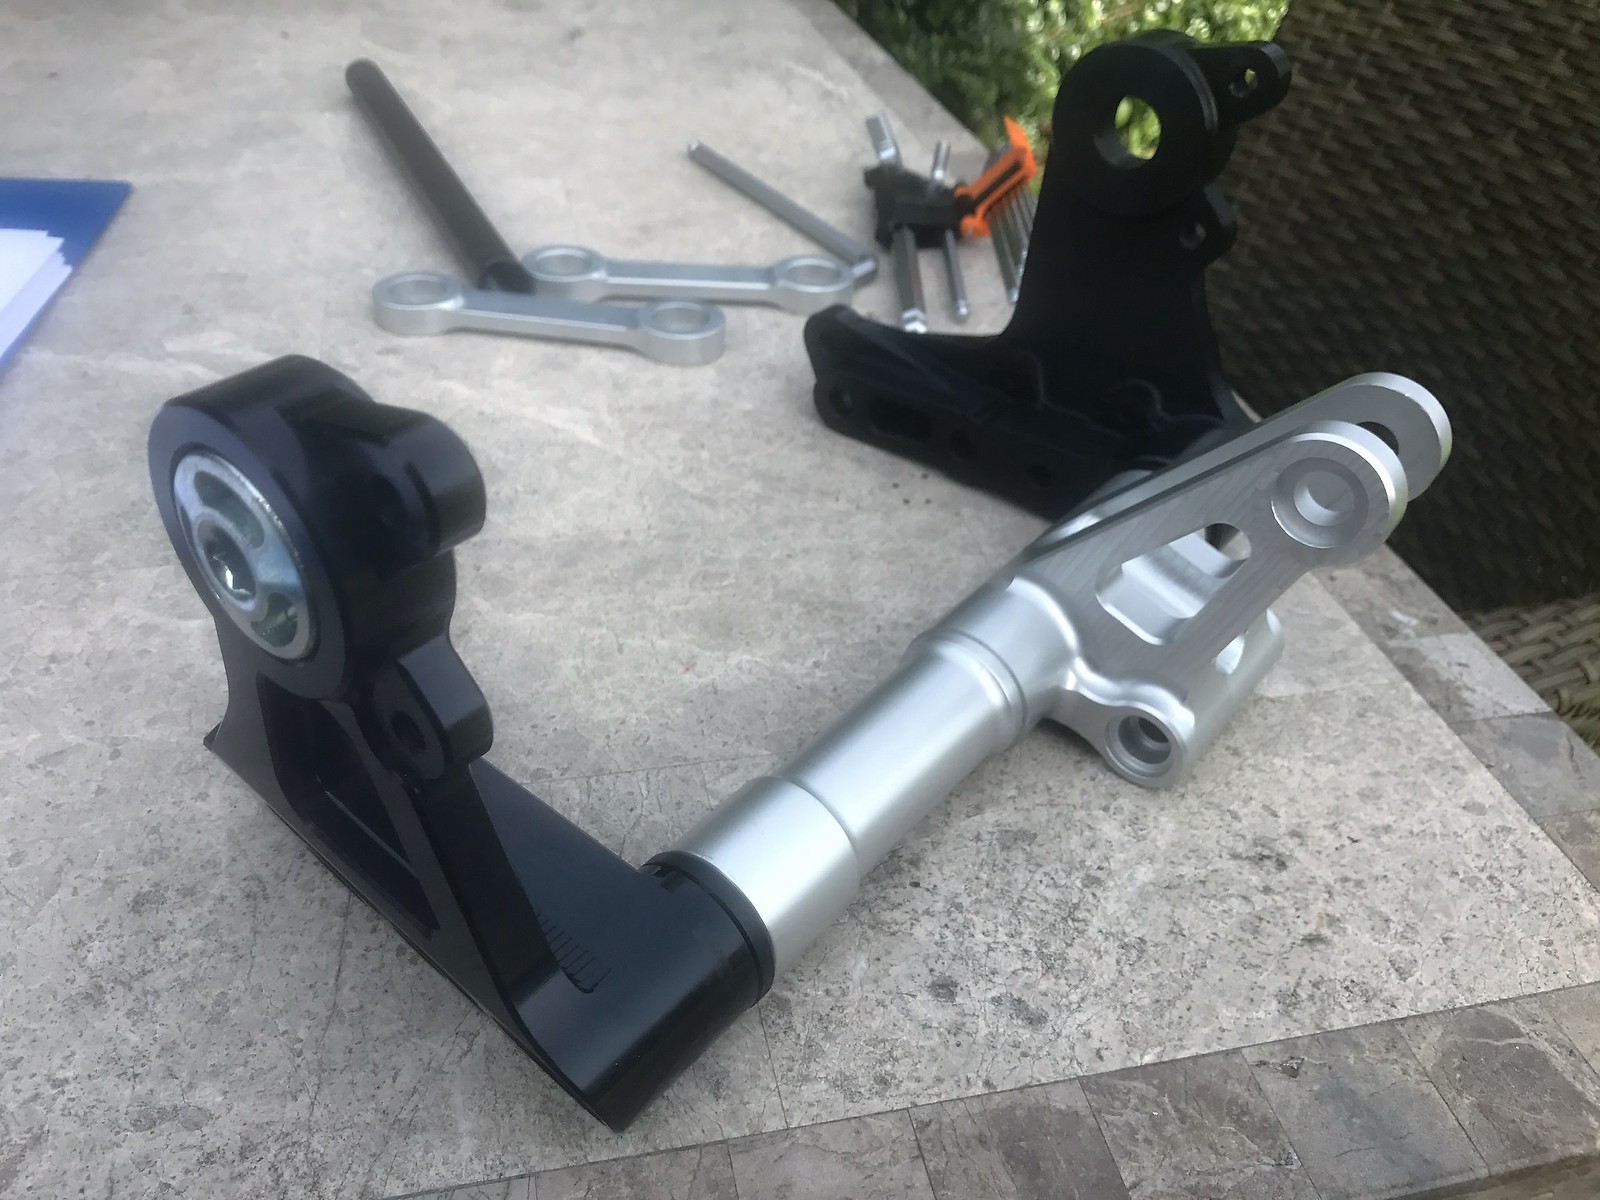
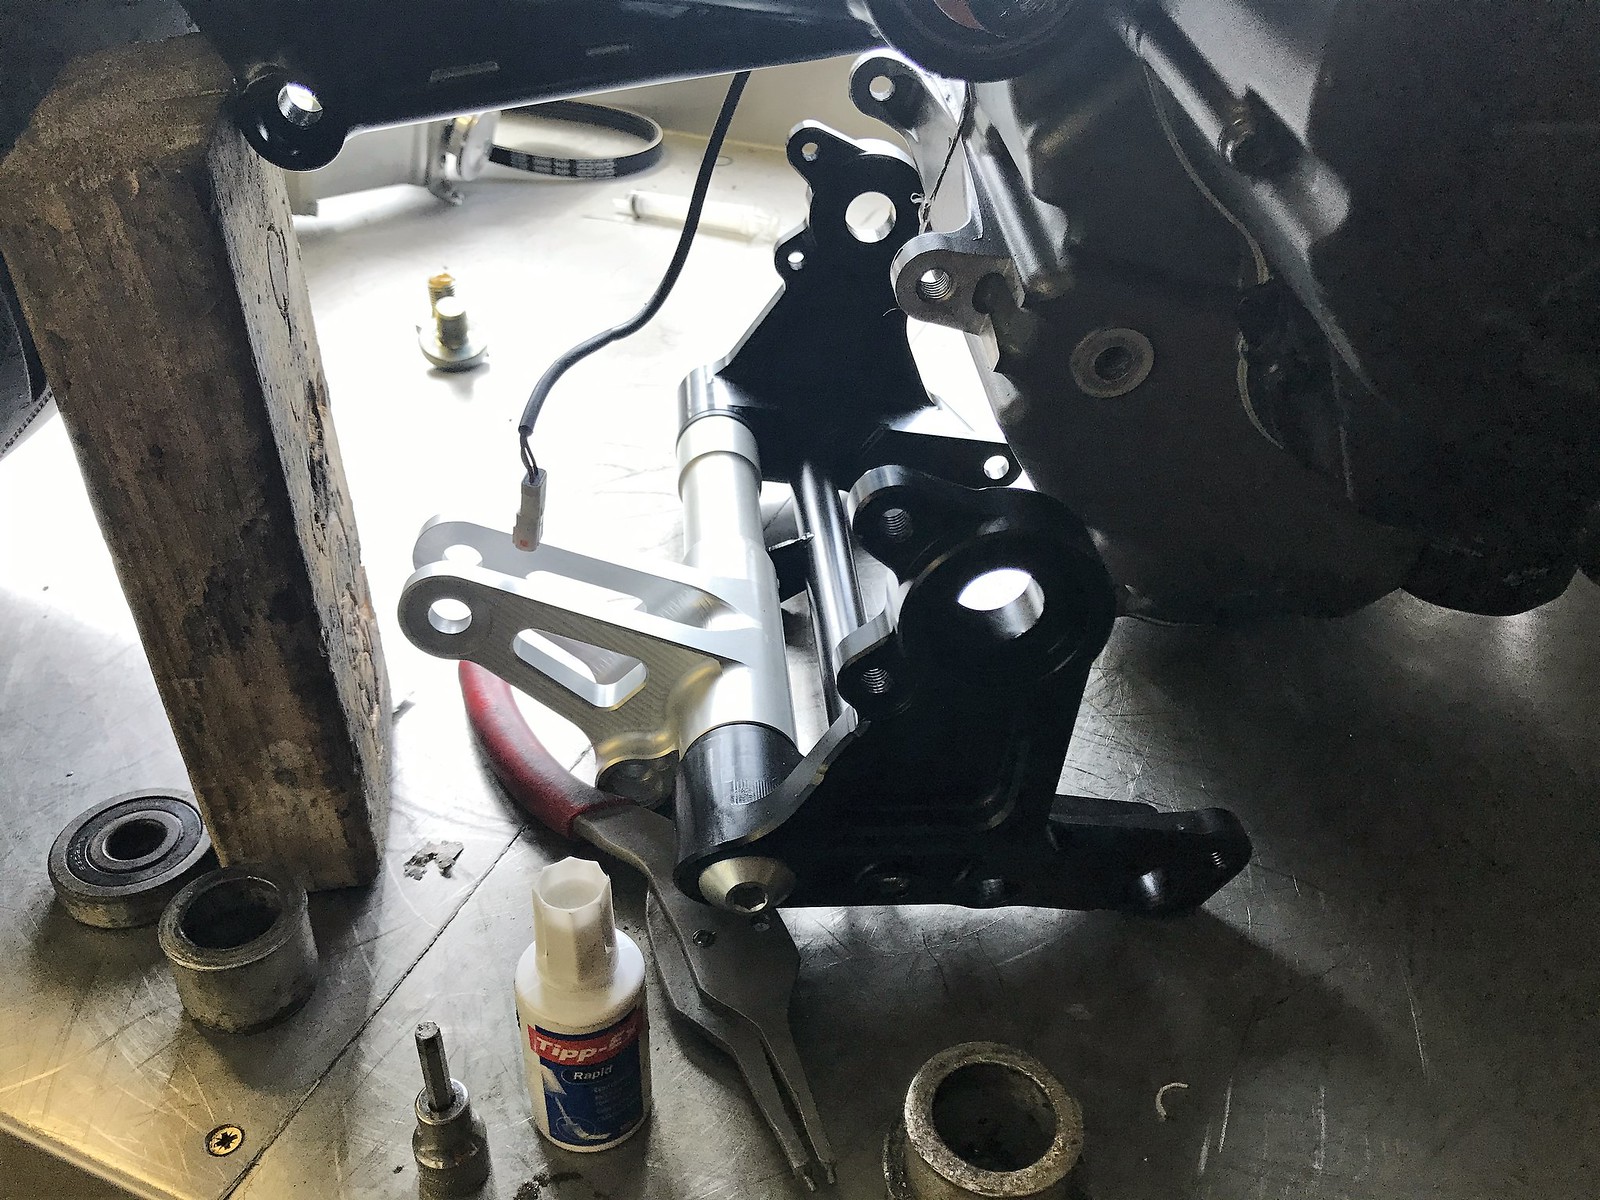
All this section had to be pressed together and offered up to the rear section of the Ducati Diavel engine.
 IMG_0160 (1) by Gavin Robertson, on Flickr IMG_0160 (1) by Gavin Robertson, on Flickr
Everything has to be oiled, greased and assembled by press or copper mallet and the magical hands of a 6 year year old...........I have 57 year old hands more akin to a Scottish sausage.....my hands ached after each assembly.
 IMG_0198 by Gavin Robertson, on Flickr IMG_0198 by Gavin Robertson, on Flickr
Undeterred, I collected the alloy sections from the anodizers, they also coated the new front spindle (made to fit the Bennelli TNT 1130 wheel and Diavel Forks)
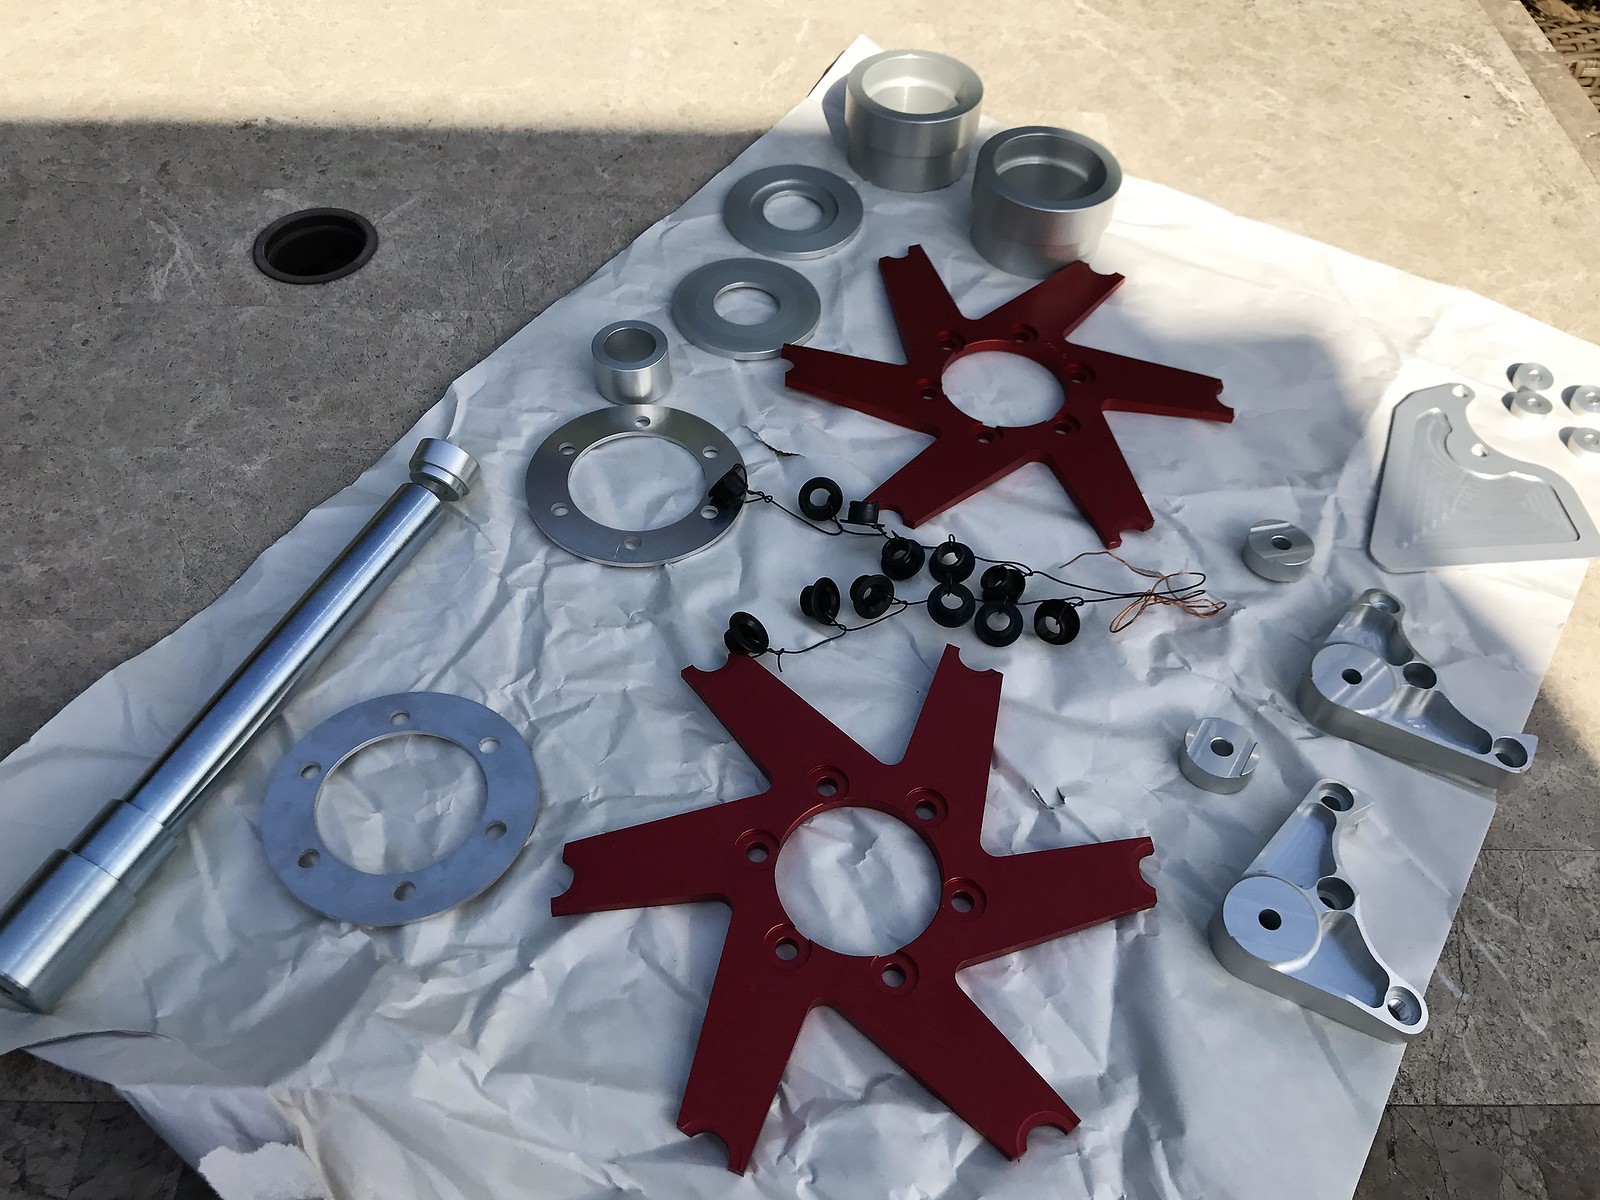 IMG_0169 by Gavin Robertson, on Flickr IMG_0169 by Gavin Robertson, on Flickr
It turned out better than I thought and the Beringer disc carriers and bobbins came up at treat.
You might also make out the new footpeg bracket....the same as the DB9 version on my bike to accommodate my twisted ankle (from being pinned)
My feet sit at a strange angle after many old injuries and I am more inclined to machine and custom every bike to suit........rather than be in pain
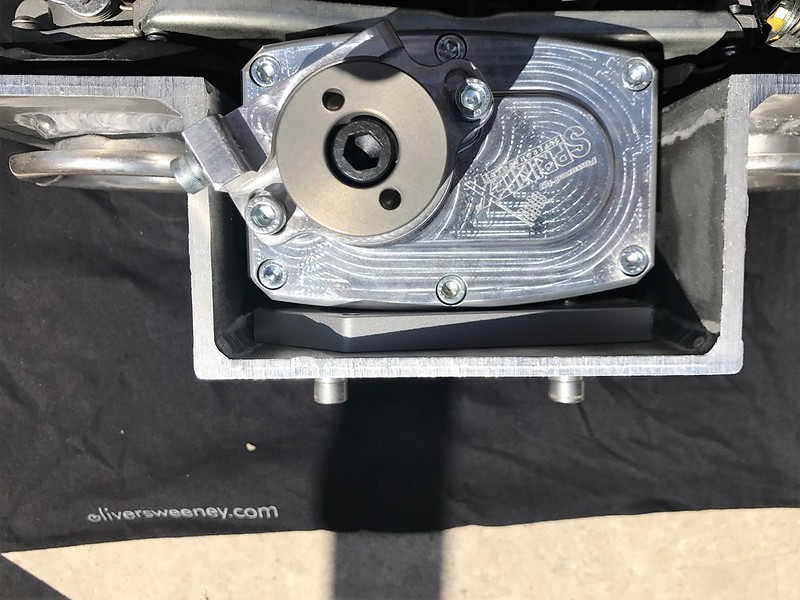
 IMG_0187 by Gavin Robertson, on Flickr IMG_0187 by Gavin Robertson, on Flickr
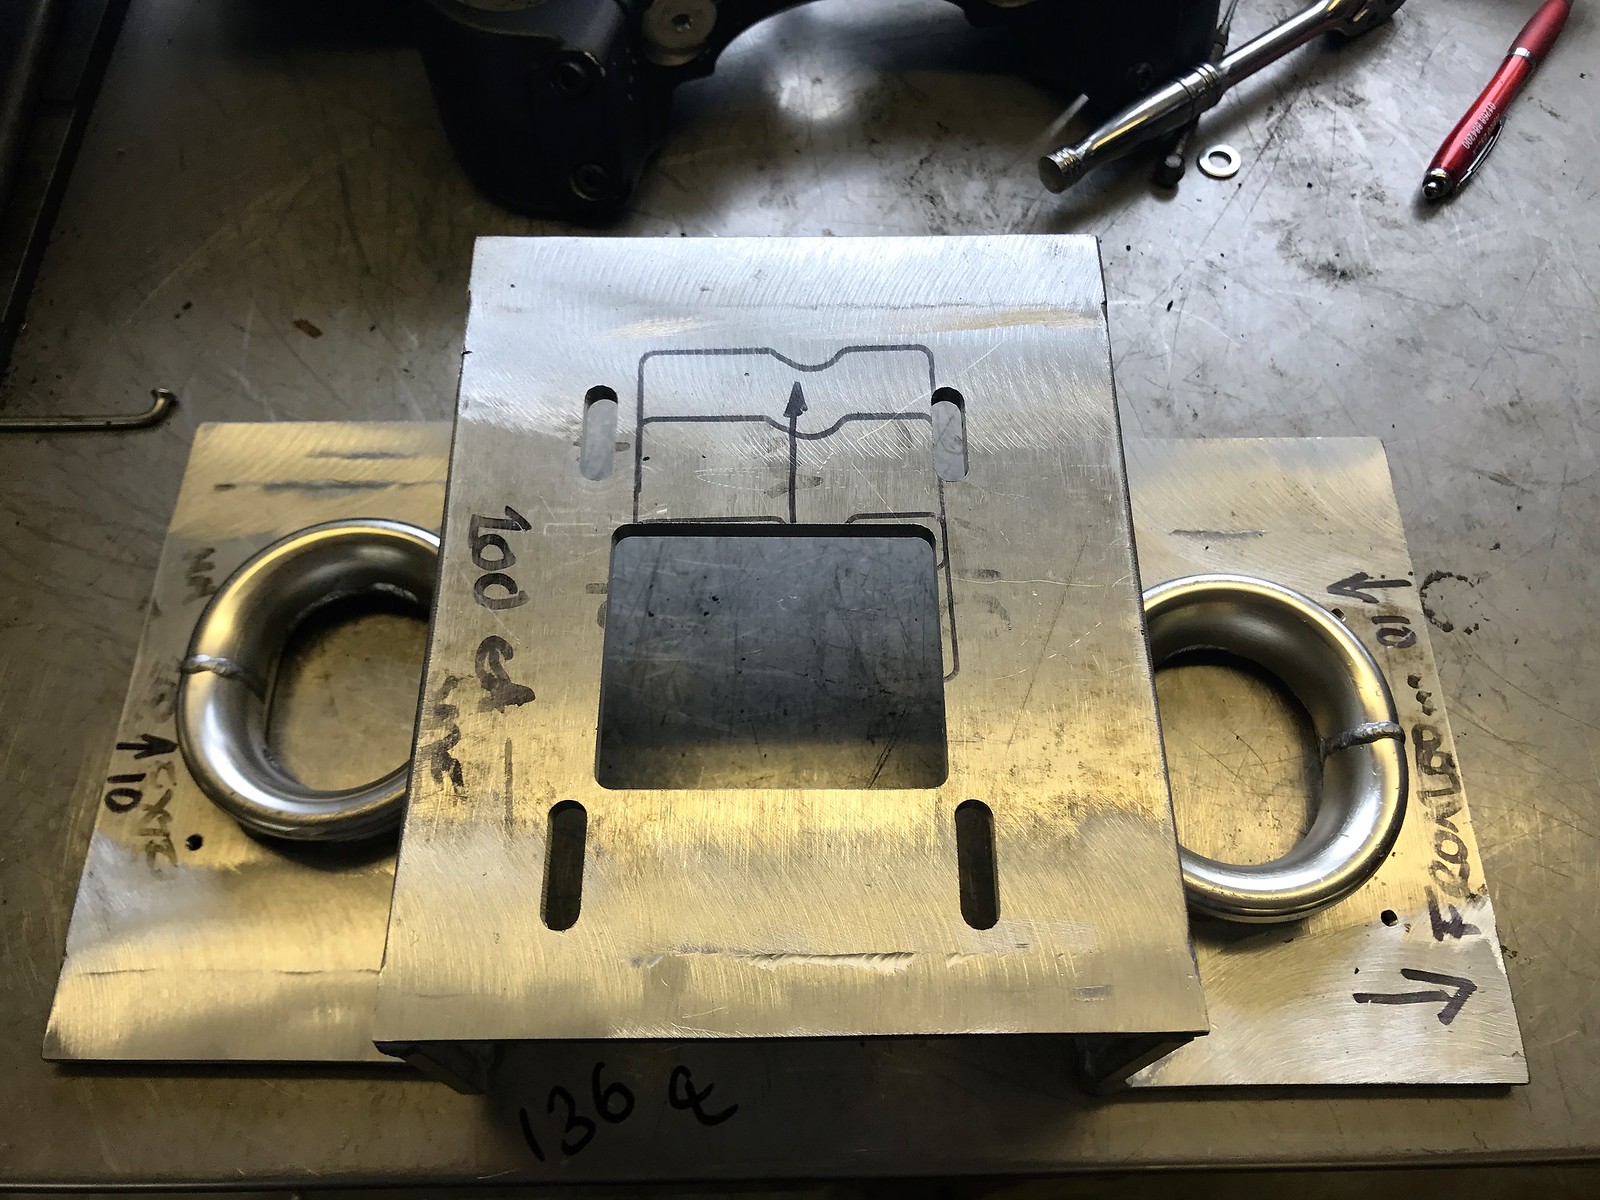
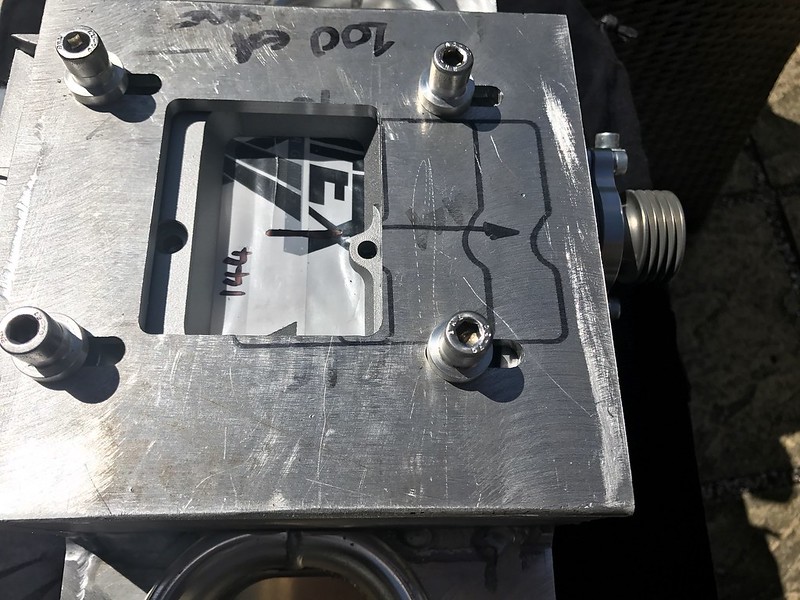
What we have here is the machined Supercharger manifold plate....the one with much marker pen on it.
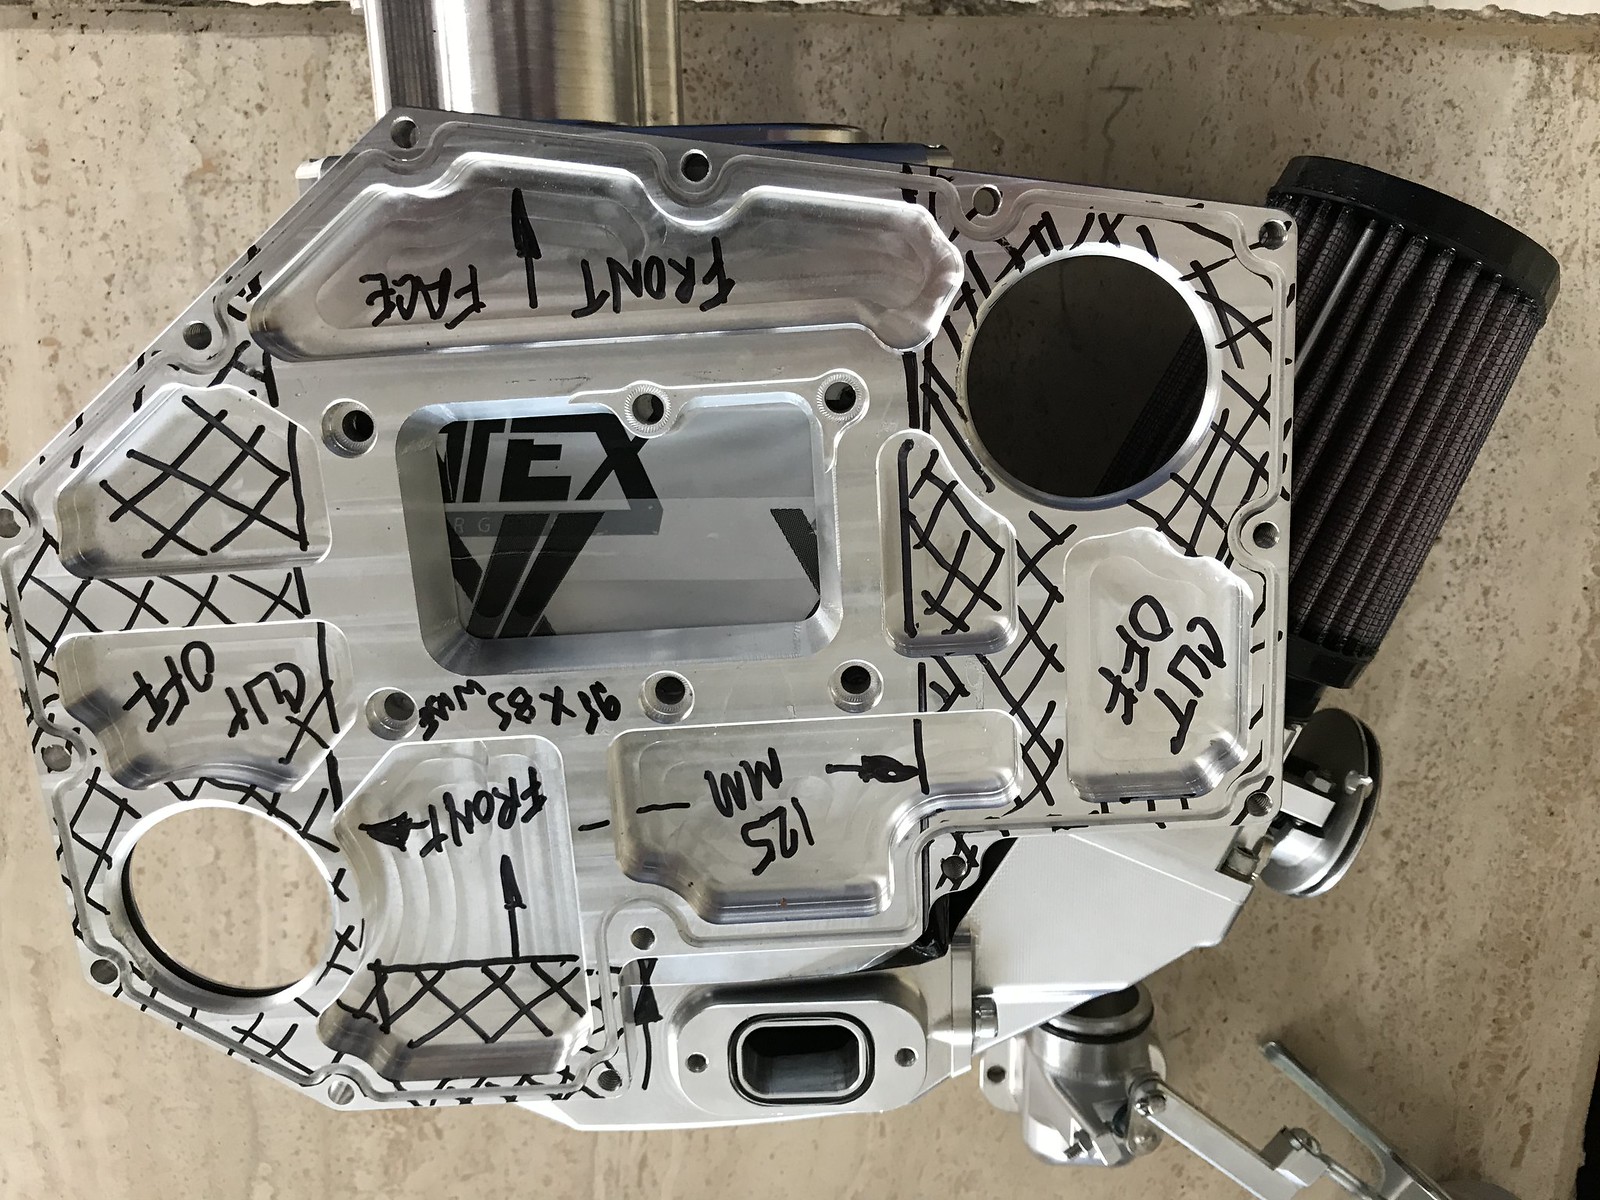 Untitled by Gavin Robertson, on Flickr Untitled by Gavin Robertson, on Flickr
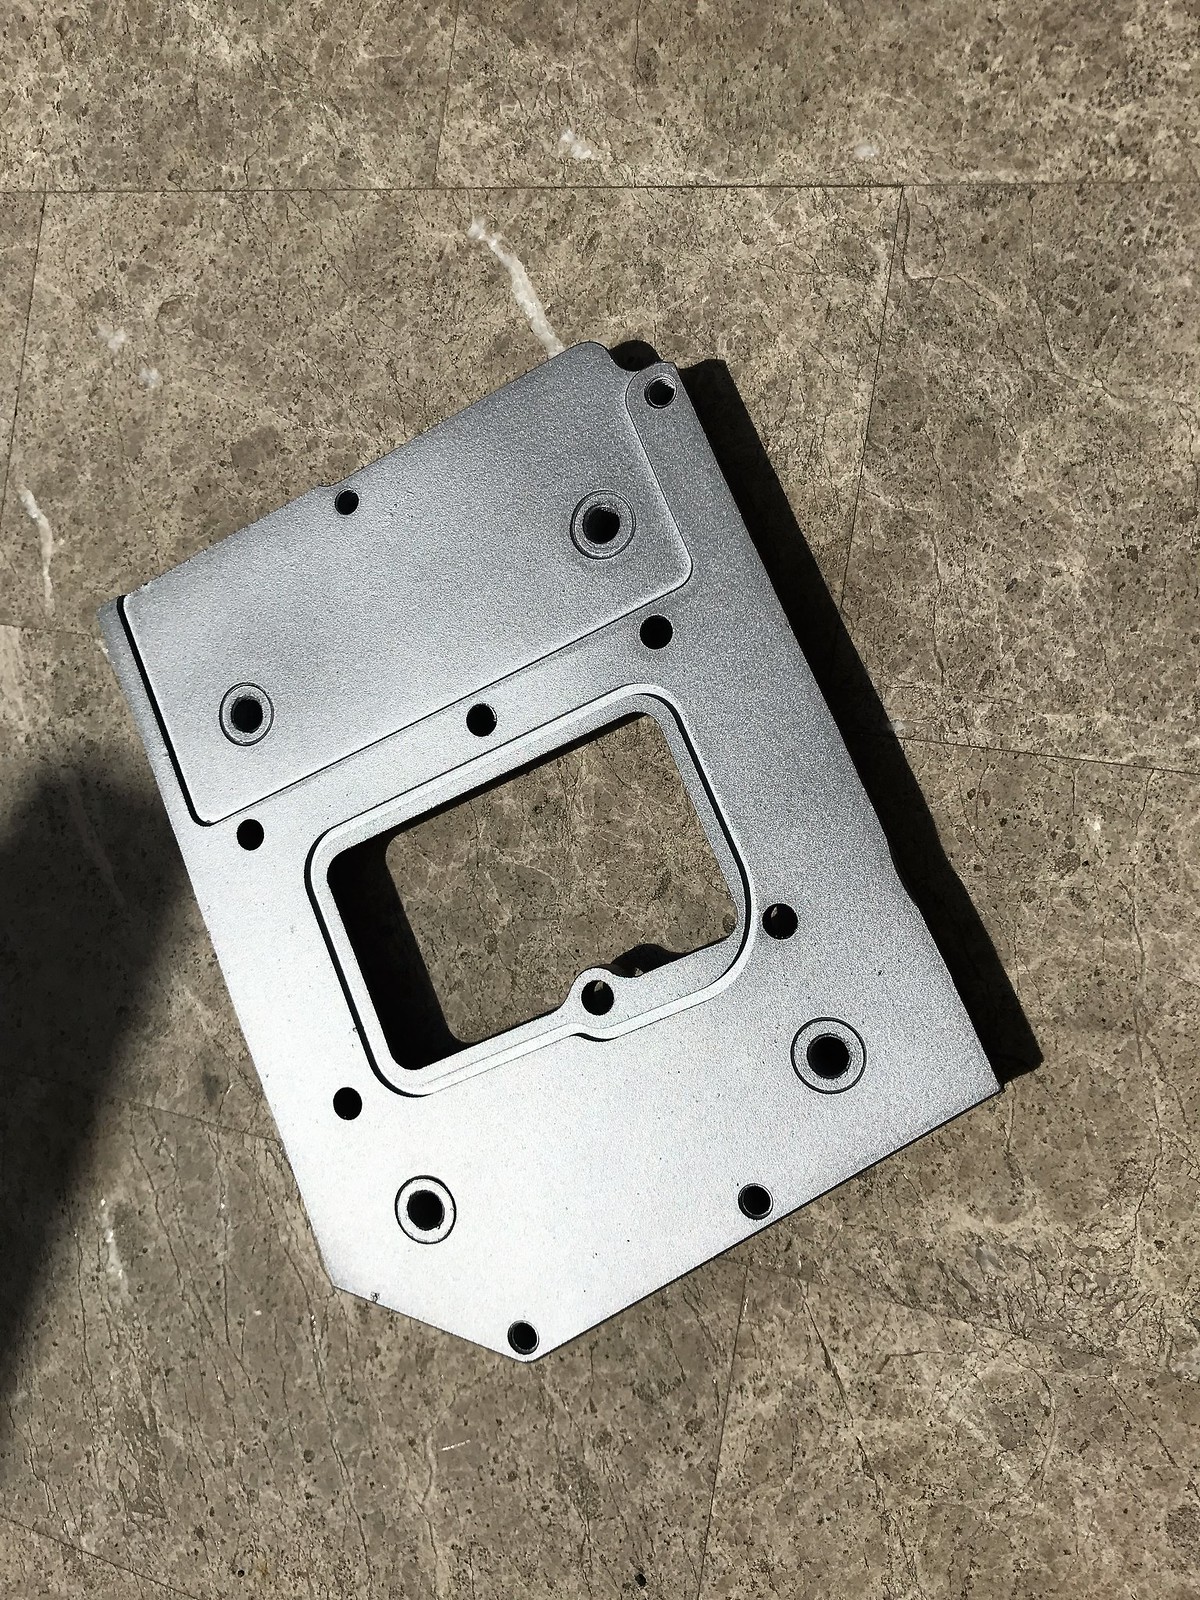
This is what it looked like before the machining.
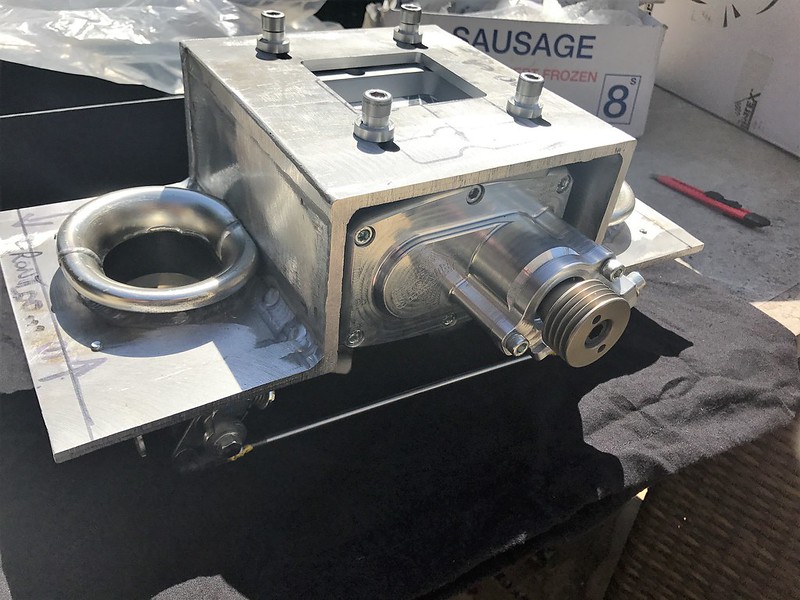
 IMG_0189 by Gavin Robertson, on Flickr IMG_0189 by Gavin Robertson, on Flickr
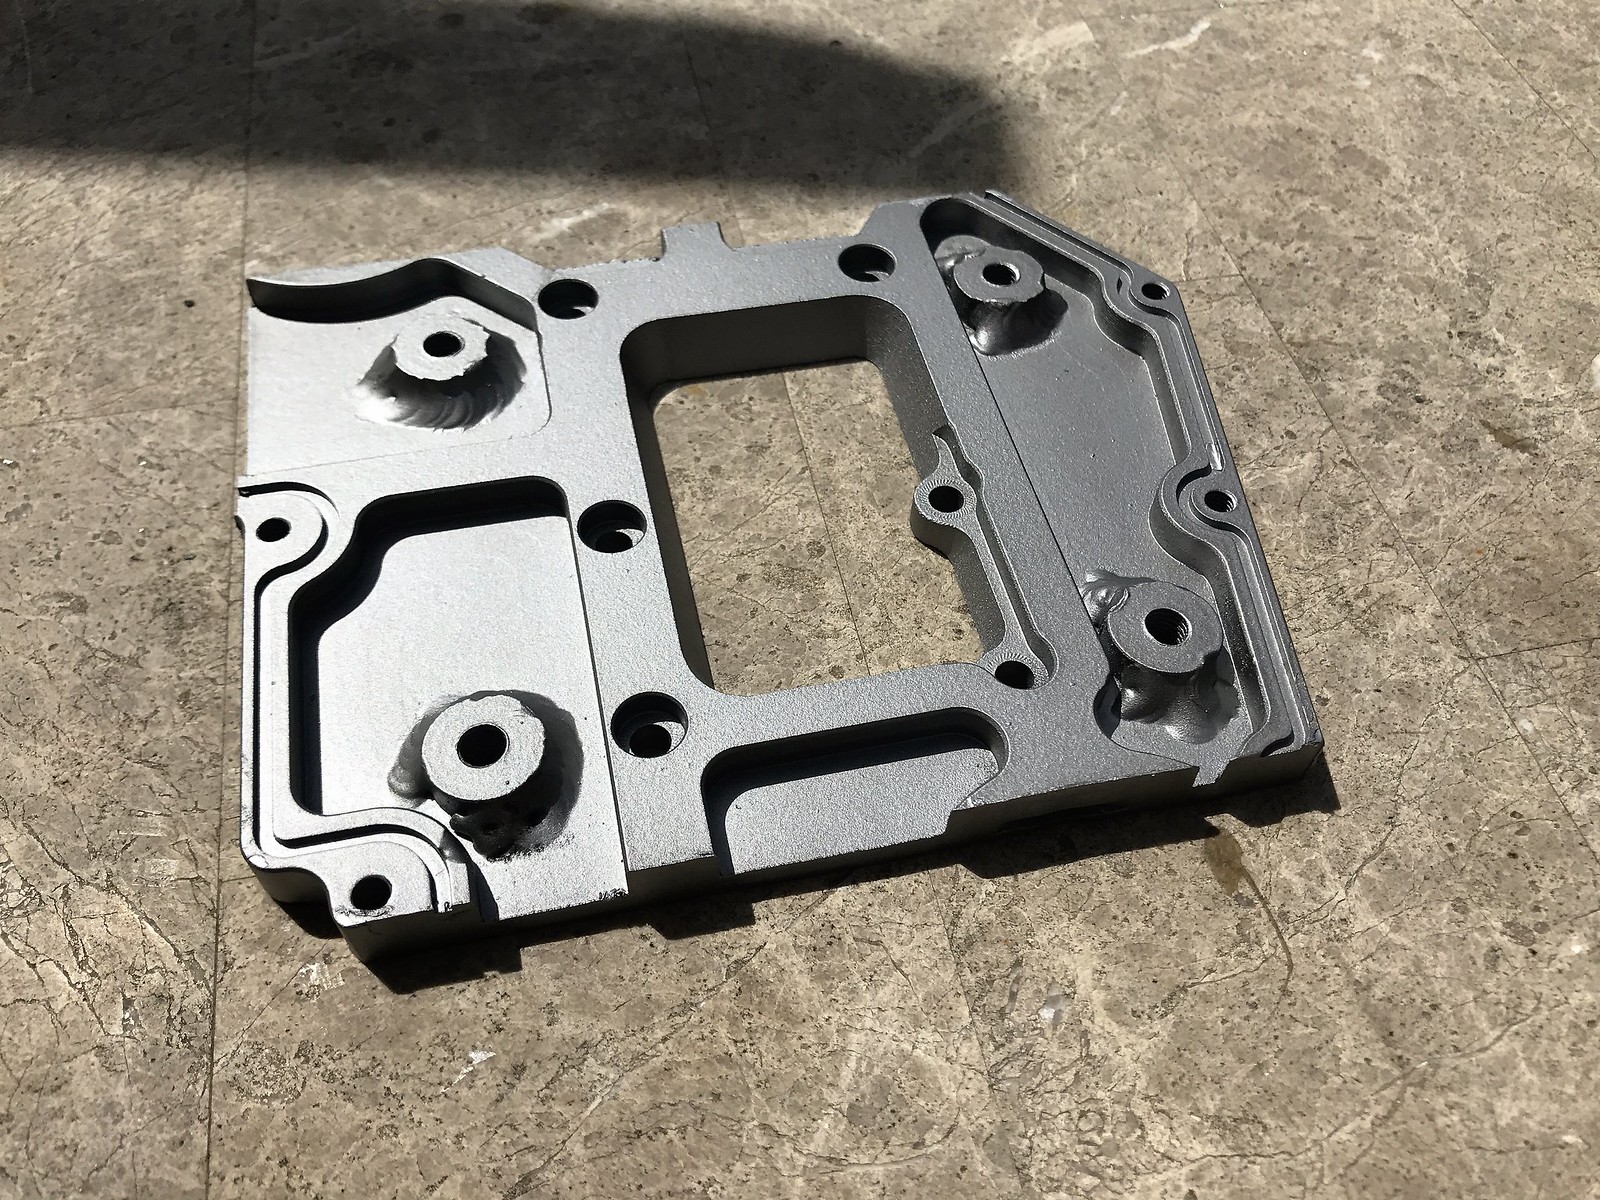
This is the other side after 4 machined bosses (to run in the slots of the bridge) were pressed into a interference fit hole and welded into place.
 IMG_0200 by Gavin Robertson, on Flickr IMG_0200 by Gavin Robertson, on Flickr
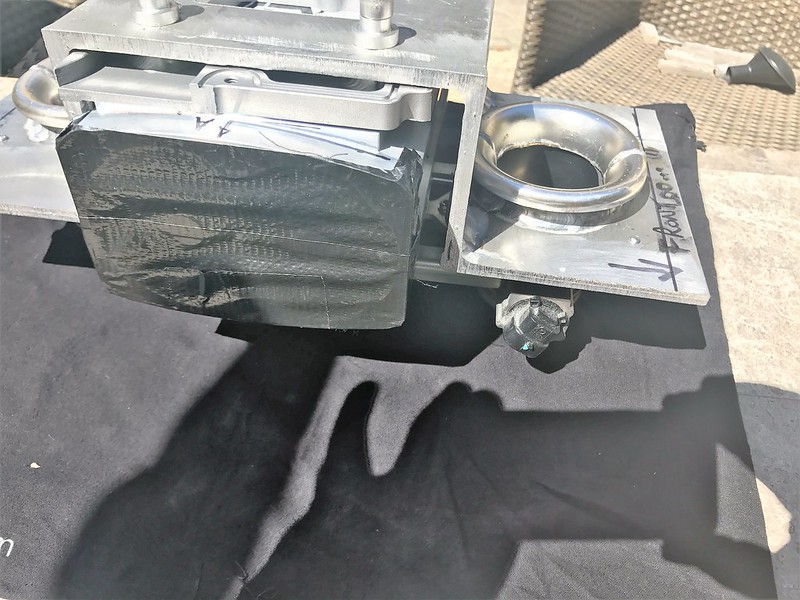
The Supercharger manifold bolts to the supercharger and this whole assembly hangs from the Bridge and can be aligned in the slots.
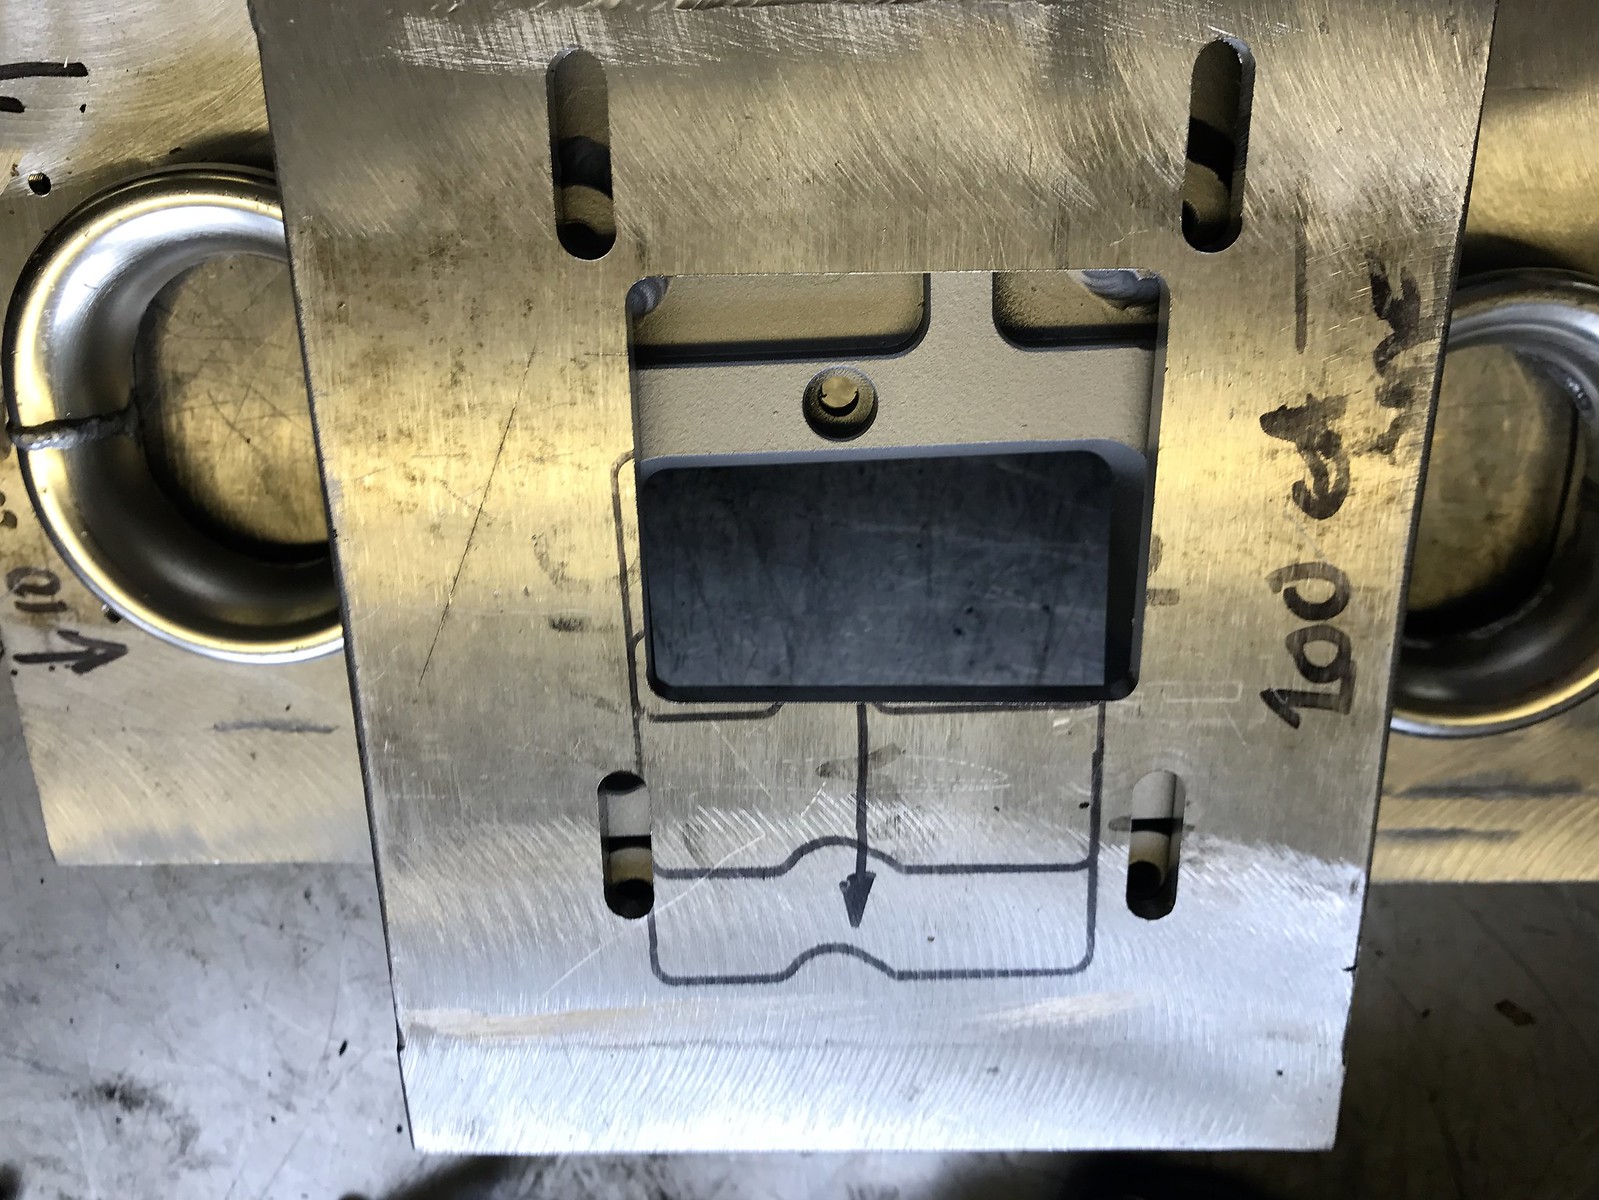 IMG_0201 by Gavin Robertson, on Flickr IMG_0201 by Gavin Robertson, on Flickr
Here you can see the Bridge partly machined but with the slots and air outlet from the Supercharger all in show.
After this the Bridge will be reduced in size.....have some location points added and then coated with something fuel resistant PRIOR to the custom air box being fabricated.
This section of work has been the most time consuming....on and off the engine many times and then in and out of the frame to check measurements and clearance as well as location issues.
 IMG_0199 by Gavin Robertson, on Flickr IMG_0199 by Gavin Robertson, on Flickr
 IMG_0196 by Gavin Robertson, on Flickr IMG_0196 by Gavin Robertson, on Flickr
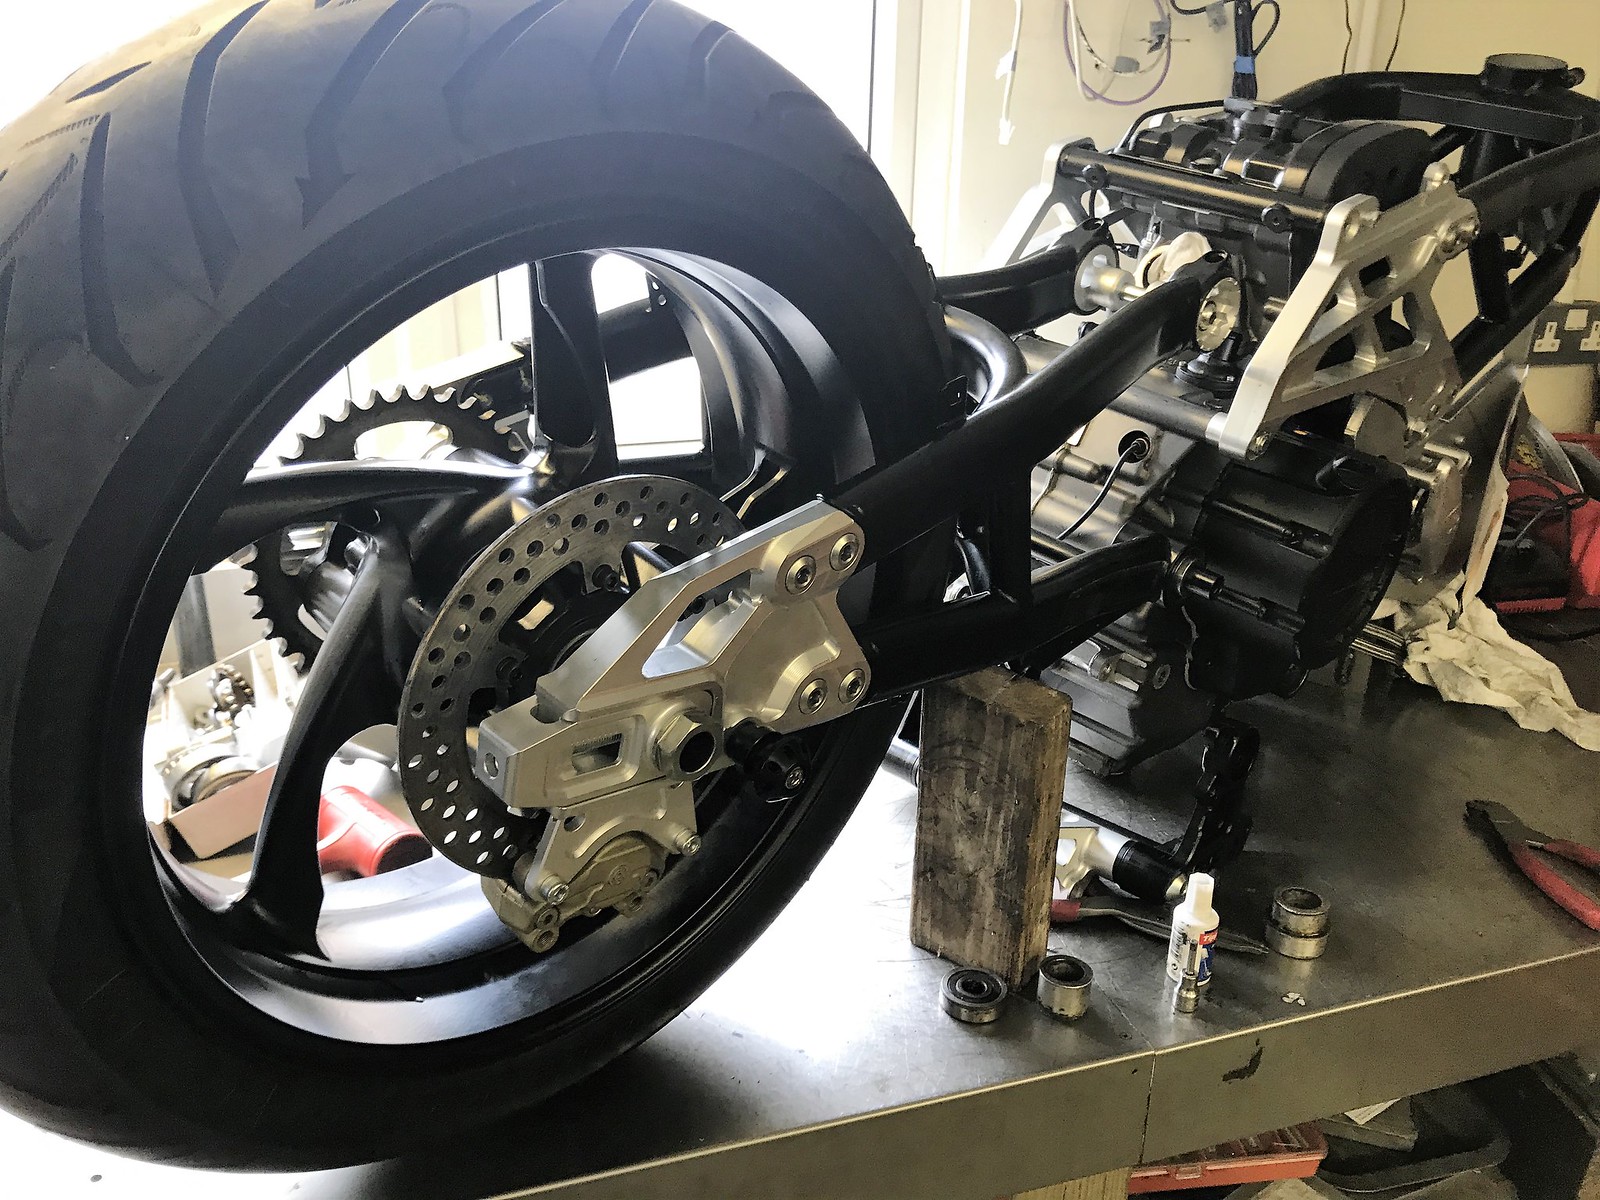
I had to kick on with the rear section whilst the bearing cups and spindles were at the anodizers.....this meants locating the rear wheeel and using a very non standard 220mm rear disc from a VOR at a fraction of a BIMOTA item.
Likewise I had an issue with a Ducati rear caliper...nothing serious...I just had to Helicoil the caliper.....so that the Bimota bracket was on FULL view rather than the Ducati way of bolting into the carrier not the caliper....ahh BIMOTA
This was then all assembled with washers and spaced...... before custom alloy spacers were machined and matched the wheeel to the OEM 269GBP BIMOTA rear spindle
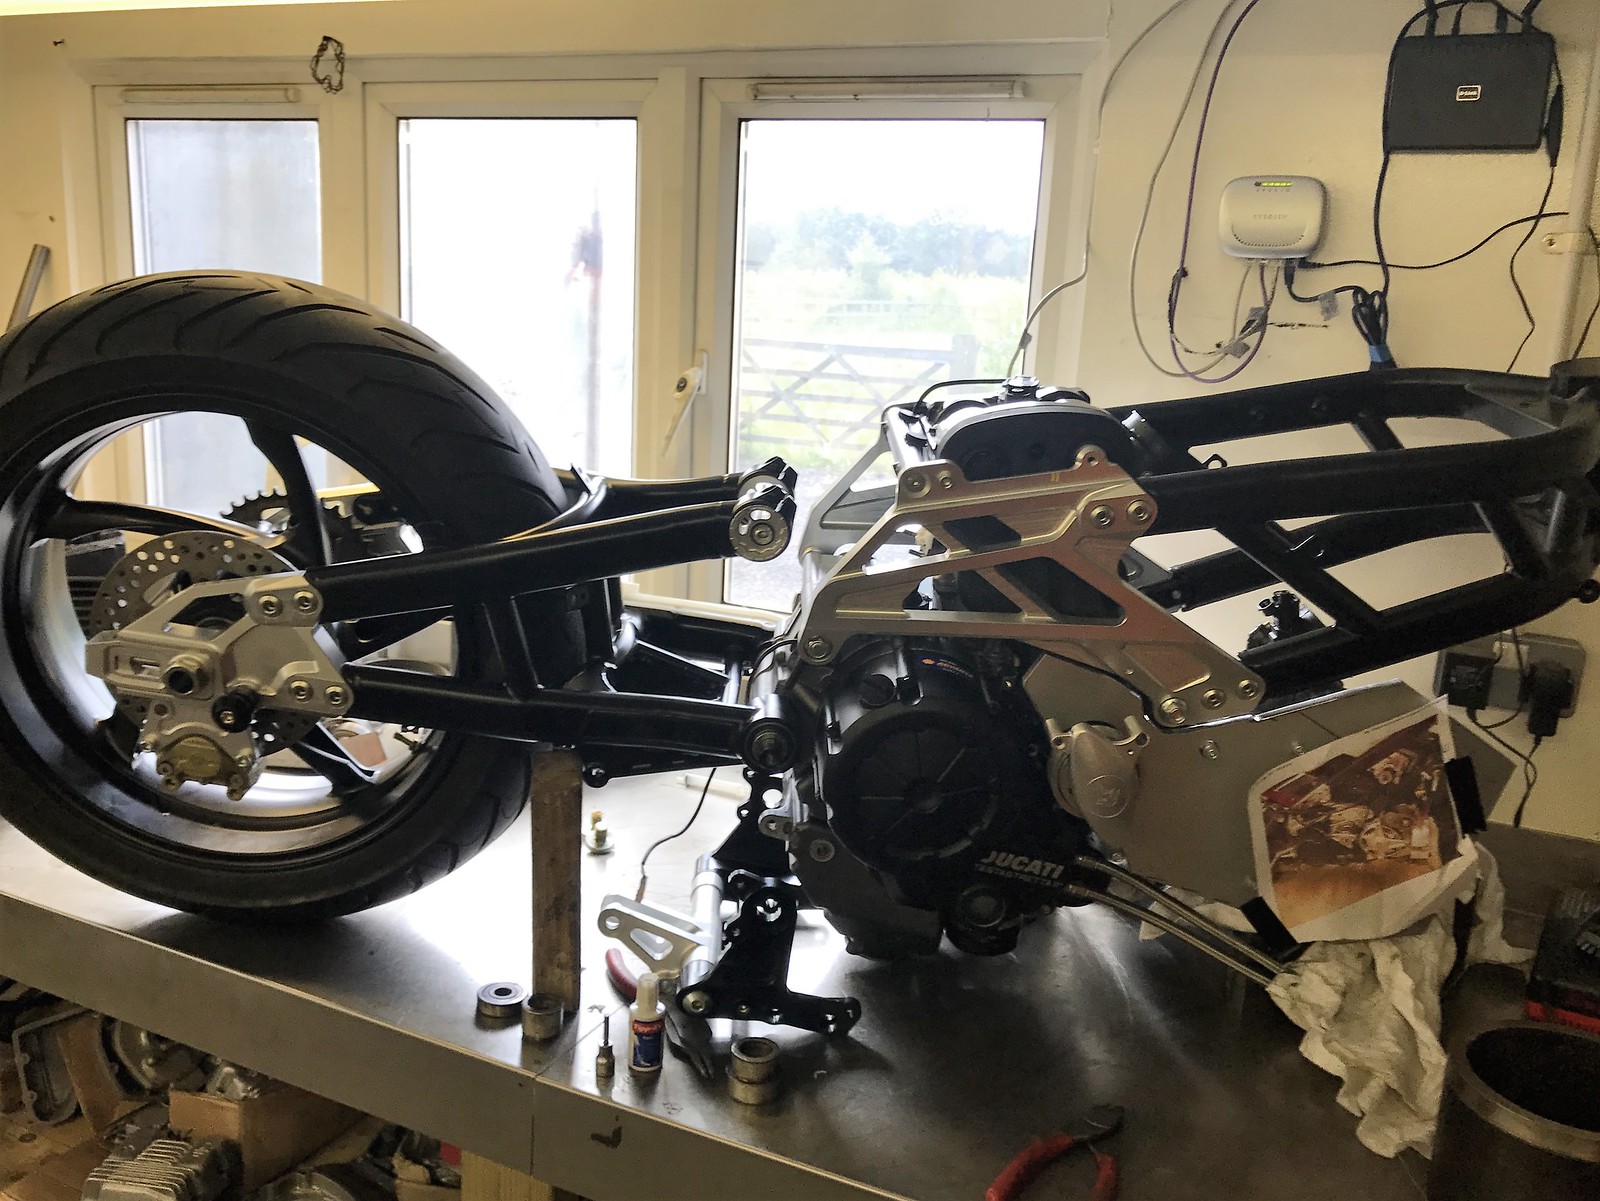
Next week the front will be on and then some makeshift bars before it goes to Electro34 the wiring company.
Whilst it is away the air-box has to be fabricated in alloy sheet.....strong enough for 5 bar pressure
 Untitled by Gavin Robertson, on Flickr Untitled by Gavin Robertson, on Flickr
It has to replace this shape and design....from my DB9....it may be a bit of a challange
 Untitled by Gavin Robertson, on Flickr Untitled by Gavin Robertson, on Flickr
Still...............what can go wrong?
More after the front wheel is in and the wiring is sorted....have I mentioned....I HATE ELECTRICS!
Gavin
_________________
On an Island in the River Thames!
Cagiva Elefant 888/955 & adventure sidecar
Cagiva Elefant 999r engined
Cagiva BIMOTA Motard Concept
BIMOTA DB9 (with DB11 rear-end)
BIMOTA DB7-11 VLX MULE (build coming to an end)
BIMOTA DB11 VLX Supercharger |
|
| Back to top |
|
|
GeeKay
Joined: 29 May 2009
Posts: 1767
Location: West Yorkshire
|
| Posted: Fri Jun 30, 2017 6:48 pm Post subject: |
|
|
errrrr - WOW !
preferred the black marker pen to that fancy milling though 
_________________
Bimota SB6 and Benelli TNT 899S road bikes.
Beta Techno trials iron. Project bikes:- Suzuki V4 500, TS185 cafe racer, XR11/71, Kettle/Katana, TDRGV250, OR50, Gag125,Triumph T595 and a Triumph X75 Hurricane replica.
Too many projects............... |
|
| Back to top |
|
|
Gavin944888
Joined: 29 Jan 2014
Posts: 572
Location: Essex....way South of Scotland
|
| Posted: Fri Jun 30, 2017 7:31 pm Post subject: |
|
|
Well thanks GeeKay".......I am grateful that you like the project
A big day getting it up onto its hind legs......so to speak.
More machining this weekend.......swarf and white water .......great.
Got a couple of bits left over........might have to double check the drawings again..........I'll get my coat!
Gavin
_________________
On an Island in the River Thames!
Cagiva Elefant 888/955 & adventure sidecar
Cagiva Elefant 999r engined
Cagiva BIMOTA Motard Concept
BIMOTA DB9 (with DB11 rear-end)
BIMOTA DB7-11 VLX MULE (build coming to an end)
BIMOTA DB11 VLX Supercharger |
|
| Back to top |
|
|
Gavin944888
Joined: 29 Jan 2014
Posts: 572
Location: Essex....way South of Scotland
|
| Posted: Wed Jul 05, 2017 3:05 pm Post subject: |
|
|
Gentlefolk of Bimota tinkering .....
Sorry about the size of the images..............still getting to grips with Flickr and uploading.
However .......the supercharger and its adjustable manifold, are nearing completion.
 IMG_0206 by Gavin Robertson, on Flickr IMG_0206 by Gavin Robertson, on Flickr
Here you can see the supercharger bolted to the manifold and then the assembly mounted in the bridge.
 IMG_0208 by Gavin Robertson, on Flickr IMG_0208 by Gavin Robertson, on Flickr
Above another view but not the best, this is the air inlet side..............where as below .....it makes more sense....the spinning side with belts and stuff!.
 IMG_0203 by Gavin Robertson, on Flickrm IMG_0203 by Gavin Robertson, on Flickrm
The silver Duct tape in the photo No 2 covers the air inlet and DIRECT access to the turbines....must be kept clean at all costs!
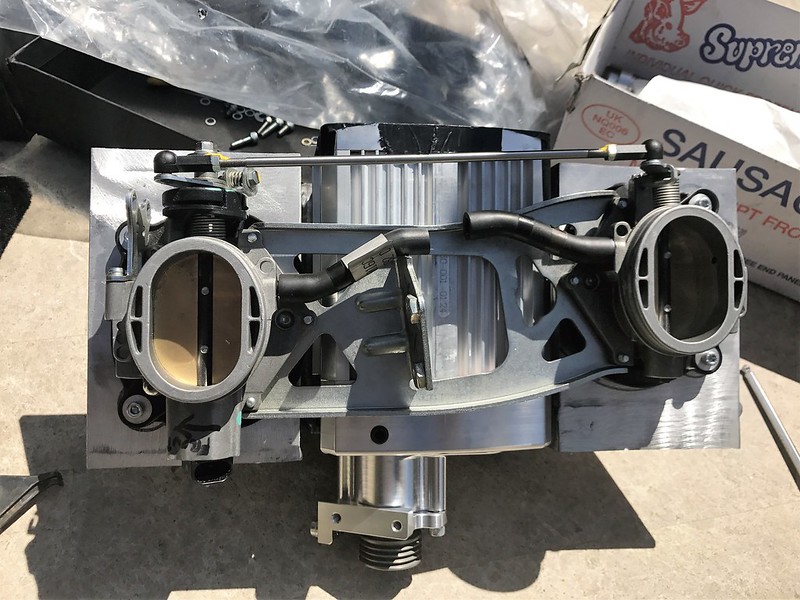
 IMG_0209 by Gavin Robertson, on Flickr IMG_0209 by Gavin Robertson, on Flickr
In this image you can see the unit UPSIDEDOWN...but it shows the super charger and the sliding arrangement of the manifold and how it clears the OEM Ducati 1098 throttle bodies.
The bridge will take the weight associated with the supercharger and will be bolted to both the engine and the frame.
The OEM air inlets manifolds (still with their rubber flexible inlet tracts) will absorb any vibration...... but NOT the weight.
 IMG_0212 by Gavin Robertson, on Flickr IMG_0212 by Gavin Robertson, on Flickr
This is the underside of the assembly where it mounts into the air inlet manifolds and is secure by jubilee clips!
The 2 hoses are meant to link up to the OEM Ducati Stepper Motor.
The OEM throttle bodies are DUCATI standard but are bolted to a customised fabricated alloy bridge and oval alloy bellmouths.
Now everything fits it is time to clean the wels and cut off any excess metal.
After this has been done the AIRBOX proper...so to speak...has to be fabricated......before that, it has to have its wiring positioned and ran from front to back.
More to follow.
regards
Gavin
_________________
On an Island in the River Thames!
Cagiva Elefant 888/955 & adventure sidecar
Cagiva Elefant 999r engined
Cagiva BIMOTA Motard Concept
BIMOTA DB9 (with DB11 rear-end)
BIMOTA DB7-11 VLX MULE (build coming to an end)
BIMOTA DB11 VLX Supercharger |
|
| Back to top |
|
|
djt77
Joined: 27 Feb 2008
Posts: 413
Location: Perth, Western Australia
|
| Posted: Thu Jul 06, 2017 12:44 am Post subject: |
|
|
| looking good there Gavin, keep up the impressive work |
|
| Back to top |
|
|
Gavin944888
Joined: 29 Jan 2014
Posts: 572
Location: Essex....way South of Scotland
|
| Posted: Tue Jul 11, 2017 4:46 pm Post subject: |
|
|
Hello.........again.
The weekend was full of machining...white water and swarf.
Took me back to the days, when we heated the scotch pies on the bearing heat plates....aaahhhh the smell of mutton and penetrating oil.
 IMG_0224 by Gavin Robertson, on Flickr IMG_0224 by Gavin Robertson, on Flickr
The yokes were dismantled and the pin copied, but with additional detail and measurement.
I am not a lover of ball bearing steering heads
.they should all be oversize taper bearings.
Here is the steering new pin...next to a machined lay shaft and drive cogs plus some super charger pulley bits.
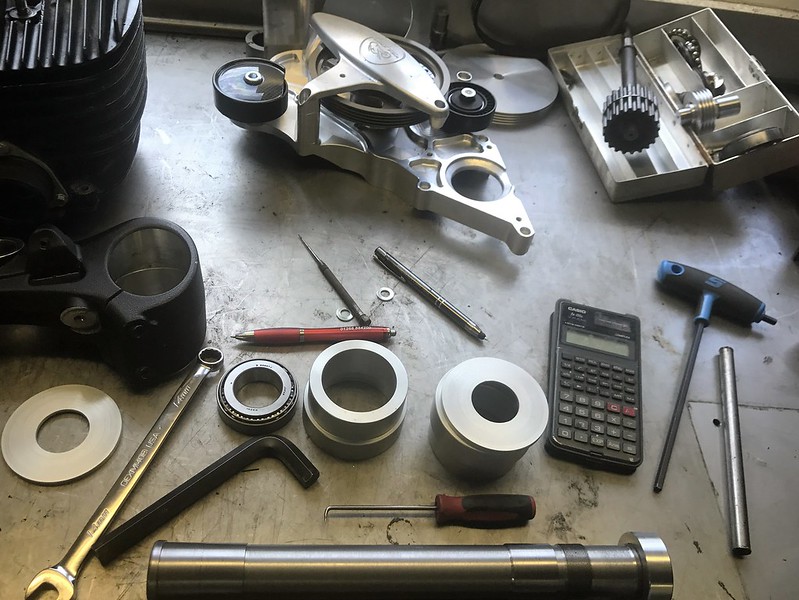 IMG_0225 by Gavin Robertson, on Flickr IMG_0225 by Gavin Robertson, on Flickr
And here we have the steering pin in its final position and with ring nut...a machined boss with dowel hole to tighten everything up!
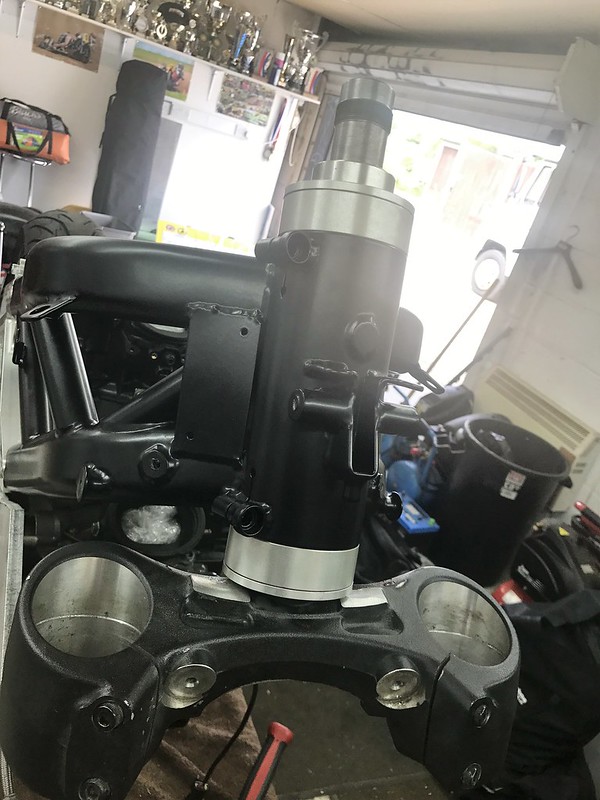
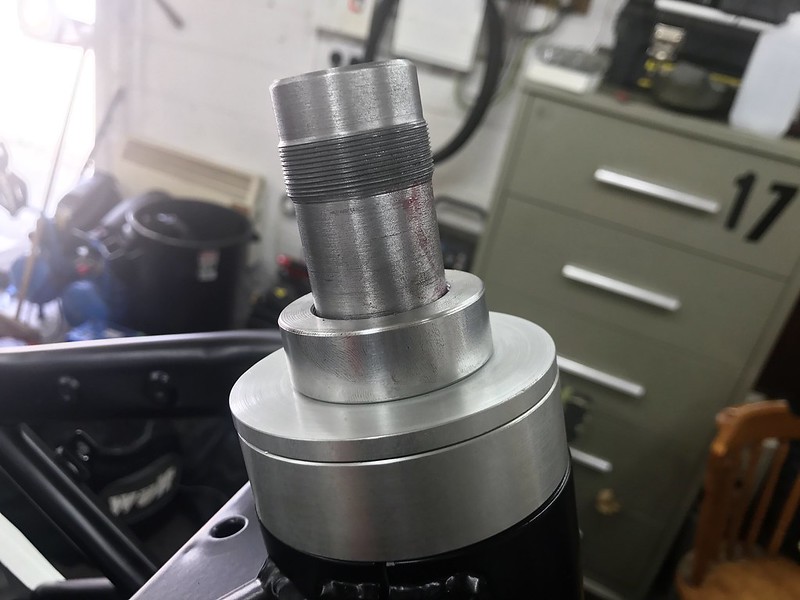 IMG_0240 by Gavin Robertson, on Flickr IMG_0240 by Gavin Robertson, on Flickr
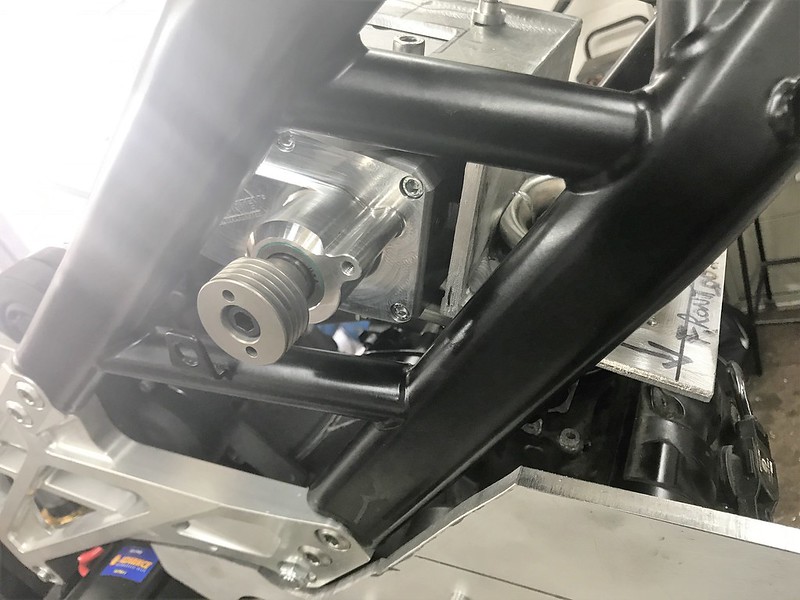
This shot shows the finished assembly...the 2 machined bosses on the yoke are earmarked to take the lithium battery box.
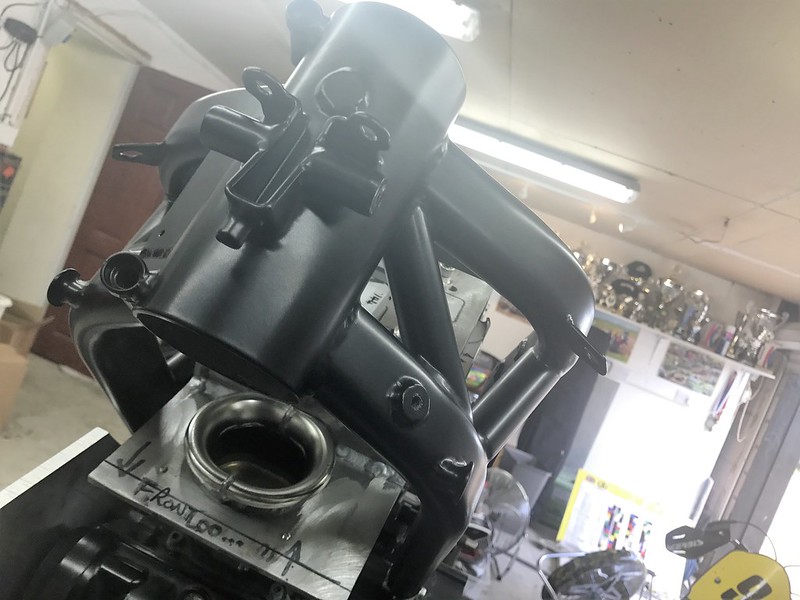
 IMG_0237 by Gavin Robertson, on Flickr IMG_0237 by Gavin Robertson, on Flickr
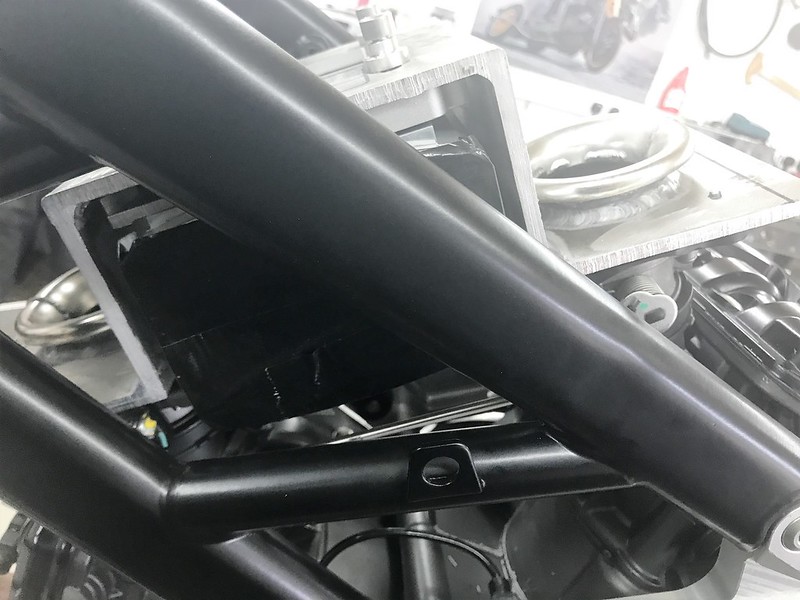
Once the Supercharger had been assembled, final measurements could be taken in situ on the engine and in the frame.
 IMG_0226 by Gavin Robertson, on Flickr IMG_0226 by Gavin Robertson, on Flickr
The black marker line shows where the excess metal can be removed.
 IMG_0228 by Gavin Robertson, on Flickr IMG_0228 by Gavin Robertson, on Flickr
Here you can see the unit from a different angle.
 IMG_0230 by Gavin Robertson, on Flickr IMG_0230 by Gavin Robertson, on Flickr
The boring side.....this is where the air enters the twin screw turbines...currently covered by duct tape.
 IMG_0232 by Gavin Robertson, on Flickr IMG_0232 by Gavin Robertson, on Flickr
The air box dimensions were reduced to a max size of 360mm long X 215mm wide and 130mm at its highest point.
The next time you see it the BOX will have built around it ......along with pressure and temp sensors
 IMG_0234 by Gavin Robertson, on Flickr IMG_0234 by Gavin Robertson, on Flickr
The wheels, both front and rear, were positioned with the new spindles and spacers.
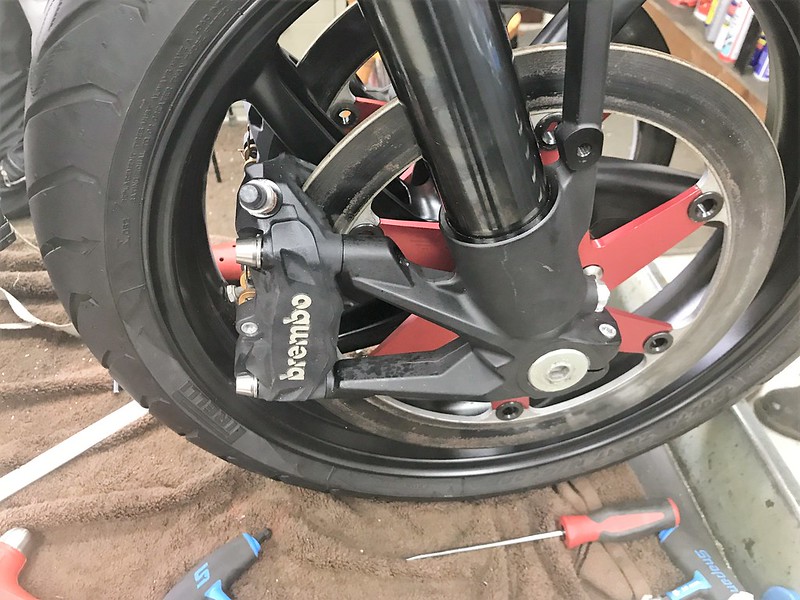 IMG_0246 by Gavin Robertson, on Flickr IMG_0246 by Gavin Robertson, on Flickr
The initial measurements were good..... that all was required was the turning around of the sprocket so that the spacer was at the front and not the rear on the engine spline.
 IMG_0241 by Gavin Robertson, on Flickr IMG_0241 by Gavin Robertson, on Flickr
Once everything went together I was unhappy with the offset
..less than 21 mm and definitely not good given the Bimota steering head angle.
All okay with a Ducati Diavel rake but not so good on the one here.
But it did give me a chance to see how it was all coming together
..and I will need something to do, when the bike goes off to the wiring company.
So now I need to fabricate some yokes to take the strangely sized Diavel forks.
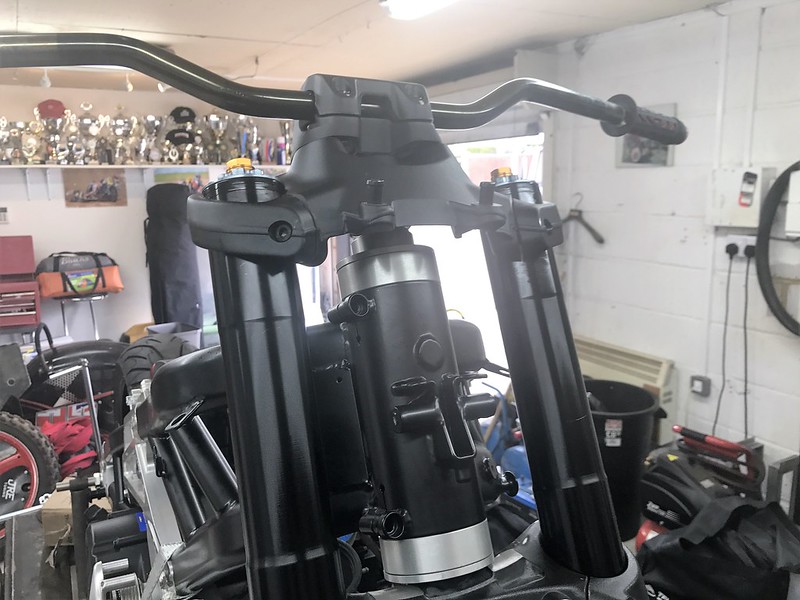 IMG_0244 by Gavin Robertson, on Flickr IMG_0244 by Gavin Robertson, on Flickr
The top yoke was so wrong anyway
so much so that I had made my mind up to make a new one
.only now I was making the complete set.
At the moment the bars and yokes are only there to help move the bike about.
Some alloy sections were bolted together to give some indication as to where to mount the electrics, bearing in mind that the supercharger and air-box will be taking up most of the space.
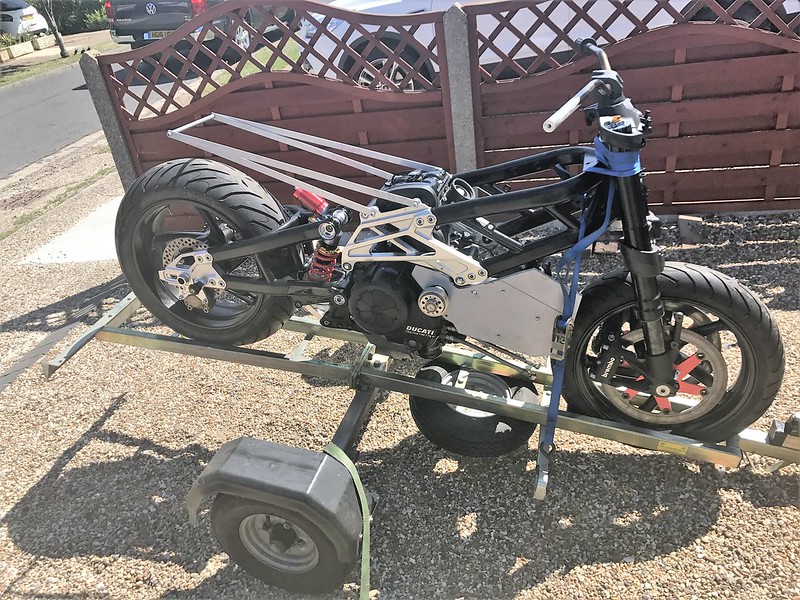 IMG_0249 by Gavin Robertson, on Flickr IMG_0249 by Gavin Robertson, on Flickr
Not your usual Bimota stance.....granted, but close to my initial ideas
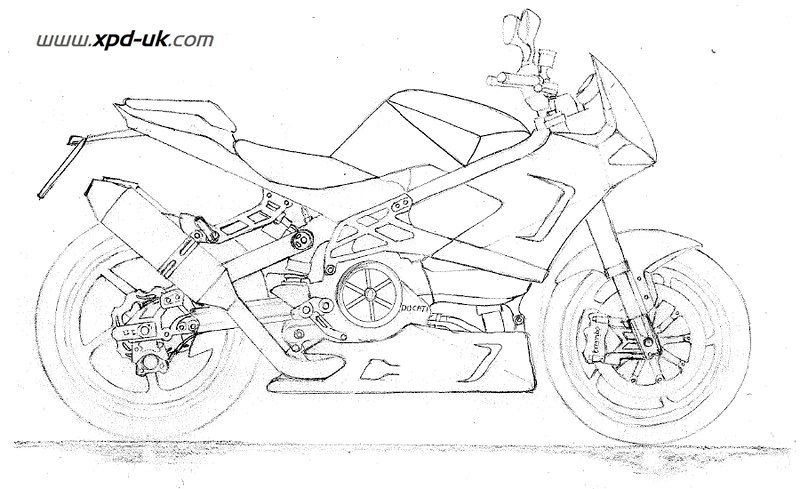 bimota-impeto-concept-sketch7 by Gavin Robertson, on Flickr bimota-impeto-concept-sketch7 by Gavin Robertson, on Flickr
And here is the version that BIMOTA said they were going to build.........hhhmmm
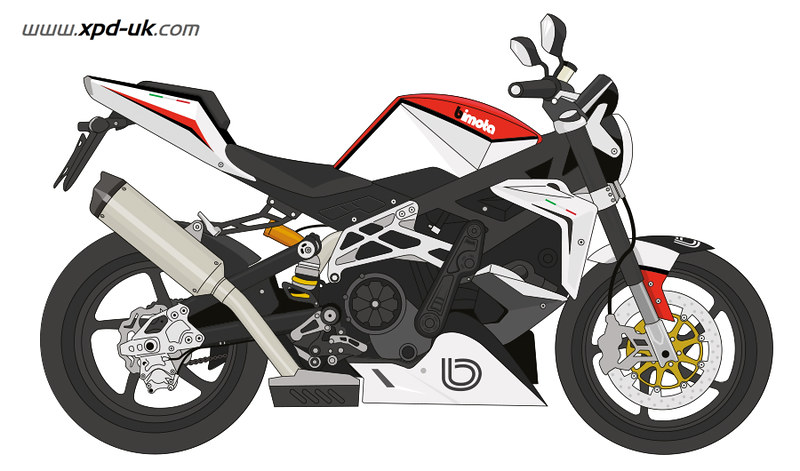 Bimota-Impeto-DB11-DB13-Illustration by Gavin Robertson, on Flickr Bimota-Impeto-DB11-DB13-Illustration by Gavin Robertson, on Flickr
Slowly but surely................it is biking season.
I am off to Germany in a week or so then France,......things will be slower now.
regards
Gavin
_________________
On an Island in the River Thames!
Cagiva Elefant 888/955 & adventure sidecar
Cagiva Elefant 999r engined
Cagiva BIMOTA Motard Concept
BIMOTA DB9 (with DB11 rear-end)
BIMOTA DB7-11 VLX MULE (build coming to an end)
BIMOTA DB11 VLX Supercharger |
|
| Back to top |
|
|
Gammaboy
Joined: 25 Feb 2016
Posts: 188
Location: Brisbane, Australia
|
| Posted: Wed Jul 12, 2017 2:51 am Post subject: |
|
|
| What size are the diavel legs that makes them "strangely sized"? |
|
| Back to top |
|
|
JRH
Joined: 21 Jan 2013
Posts: 223
Location: West Mids/North East
|
| Posted: Wed Jul 12, 2017 2:20 pm Post subject: |
|
|
| Is the Tornado wheel on backwards? |
|
| Back to top |
|
|
Gavin944888
Joined: 29 Jan 2014
Posts: 572
Location: Essex....way South of Scotland
|
| Posted: Wed Jul 12, 2017 8:37 pm Post subject: |
|
|
Hello".......
The forks are 20 thousands of an inch different in diameter between top and bottom yoke position
20 thou......l mean why bother .....unless you made a mistake
The wheels could be on backwards....but I think that they are OK and that the bike is the wrong way round.......l best check!
That is the kind of comment GeeKay usually makes.
Thanks
Gavin
_________________
On an Island in the River Thames!
Cagiva Elefant 888/955 & adventure sidecar
Cagiva Elefant 999r engined
Cagiva BIMOTA Motard Concept
BIMOTA DB9 (with DB11 rear-end)
BIMOTA DB7-11 VLX MULE (build coming to an end)
BIMOTA DB11 VLX Supercharger |
|
| Back to top |
|
|
JRH
Joined: 21 Jan 2013
Posts: 223
Location: West Mids/North East
|
| Posted: Wed Jul 12, 2017 9:54 pm Post subject: |
|
|
Gavin,
Apologies, your project is awesome, and way ahead of anything I would attempt....... I have 2 Benelli's and I hoped mine weren't on wrong 😄 |
|
| Back to top |
|
|
Gavin944888
Joined: 29 Jan 2014
Posts: 572
Location: Essex....way South of Scotland
|
| Posted: Thu Jul 13, 2017 4:35 am Post subject: |
|
|
JRH"......hello,
No apologies needed and no offence intended by my reply.
Scottish sense of humour added to reading the posts after a crap day at the office.
Still can't sleep ......and by the way you are correct....the front wheel is on back to front.
Everything is dry build at the moment and as long as the supercharger is fitted the right way round ......it should all be okay
Always wanted the 900-6 by the way.........and the 650 tornado
Regards
Gavin
_________________
On an Island in the River Thames!
Cagiva Elefant 888/955 & adventure sidecar
Cagiva Elefant 999r engined
Cagiva BIMOTA Motard Concept
BIMOTA DB9 (with DB11 rear-end)
BIMOTA DB7-11 VLX MULE (build coming to an end)
BIMOTA DB11 VLX Supercharger |
|
| Back to top |
|
|
Gavin944888
Joined: 29 Jan 2014
Posts: 572
Location: Essex....way South of Scotland
|
| Posted: Fri Jul 14, 2017 9:06 am Post subject: |
|
|
Okay..........I have to coat the bridge and manifold and I am thinking of Cerakote or something similar.
Has anyone had any UK experience of this type of coating. I know that some of you have coated exhausts but this is a bit more tolerance important.
It is imperative that the Supercharger and manifold are flat and each have a mating surface.......but the manifold has to be treated for fuel and oxidization
Any info or contact details very welcome.
thanks
Gavin
_________________
On an Island in the River Thames!
Cagiva Elefant 888/955 & adventure sidecar
Cagiva Elefant 999r engined
Cagiva BIMOTA Motard Concept
BIMOTA DB9 (with DB11 rear-end)
BIMOTA DB7-11 VLX MULE (build coming to an end)
BIMOTA DB11 VLX Supercharger |
|
| Back to top |
|
|
Gavin944888
Joined: 29 Jan 2014
Posts: 572
Location: Essex....way South of Scotland
|
| Posted: Fri Jul 14, 2017 3:13 pm Post subject: |
|
|
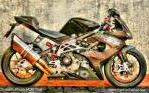
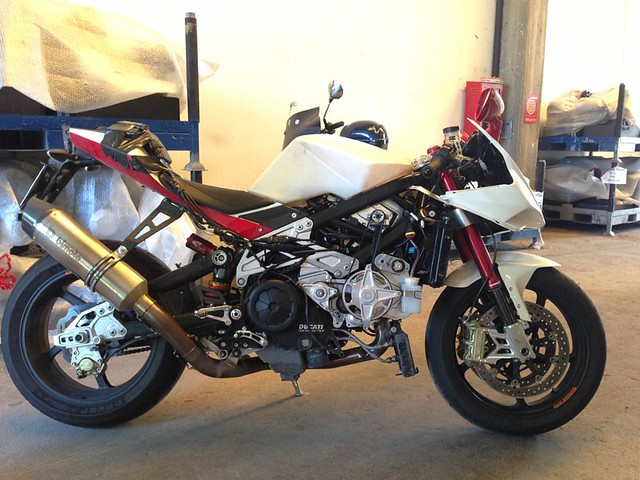
I had mentioned before the bike I had tried to get built.
In fact ....there is an image of it above BUT the obsession which started it all off was this bike.
 B by Gavin Robertson, on Flickr B by Gavin Robertson, on Flickr
This was the original MULE DB7 with the Diavel 1198 engine I witnessed at the factory in June 2014.
 2 by Gavin Robertson, on Flickr 2 by Gavin Robertson, on Flickr
Davide Commandini, was busy testing and you can clearly see, the electronics strapped for easy access to the tail unit.
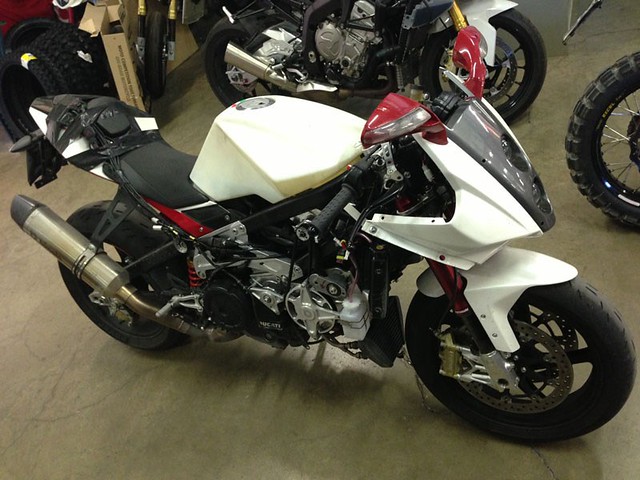 1 by Gavin Robertson, on Flickr 1 by Gavin Robertson, on Flickr
There were 2 versions eventually....the high mileage DB7-11 MULE and the exquisitely finished DB11 VLX version.
I was promised the VLX version...but it did not work out..... followed by the promise of the MULE version...... which vanished!
This bike was the one (which as an engineer) I wanted..... full of marker pen marks and 'on the go' prototype stuff.
Thanks to contacts on this forum and in Italy....the obsession seems to be taking shape.
Labour of love
BIG thanks to those who helped
Gavin
_________________
On an Island in the River Thames!
Cagiva Elefant 888/955 & adventure sidecar
Cagiva Elefant 999r engined
Cagiva BIMOTA Motard Concept
BIMOTA DB9 (with DB11 rear-end)
BIMOTA DB7-11 VLX MULE (build coming to an end)
BIMOTA DB11 VLX Supercharger |
|
| Back to top |
|
|
|
|
You cannot post new topics in this forum
You cannot reply to topics in this forum
You cannot edit your posts in this forum
You cannot delete your posts in this forum
You cannot vote in polls in this forum
|
Powered by phpBB © 2001, 2005 phpBB Group
The Bimota Forum has no official connection to Bimota S.p.A.. We just ride or are interested in their motorcycles and support the brand. All trademarks are acknowledged |

